



Kẹp giữ sợi Filament
 Bytinx_1344834Likes1.2KDownloads6K
Build another version of this model.
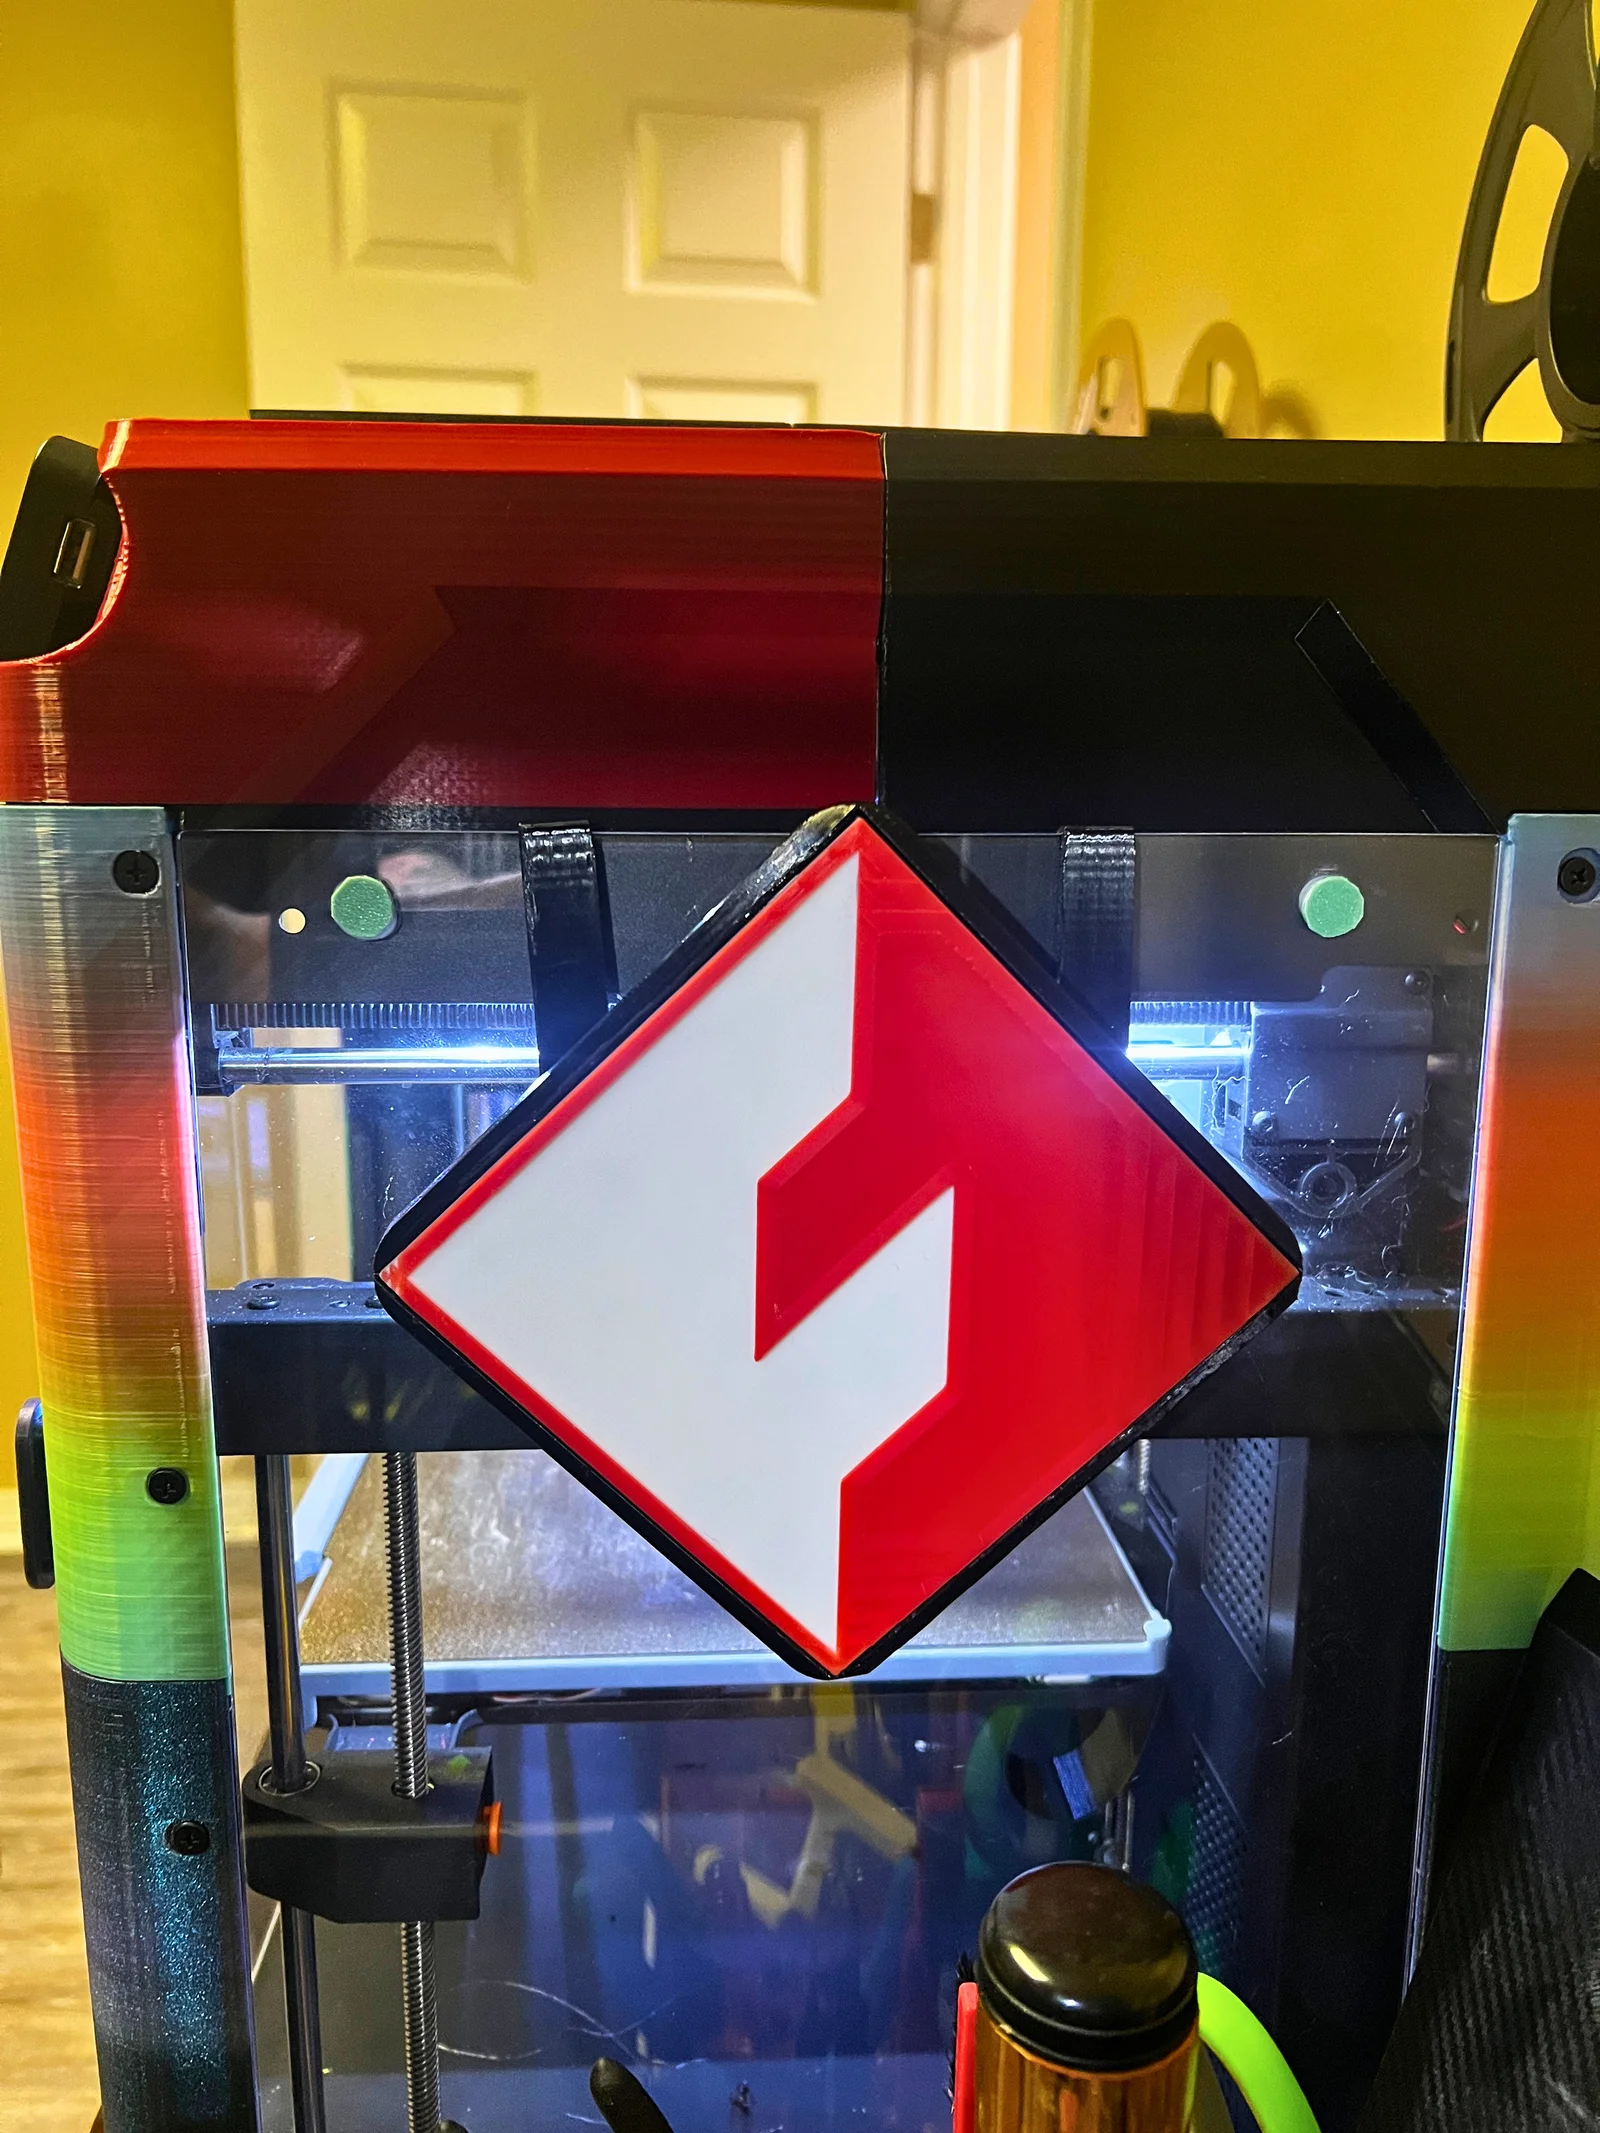
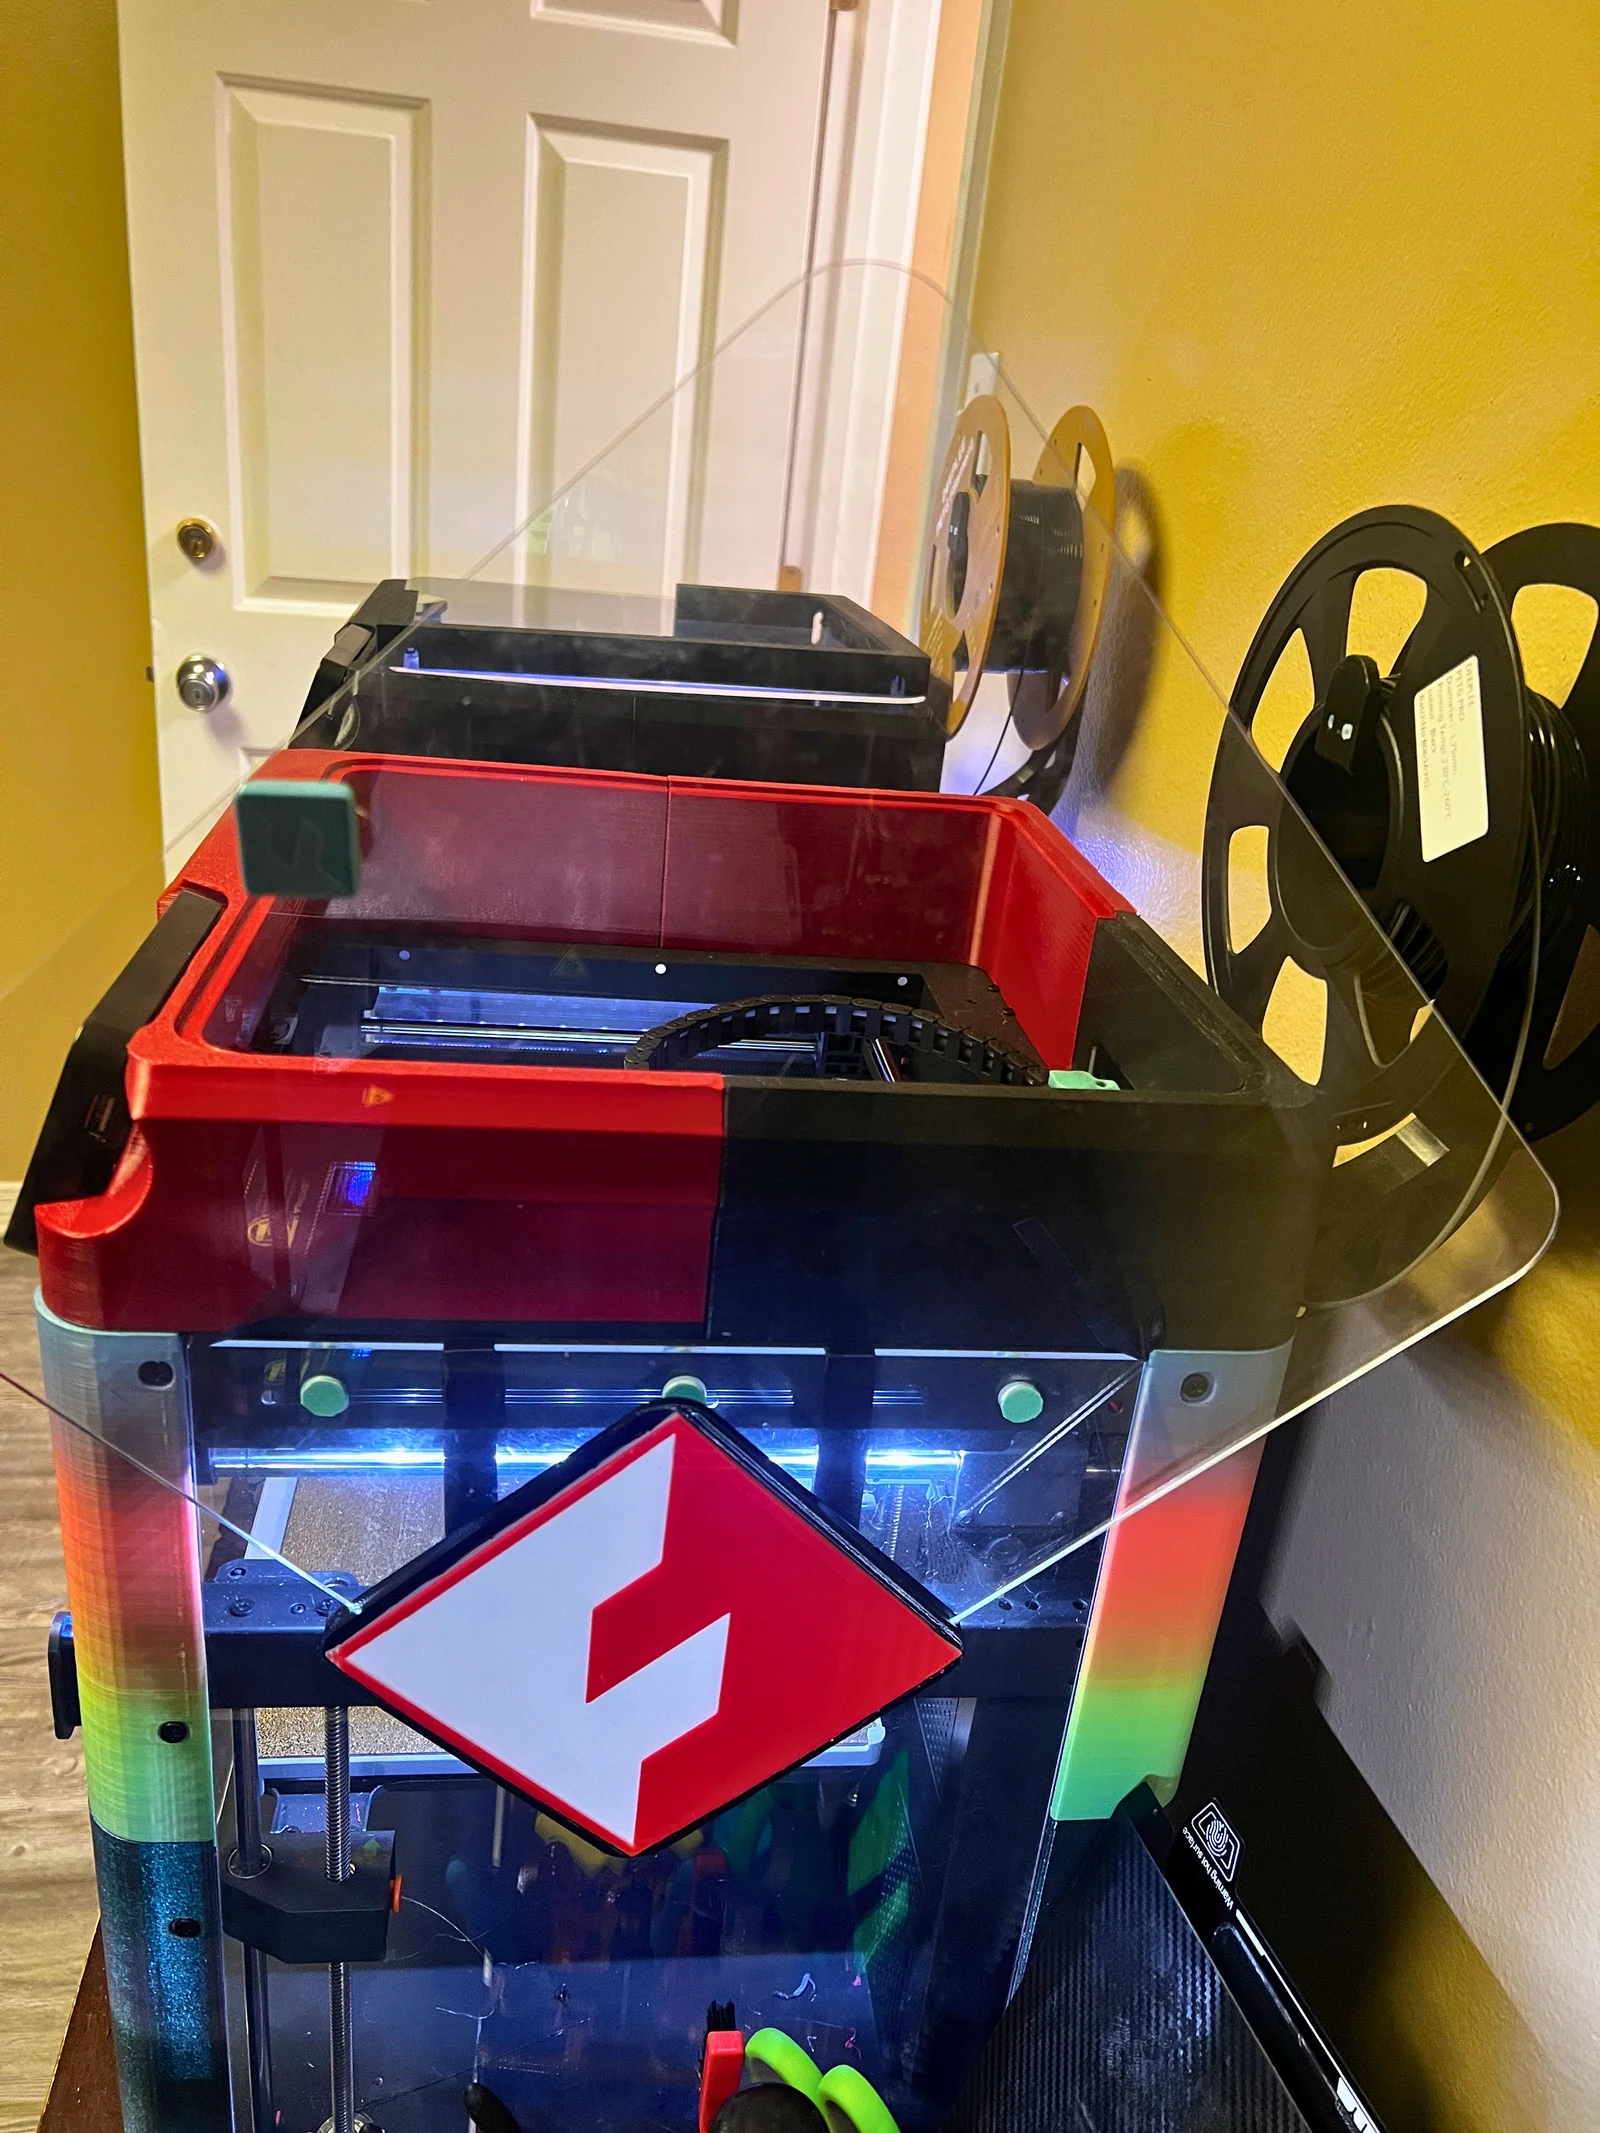
## Flashforge AD5M Enclosure Lid Holder
Every AD5M owner knows the struggle: you need to swap a hotend, change filament, or do a quick bit of routine maintenance, so the top lid has to come off... but you never have a good place to set it down without it cluttering your desk or risking scratches.
This side-mounted holder solves that problem by giving your enclosure lid a secure, dedicated home right on the side of the printer whenever you are working on the toolhead.
### Features:
* No Hardware Required: Features two integrated hooks (printed separately as Hangers). They simply slide directly over the top edge of your side plexiglass panel.
* Two Faceplate Options: Includes the standard holder with a recessed slot for the included Flashforge logo, and a a blank holder with no recess.
* Flashforge insert: A separate 2-color Flashforge logo plate insert, it can be printed with an MMU or by creating a pause in the Gcode and swapping filaments.
### Print Settings & Assembly:
* Print Settings:
Holder and Hangers
Material: PETG
Nozzle temperature: 245 °C
Bed temperature: 80 °C
Layer height: 0.2 mm
First layer height: 0.23 mm
Infill: 30%
Infill pattern: Rectiliner
Supports: Yes
Support type: Automatic tree supports for Hanger
Support type: Automatic Lattice Supports for Holder
Support base pattern: Rectilinear
Support interface: Auto
Brim: Yes
* Material: PETG or ABS/ASA is recommended with moderate heat coming from the enclosure, though PLA works great since it sits entirely on the outside of the printer.
* Assembly:
Print the holder body and two hangers.
Print the Flashforge insert with MMU or Gcode pause.
Super glue the Flashforge insert into the holder and clamp it for an hour or so.
Slot the hangers into the back of the holder, they will be somewhat lose and have some play, this is intentional.
Slide the hangers over the plexi glass on either side, the holder will settle into place and you're ready to go
Not my first design but my first time posting and open to criticism, critique, or anything else.
Bytinx_1344834Likes1.2KDownloads6K

 By3DSourcererLikes48Downloads380

 Bygummiegecko8477Likes0Downloads167

 BydalleLikes0Downloads149

 Byprusa-researchLikes0Downloads783

 Byarhi_585078Likes64Downloads545

 ByHanzo3dLikes155Downloads417

 ByGeek5DLikes147Downloads490

 ByBrokentooth_designsLikes23Downloads412

 Bycrawler-3903250Likes0Downloads909

 Byartme-3dLikes0Downloads336

 Bybloblis67Likes0Downloads319