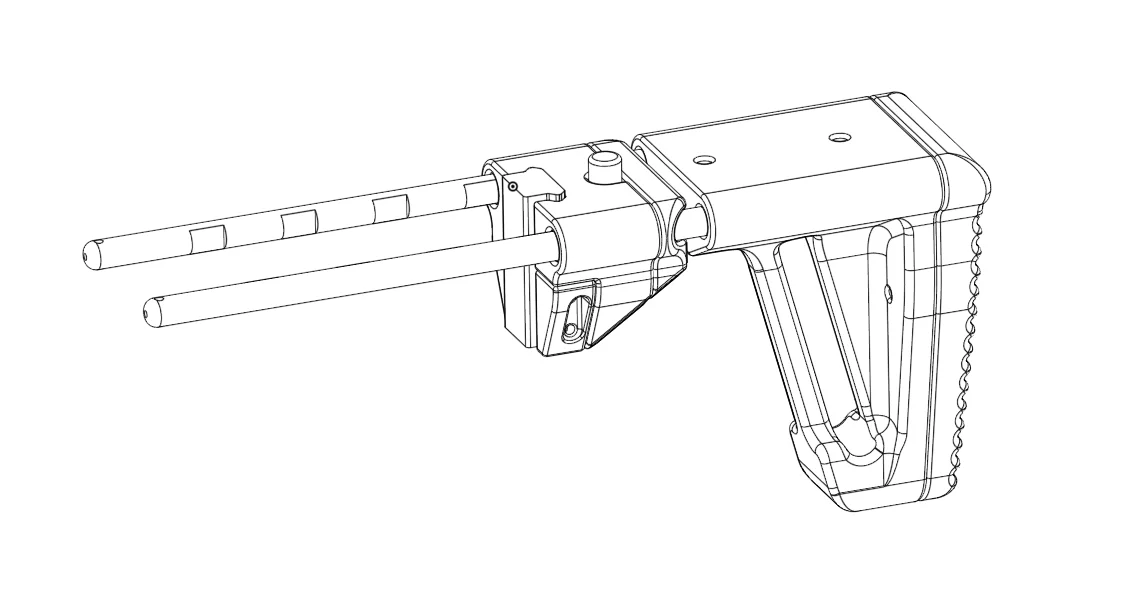
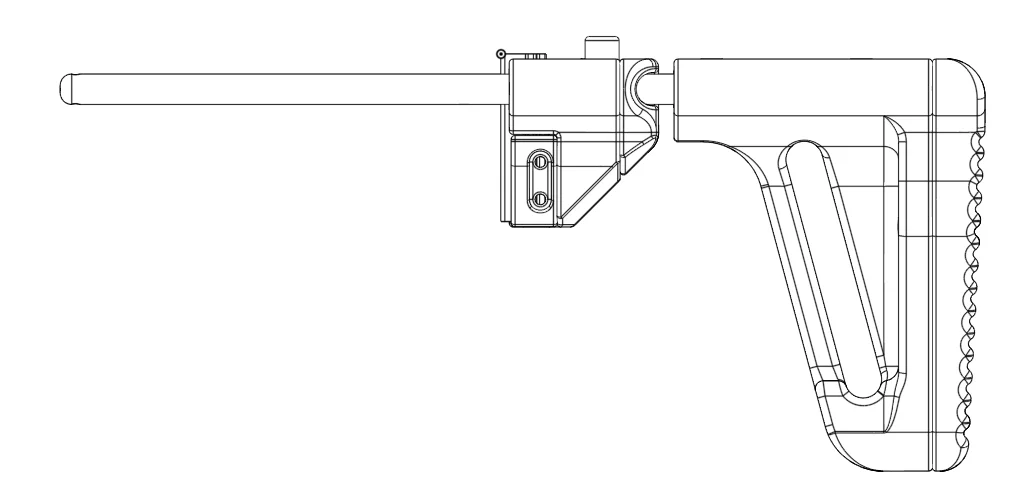

Delta Industrial Strider Collapsing Rod Stock
- Downloads
- 122
- Likes
- 38
- Views
- 841
- Remixes
- 0
- Comments
- 0
Files 11 107.5 MB
- Delta_Industrial_-Strider-_Collapsing_Rod_Stock_-_Main_Mounting_Body_Bite_Unit_1777664569.stlSTL · 6.1 MB
- Delta_Industrial_-Strider-_Collapsing_Rod_Stock_-_Rod_Latch_1777664571.stlSTL · 3.8 MB
- Delta_Industrial_-Strider-_Collapsing_Rod_Stock_-_Main_Mounting_Body_1777664572.stlSTL · 15.8 MB
- Delta_Industrial_-Strider-_Collapsing_Rod_Stock_-_Main_Mounting_Body_Cover_Plate_1777664575.stlSTL · 9.2 MB
Make a variant with AI
Build another version of this model.
Details
- Model ID
- #359978
- Category
- Thể Thao & Ngoài Trời
- Published
Description
The Strider Collapsing Rod Stock From DI, A wonderful budget friendly printed alternative to metal & polymer collapsing rod stocks.
- Fully Open Source Files
- SBL1/Protean/Worker Collapsing Rod Stock Full Metal Rod Construction
- Quick Deploy
- Spacious LOP Adjustability
- Durable Construction
- Heat-Set Insert Mounting & Adjustable Bite Unit
- Low Cost Relative To Other Rod Stock Offerings
- 1913' Standard Metric Picatinny 5 Slot Mounting
General Advice & Remarks
- The Strider was originally intended for the Rush/Crush Platforms designed by Je, Shoeless Historian, and the flip flop foam factory, as-well as Chance and his remix, the Crush. However with some editing it can be used on a variety of blasters, and already works with several by default within the community.
- To ensure proper compatibility with your blaster of choice, I highly recommend referencing the provided CAD STEP files.
- The collapsing rod system does have some noticeable play although it should not affect performance, this play is caused by intentionally wide tolerances on the prints to ensure general compatibility, however with some fine tuning they can be tightened to your personal preferences. *As of 5/13/2025 The Tolerance Issues have been significantly improved with little play now in the stock
- Improved V2 Files are labeled as such in the file repository, V2 Files for the Mounting Body will function with the standard V1 Stock Frame and Stock Frame Pad
- If you are reading this with the intent to commercialize this platform or a section of it in any form, or to use without proper attributions, or credit, do note this item is protected under Creative Commons. If you are interested in licensing you can reach me through discord @delta_ivas
- If it wasn't evident this product is not intended for usage on genuine firearms, please don't try it, (it is intended for airsoft & foam, and cannot hold up to the constraints of genuine usage).
Hardware Required For Standard Model:
Unique Hardware to this build
- 2x SBL1/Protean/Worker Collapsing Metal Rods (One pair) Buy Link
- 6x M3x5.7mm Ruthex Brass Heat-set Inserts Buy Link
Standardized Hardware to this build
- 6x M3x10-12mm Hex, Socket Head Bolts (If you do not already have m3 bolts, I recommend simply buying an assorted m3 hex kit) Buy Link
- 2x M3x4-6mm Hex, Socket Head Bolts Buy Link
- 2x M3x30mm Hex, Socket Head Bolts (Used for mounting to the receiving 5 unit picatinny slot)
- 2x M3 Standard Hex Nuts (Used for mounting to the receiving 5 unit picatinny slot)
- 1x Standard Pen Spring/Catch Spring
Tools Needed
- M3 2.5mm Hex Driver / Alan Key
- Soldering Iron (Preferably with a heat-set insert tip, I highly recommend the variety packs sold by Ruthex, using a insert tip helps to prevent over shooting the mounts and more accurate mounting)
- Rubber Mallet (Please ensure to use a rubber mallet for putting in the metal rods to avoid damage to the printed parts and excessive shock)
Print Orientation & Settings
- Stock Shoulder Pad 2-3 Walls 20-30% Cubic (Brim Recommended)
- Main Mounting Body 3-4 Walls 30-40% Cubic (Tree Supports Recommended)
- Rod Clutch Button 4-5 Walls 100% Rectilinear (Or Similar Equivalent) (Standard Supports Recommended)
- Bite Unit 4-5 Walls 100% Rectilinear (Or Similar Equivalent) (Tree Supports Recommended)
- Main Mounting Body Cover 3-4 Walls 30-40% Cubic
- Main Stock Body 3-4 Walls 30-40% Cubic (Tree Supports Recommended)
Basic Assembly Instructions
Install two of the six Ruthex M3x5.7mm Brass Heat-Set Inserts with a soldering iron into the Main Mounting Body.
Install the standard Pen Spring/Catch Spring into the Main Mounting Body (Spring may need to be cut down or stretched for user preference).
Insert the Rod Rod Clutch Button above the Pen Spring/Catch Spring within the Main Mounting Body.
Put on the Main Mounting Body Cover & fasten it down using two of the six M3x10-12mm Hex, Socket Head Bolts.
Carefully but Firmly use a rubber mallet to push in both of the SBL1/Protean/Worker Metal Collapsing Stock Rods, so that both are firmly secure and travel all the way to the end of the Main Stock Body, with their notches facing inwards towards one another (Be careful or you could end up cracking the Main Stock Body, as seen on the photos used from the prototype for this post) (If you are consistently experiencing cracking, I recommend using PETG over typical PLA)
Install the remaining four of six Ruthex M3x5.7mm Brass Heat-Set Inserts with a soldering iron into the Main Stock Body in the corresponding four Heat-Set Insert cavities.
Put on the Main Stock Body Shoulder Pad onto the rear of the Main Stocky Body & fasten it down using the remaining four of six M3x10-12mm Hex, Socket Head Bolts.
Slide the Main Mounting Body onto the Collapsing Rods until it the clutch clicks into place
Install the remaining two M3x4-6mm Hex, Socket Head Bolts into the two mirrored mounting holes located on the rounded exposed ends of the collapsing rods, (These two short hex bolts act as hard-stops for the deployment of the stock to its maximum extension, preventing the rods from fully sliding out of the main mounting body. You may find that for installation on certain blasters you will need to undo these two bolts and then redo them in order to slide the stock onto the receiving 5 unit picatinny mount)
When mounting to a receiving 5 unit picatinny slot, use the remaining two M3x30mm Hex, Socket Head bolts, & two standard profile M3 Hex nuts with the hex nuts on one slot side, and the heads of the socket bolts on the other, tighten them down thoroughly until any wobble dissipates, that being said if over-torqued this can lead to the mounting and bite unit system possibly failing.
CREDITS:
Down Pour Competitive Group for Assisting in Testing & Feedback
Dingus for helping to improve on files via Feedback
Print spec
- Formats
- stepstl
- Model files
- 11
- Total size
- 107.5 MB
- Largest file
- 21.1 MB