



Kẹp giữ sợi Filament
 Bytinx_1344834Likes1.2KDownloads6K
Build another version of this model.
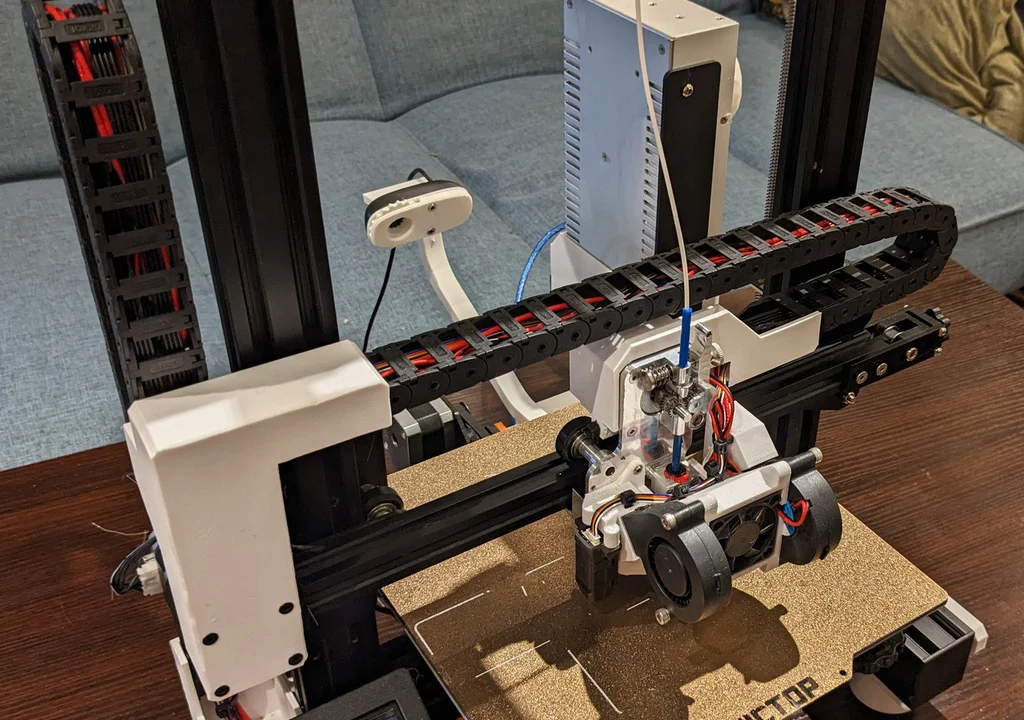
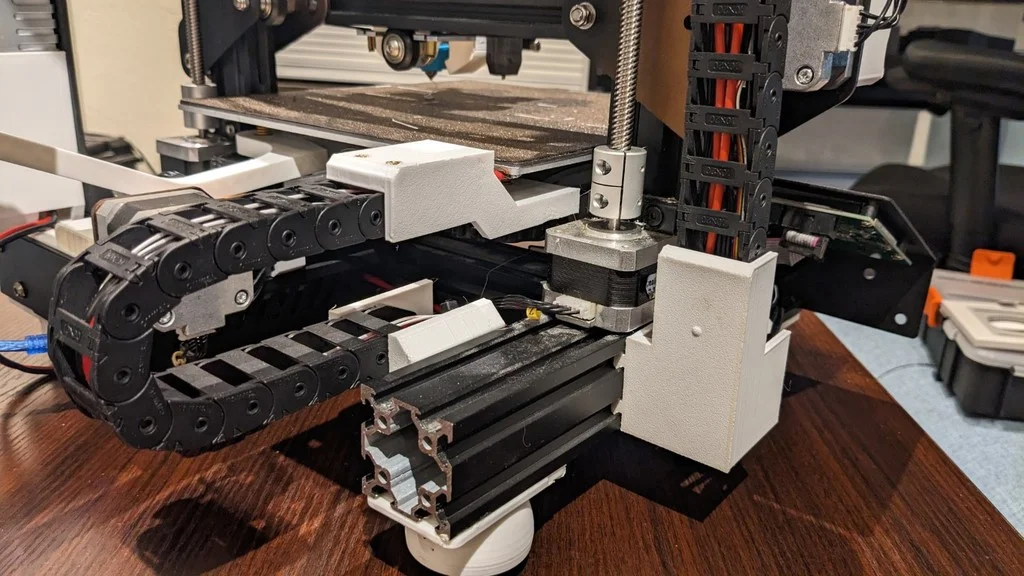
After adding a Micro Swiss direct drive to my Ender 3 I decided to also upgrade the wiring by adding drag chains to all three axes.
I'm going to warn you up front that the stock wiring harness was not long enough for these chains on my printed. Although, my printer that has the electronics case moved to the back, but I'm assuming this would be an issue with the stock position as well.
So I effectively had to rewire my entire printer. Not everyone is going to want to take this on, but if you do here's what you'll need.
I've attempted using 3D printed chains in the past and found them unreliable and fiddly. I'd always end up finding the small clips broken off and under my printer. Here are the chains I used for this project:
Befenybay R18 Drag Chain (10mm x 20 mm) https://www.amazon.com/gp/product/B07SFFT1K5
If you can't find this specific model they have a external size of 27.5 mm x 14.6 mm.
I've also added points to the bed and hotends mounts for an ADXL345 accelerometer for input shaper calibration. These require M3 size heated inserts.
I've also included a STEP file for anyone interested in doing a remix.
Printer Brand:
Creality
Printer:
Ender 3
Rafts:
No
Infill:
Cubic 20%
Filament: Overture PETG White
Notes:
The hot end mount needs to be printed with supports on the built plate only. The other mounts can print with out supports. See the photos for the correct print orientation if it's not obvious.
Post-Printing =============
Use a pair of zip ties as shown to attach the hotend mount then trim off the excess.

M3 heated inserts can be added at the point shown below for mounting an ADXL345 accelerometer.

One issue I've always had with the Ender 3 was how the bowden tube and hot end wires are routed through the center of the frame. While this is not a problem for most prints, tall prints will crush the cables and bowden tube against the top of the frame.
These cable chains instead route the wires across the front and down the side. So the full 250mm print height can be used.
Each mount includes points to add strain relief zip ties.
You will need to rotate your extruder stepper 90 degrees so the connector is facing the cable chain to the right.
Most existing drag/cable chain designs on this site are not designed properly and allow the cables to repeatedly bend in the same spot which can lead to failures. Drag chains are suppose to roll/unroll through the motion so the bend point is spread across the wire.
See Vector 3D's and Thomas Sanladerer's excellent videos on the topic below.
Category: 3D Printer Accessories
Bytinx_1344834Likes1.2KDownloads6K

 BydalleLikes0Downloads147

 Byarhi_585078Likes64Downloads543

 ByHanzo3dLikes155Downloads415

 ByGeek5DLikes147Downloads488

 ByBrokentooth_designsLikes23Downloads410

 Bycrawler-3903250Likes0Downloads907

 Byartme-3dLikes0Downloads335

 By3DSourcererLikes48Downloads377

 Bybloblis67Likes0Downloads318

 ByWyomingWolf_261196Likes52Downloads431

 Byprusa-researchLikes0Downloads2.7K