


New
Battery Boxes | AA/AAA/C/9V/D/Button Cell
 BymoonyxLikes0Downloads518
Build another version of this model.
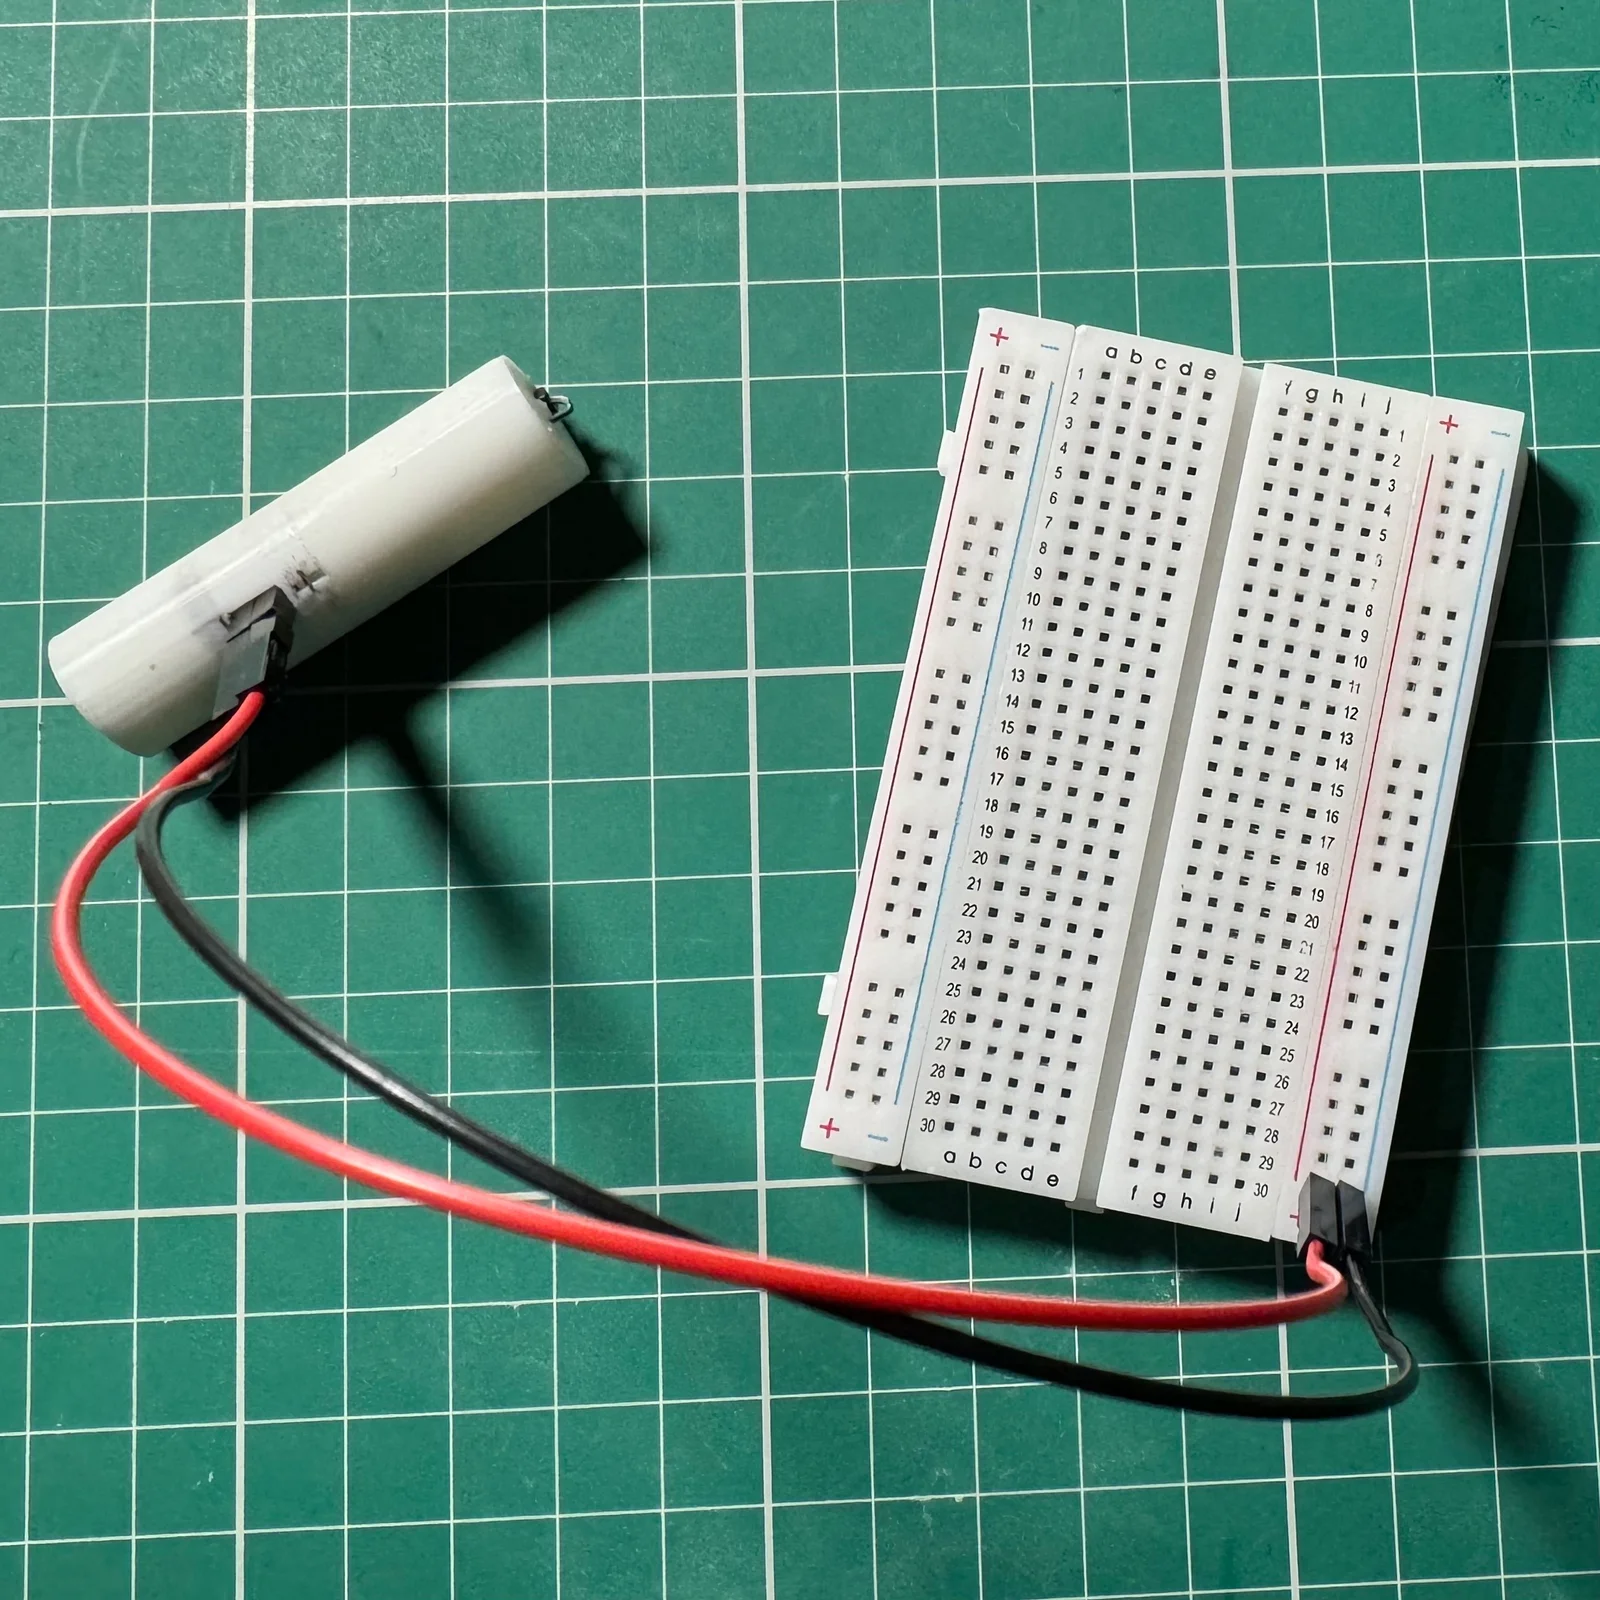
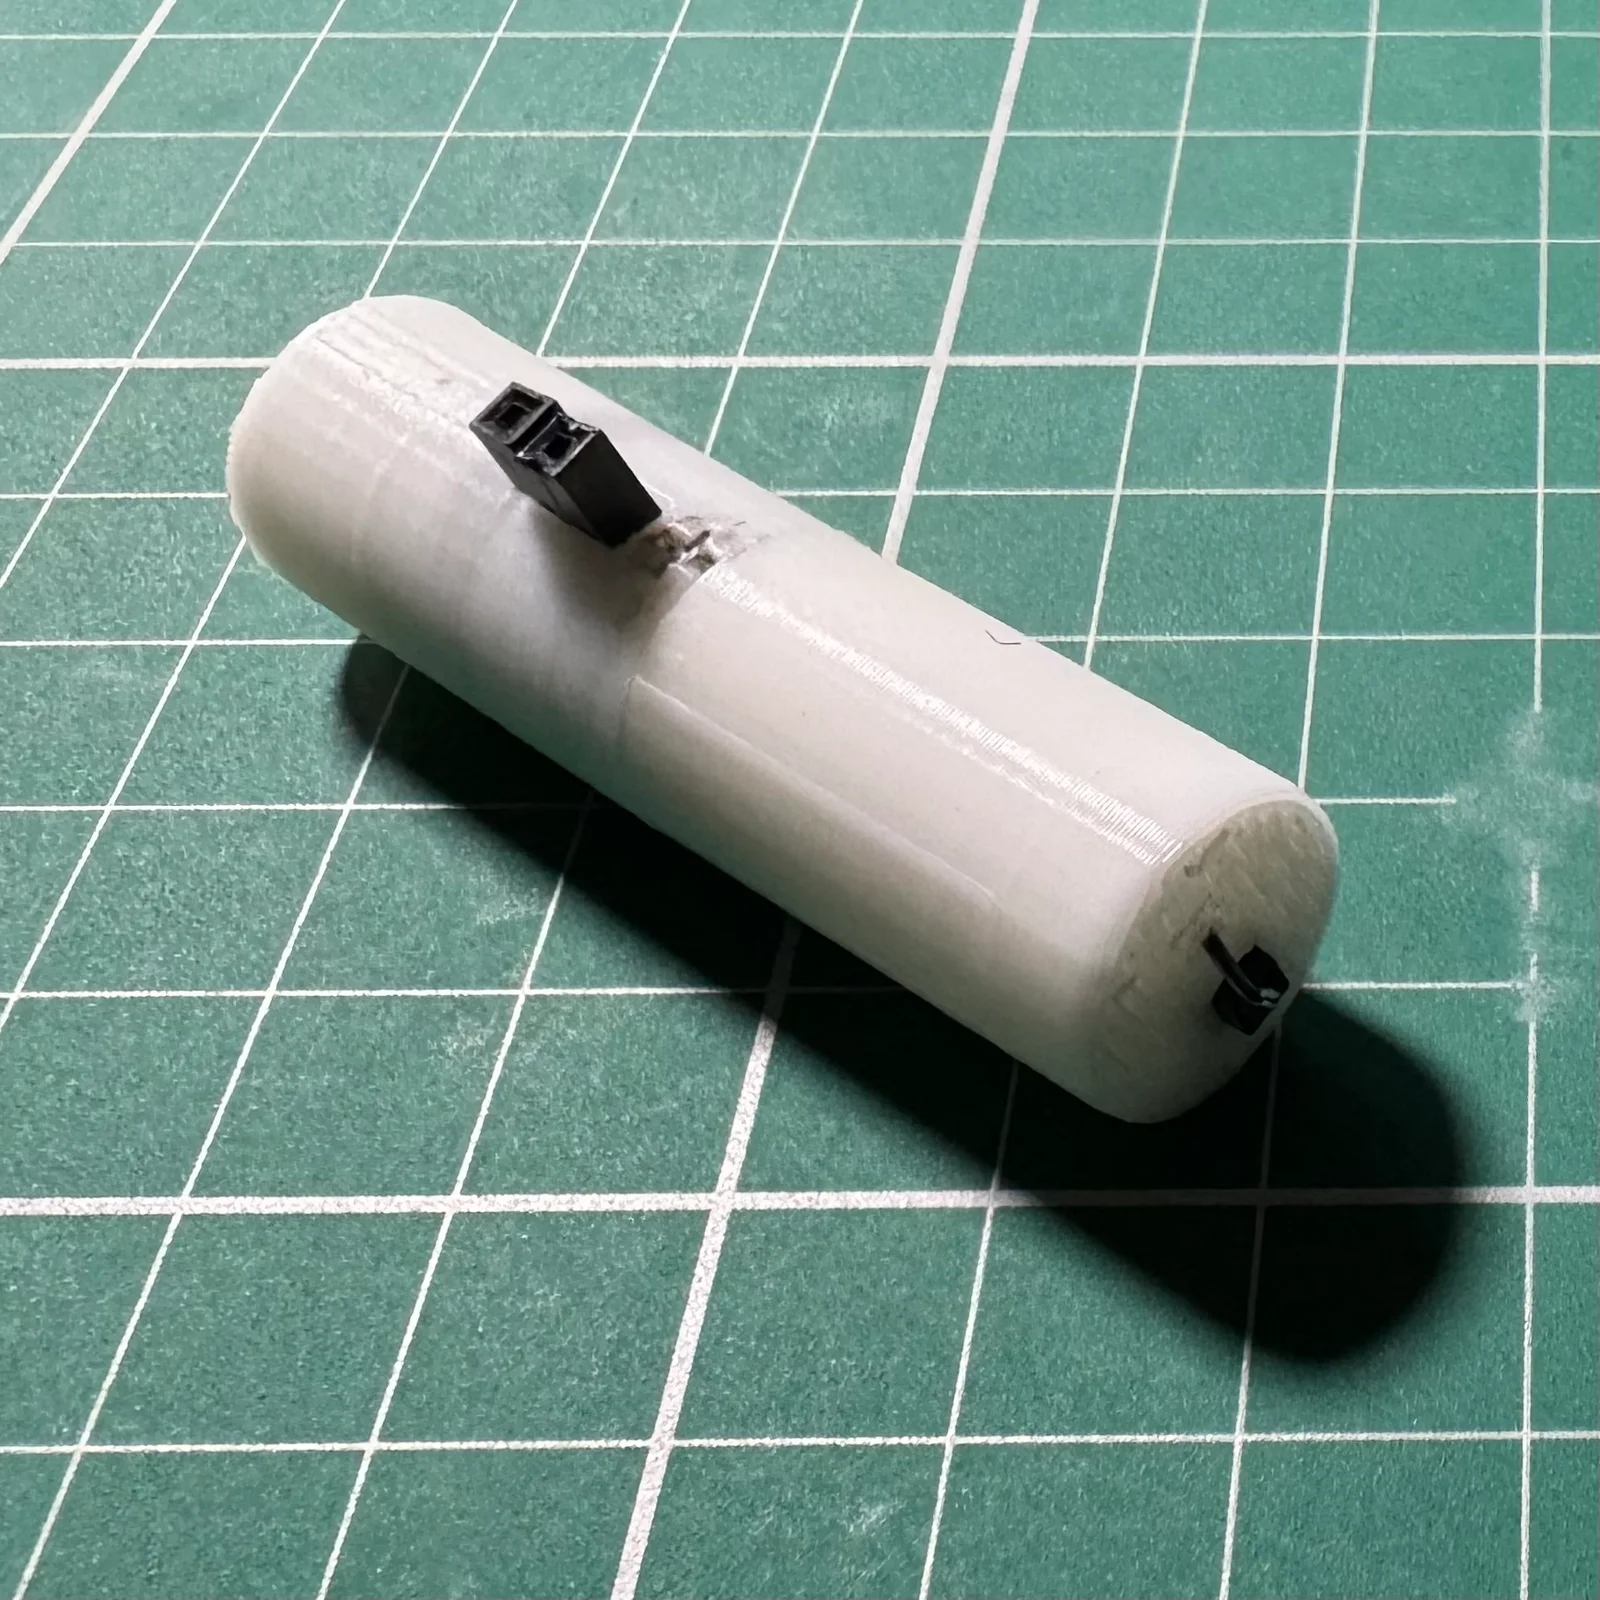
A dummy AA battery that I created in order to be able to connect my battery charger to some battery models that don't fit but are compatible. Can be wired using two female/male dupont breadboard cables. The wired result will be an AA dummy with two terminals on both ends, and a double female dupont connector on the side. This way you can connect it to a breadboard or anything else.
Print in PGE (or tough PLA) using 15% infill, 2 walls and avoid crossing perimeters in order to prevent stringing inside. Print supports on build plate only.
The tolerances are fine, so you may need a needle file in order be able to fit the dupont connectors later. Check before assembly ;-)
For poth parts, use a single male/female dupont breadboard cable. Bend the pin of the male side of the connector in a curved 90 degrees, so that it resembles a hook. Then insert the female connector through the bottom/top and slide the wire in until you reach the male connector. The male connector slides in the hole, while the pin should be bent over the little ridge and the end inserted in the 1mm hole.
Apply a little glue on the inside to fix the male connector in place.
Then push the female connector of the negative lead through the opening in the side (from inside to outside) until the connector is hanging outside of the opening with some wire (to create space for the second one).
Put the top half next to the bottom half, and push the female connector of the positive lead through the same opening until the connector is hanging out next to the other one.
Carefully position the two female connectors next to each other, taking care of the polarity (orientation) and then push (reverse) them back into the opening together until they are sitting tight. Apply some glue.
Fit the two halves on top of each other, until tight. Check the connections using a digital multimeter or similar. Glue the 2 halves together once checked.
BymoonyxLikes0Downloads518

 ByrjunLikes0Downloads305

 ByleonicLikes0Downloads1.4K

 ByZED4EverLikes313Downloads5.2K

 Byreinvent3dLikes0Downloads133

 ByfifindrLikes500Downloads4K

 Bymrfixit_324954Likes65Downloads478

 Bylab-96Likes0Downloads106

 ByVC_DesignLikes679Downloads3.6K

 ByDan Schwartz SchwartzLikes744Downloads3.4K

 ByBrokentooth_designsLikes83Downloads454

 Byvc-designLikes0Downloads3.2K