



New
CORE One L Pins Mod 5G
 Bydet-manLikes0Downloads176
Build another version of this model.
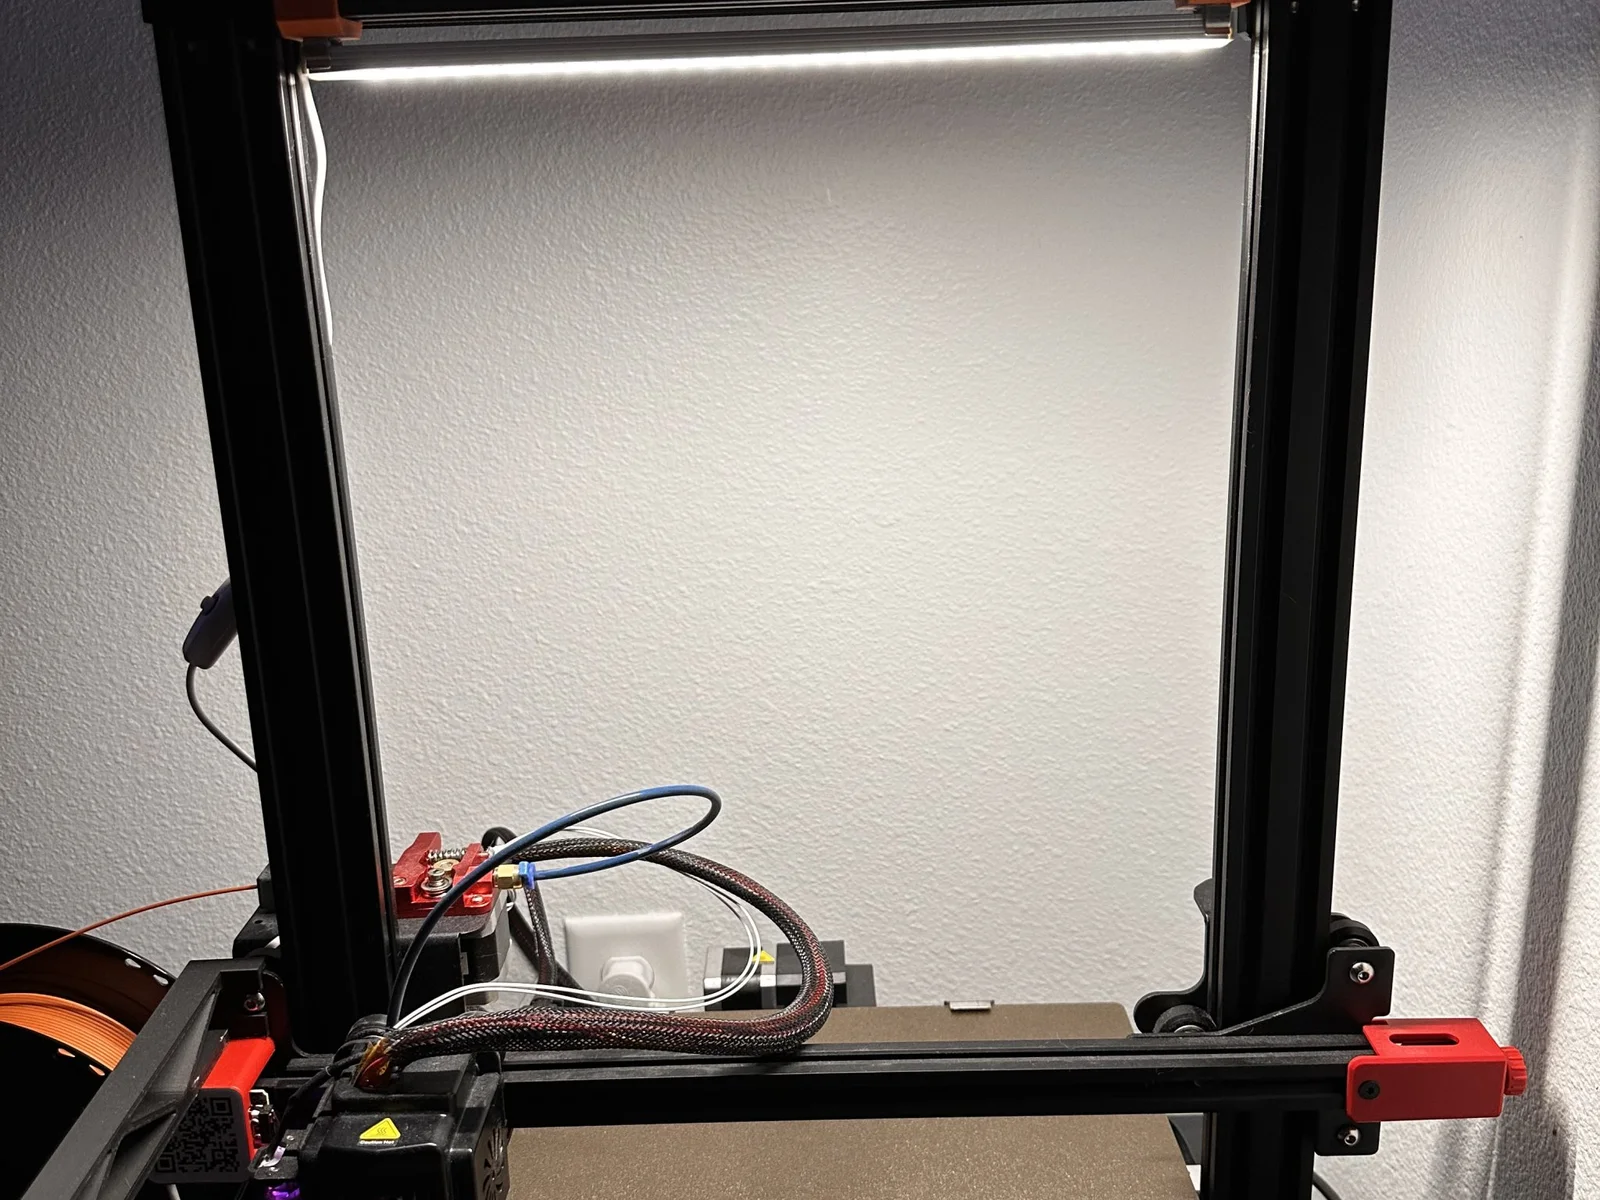
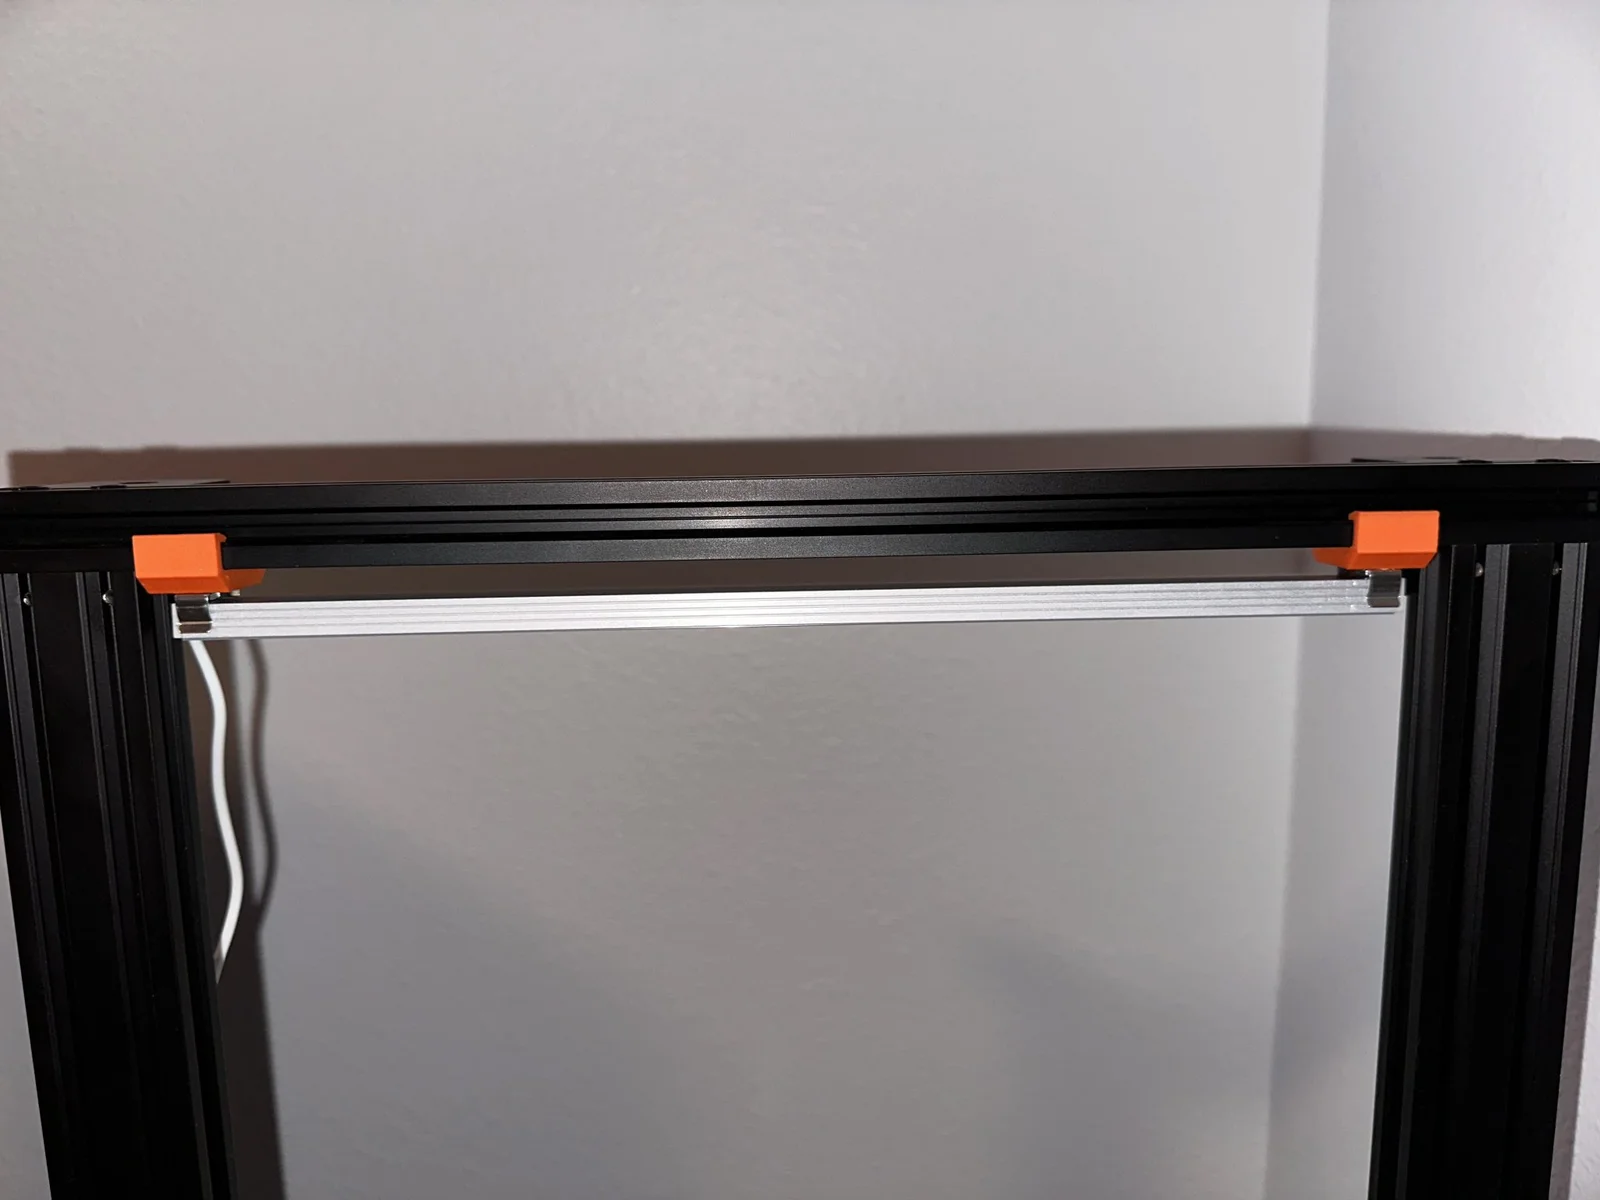
Here's a mounting bracket for the Ender 3 Max Neo top gantry
I wasn't able to find one that fit right for the Max Neo online, so I figured I would make one that fits perfectly.
For me, I decided to pick up a cheap light bar from Amazon and wanted to mount it to the top gantry for use with Octoprint and a webcam. The light bar came with some metal brackets that clamped onto the sides. This keeps it nice and slick and I really like how it turned out.
To install you need to remove the 4 screws on the top gantry as well as one plastic end cap. I toyed around with other versions that snapped on but they all were too loose for my liking. The screw removal process takes about 10 seconds and doesn't require any crazy disassembly or recalibrating of the printer
I've included a solid version as well as a version with an M3 screw hole tapped in. Also throwing in the STEP files so you can tweak them to your needs.
I am also debating adding onto this further to allow for other light bars to easily attach, as well as a version that allows for an offset light mount. If anyone's interested I'd be happy to create these, but for now I'm sticking with what works for me.
My Print Settings (I used Hatchbox PLA):
Bydet-manLikes0Downloads176

 Byprusa-researchLikes0Downloads2.7K

 Bytinx_1344834Likes1.2KDownloads6K

 BydarienLikes0Downloads1K

 Byds-printsLikes0Downloads354

 Byla-cave-au-chatLikes0Downloads971

 ByvertigomakesLikes0Downloads565

 By3DPrintDemonLikes0Downloads334

 Bybloblis67Likes0Downloads320

 Bypeter-van-der-waalLikes0Downloads260

 Bychris-hillLikes0Downloads266

 ByhumebeamLikes0Downloads133