



CORE One/+ INDX printed parts
 Byprusa-researchLikes0Downloads2.7K
Build another version of this model.
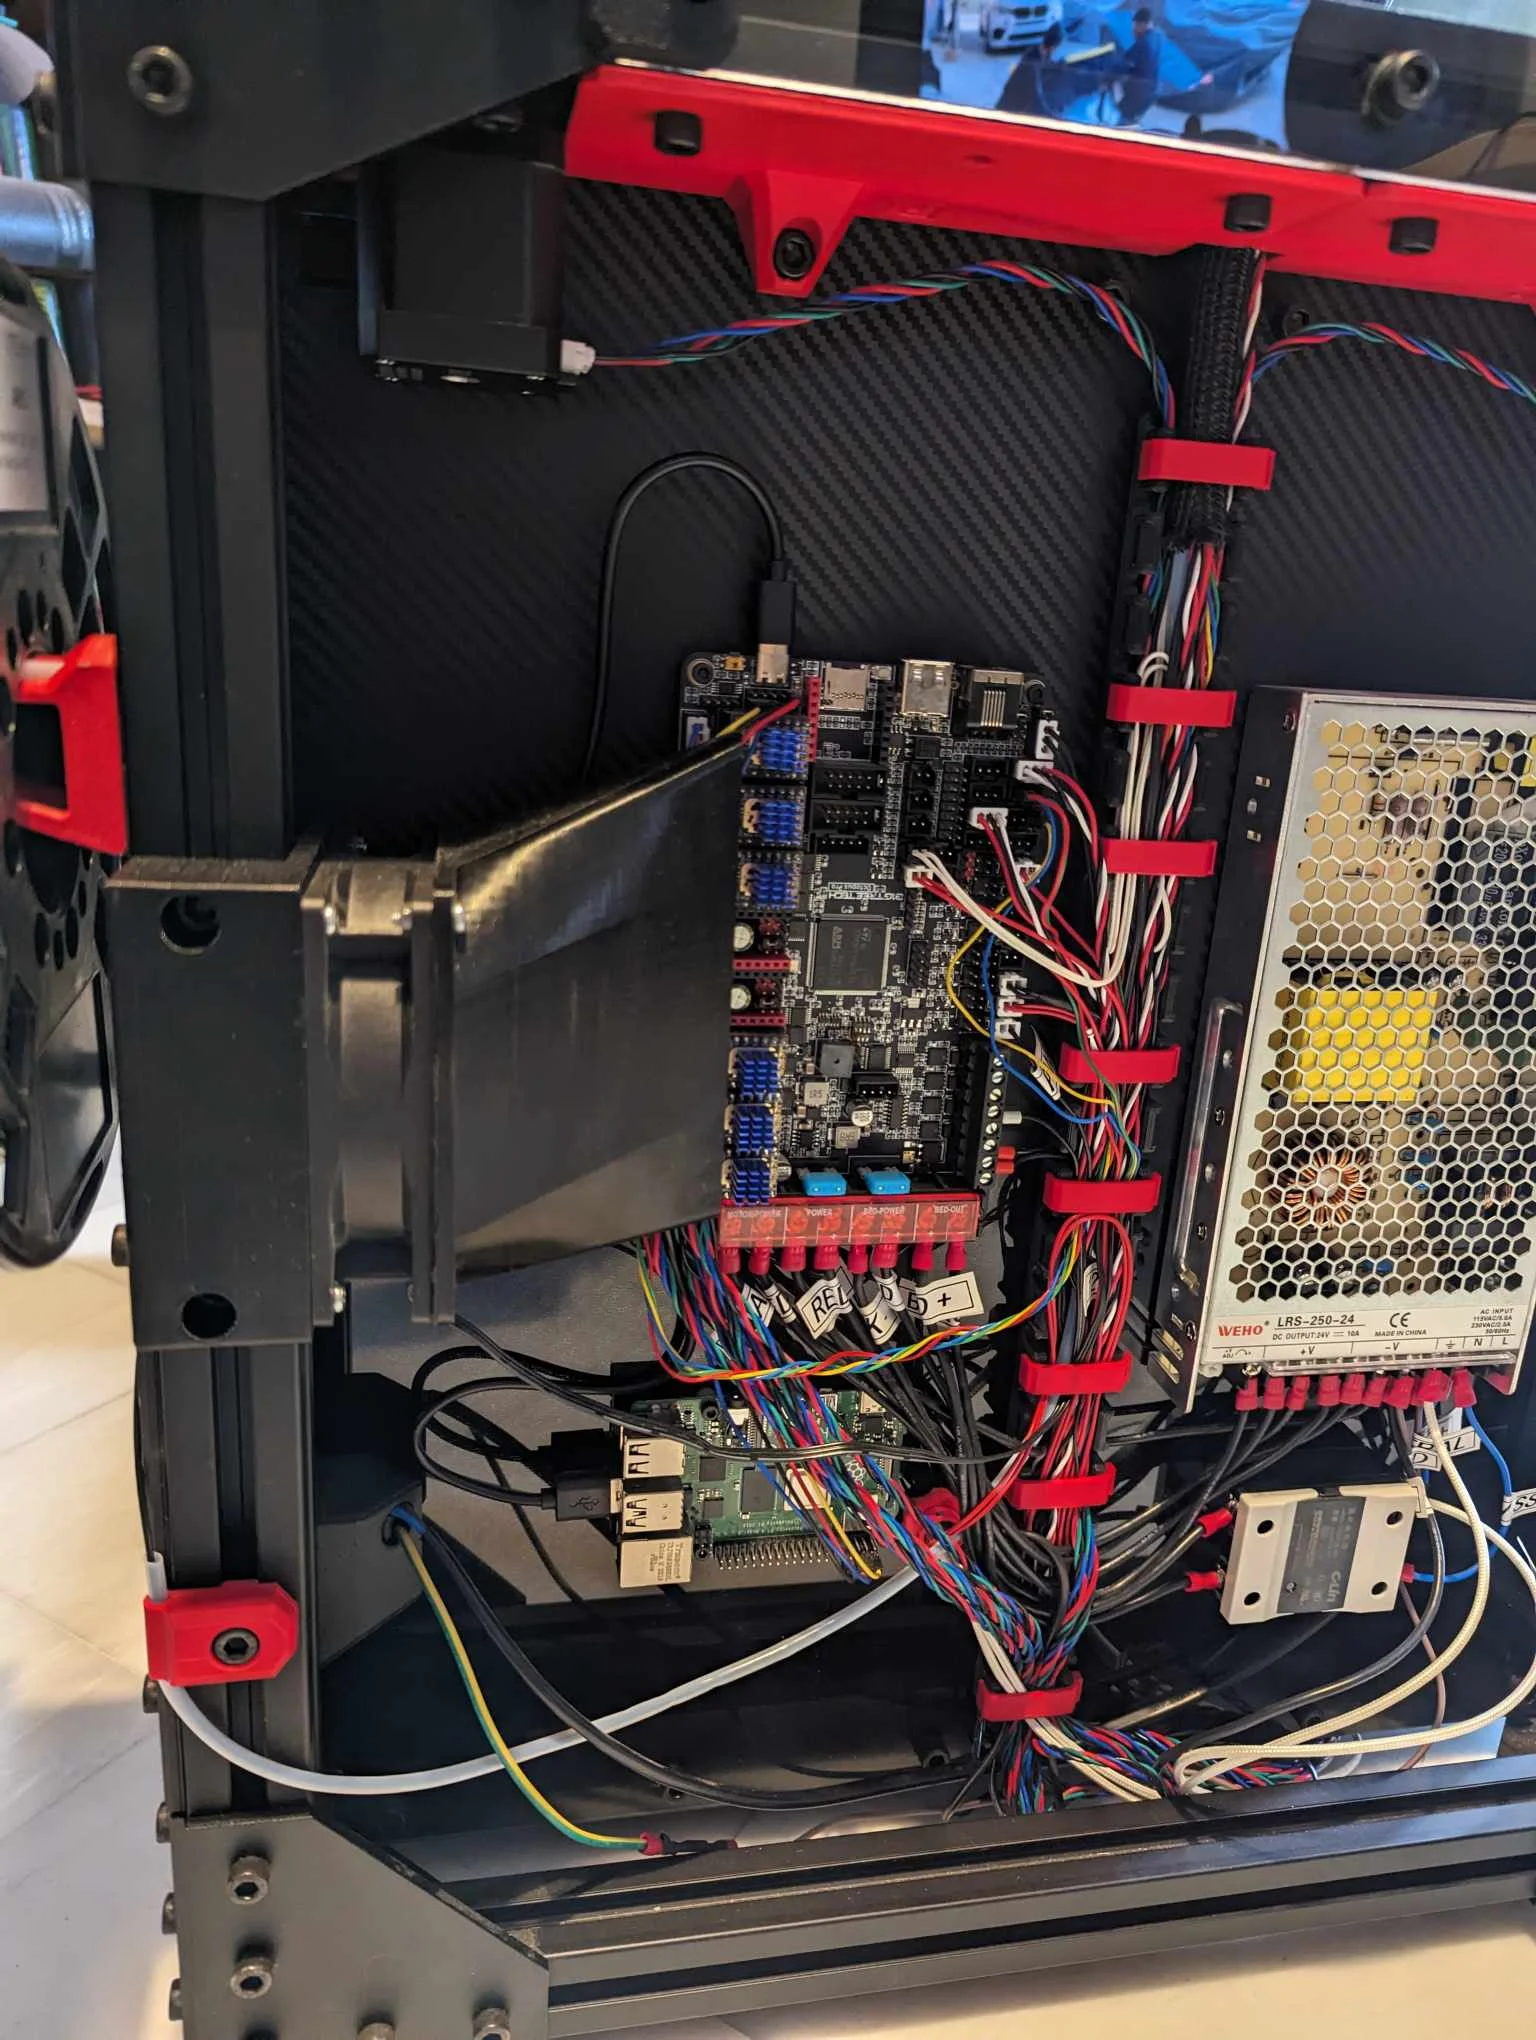
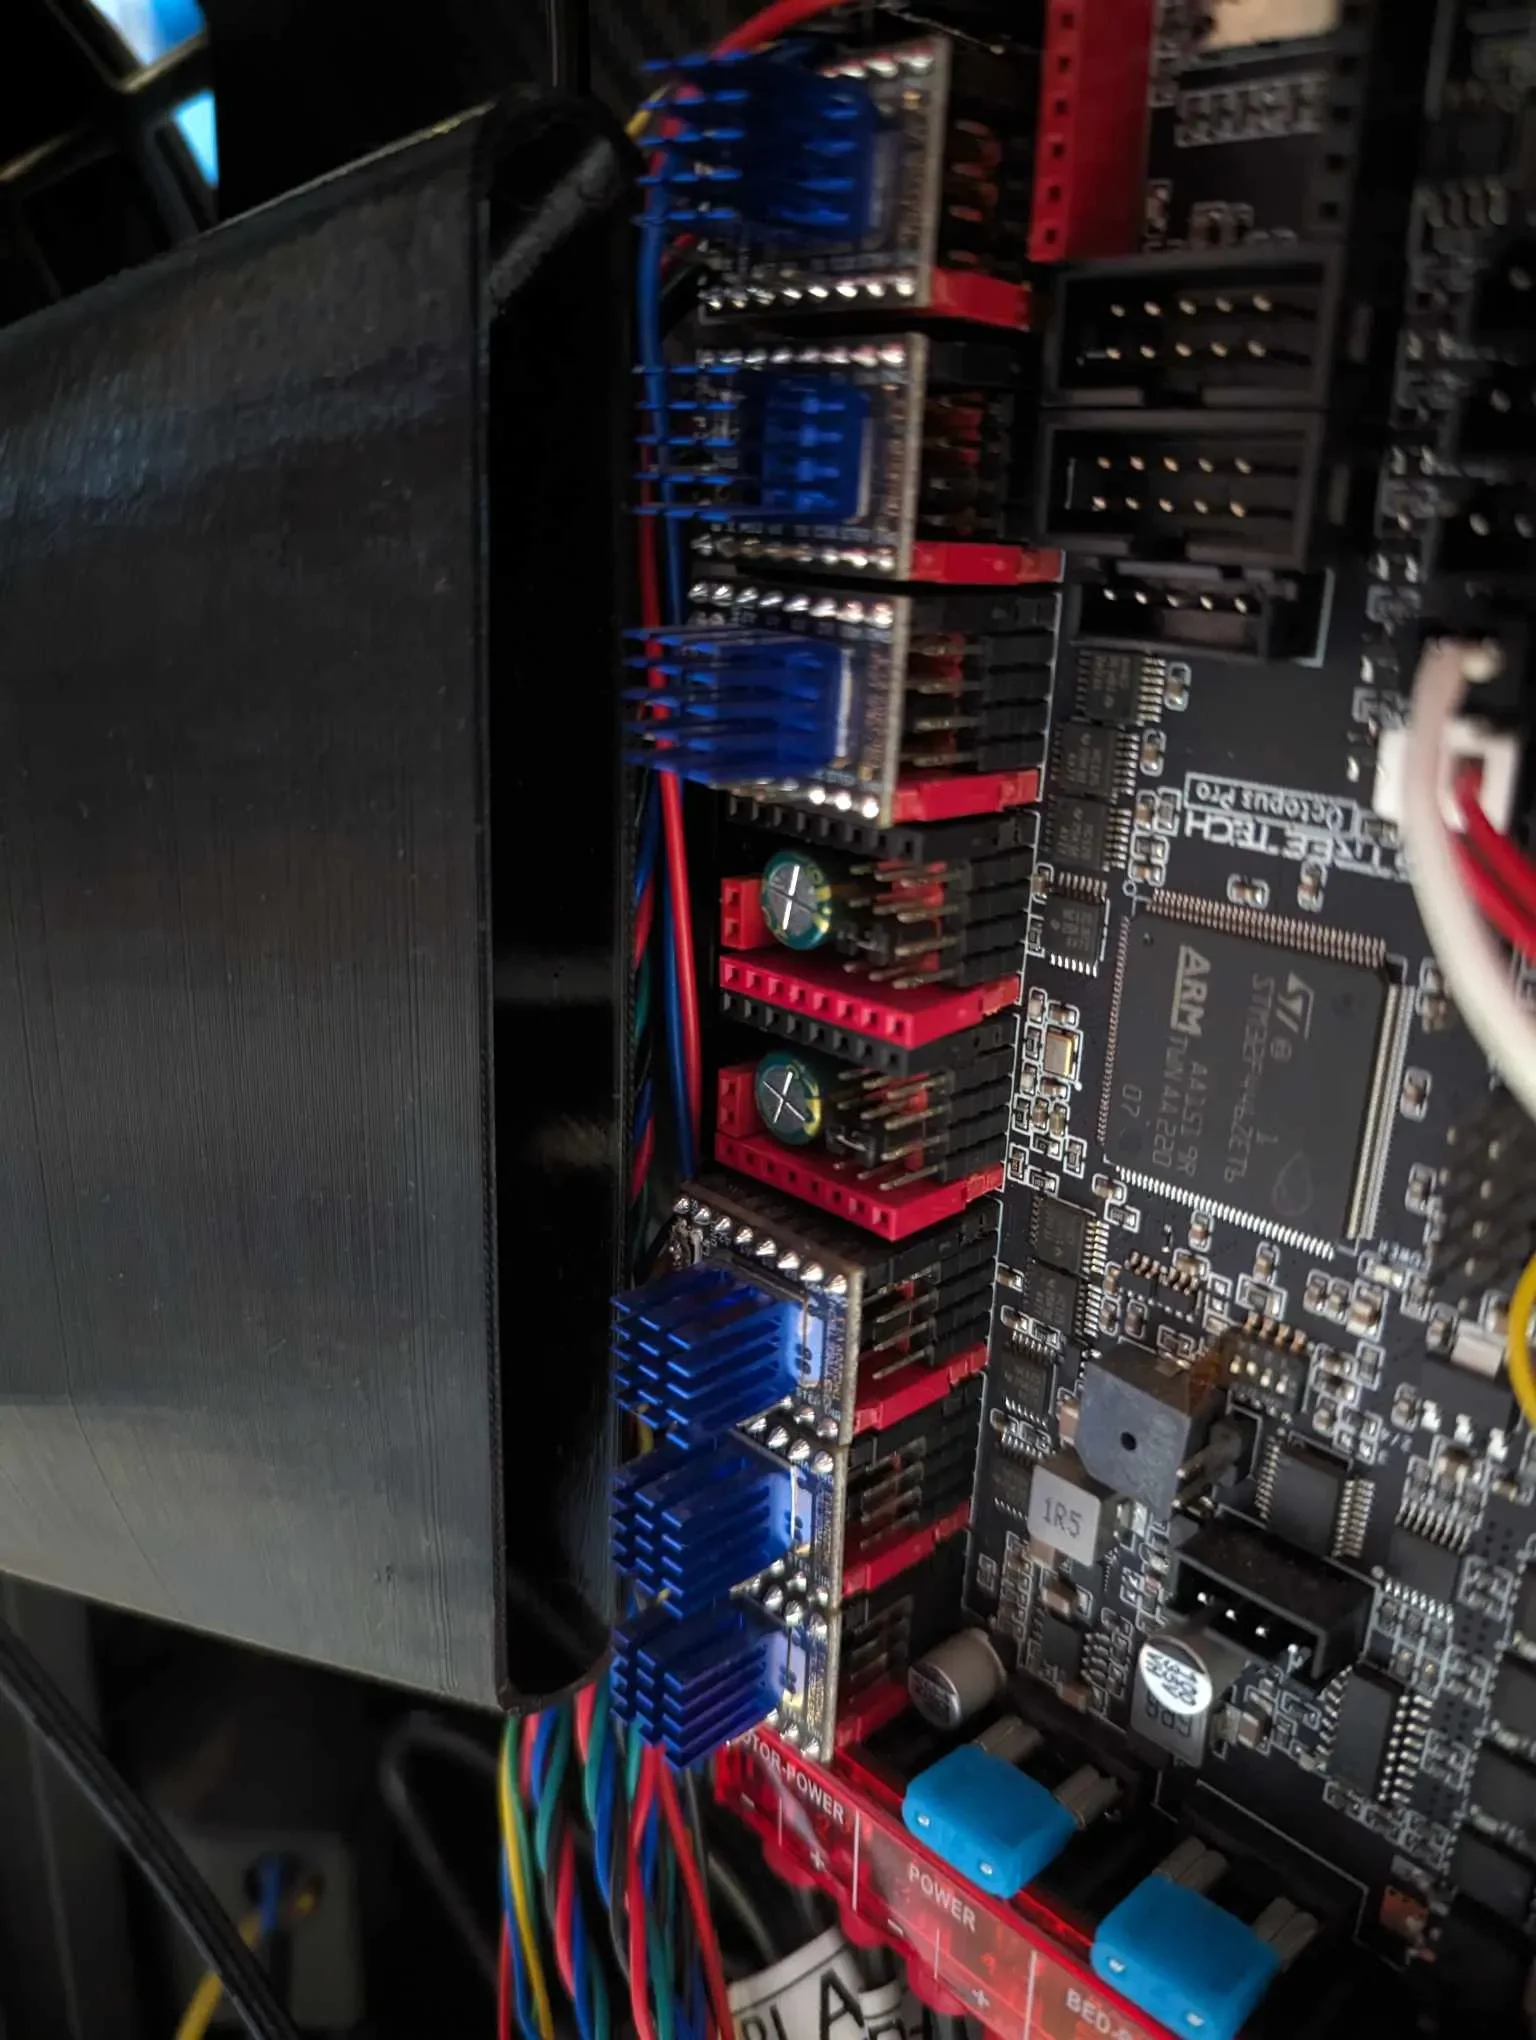
I created a mount that positions the 92mm fan vertically right next to the frame extrusion, and a duct the directs the airflow right on the octopus pro heatsinks. The duct's angle ensures that most of the airflow goes over the X,Y,E drivers, with the remaining flow hitting the Z drivers.
To connect the 3-pin fan I had, I cut the rpm signal wire and crimped a connector to the 2 remaining +12v and neutral wires. Then plugged it to one of the spare fan ports, while making sure to adjust the corresponding jumper to 12v. Leaving the jumper to 24v will propably fry your fan instantly. Most 92mm fans are silent compared to the 3d printer, so leaving it operate at 100% when printing is perfectly fine.
BOM:
For mounting the duct on the fan:
4x m3x12 + 4x m3 nuts
For mounting the fan on the bracket:
2x m3x8 + 2x m3 threaded inserts
2x m3x12 + 2x m3 nuts
For mounting the bracket on the frame:
2x m6x12 + 2x m6 t-nuts (you propably have spares of those from the build)
Byprusa-researchLikes0Downloads2.7K

 Bydet-manLikes0Downloads176

 Bytinx_1344834Likes1.2KDownloads6K

 Bynamida-verascheLikes0Downloads153

 BydarienLikes0Downloads1K

 Byla-cave-au-chatLikes0Downloads973

 ByvertigomakesLikes0Downloads565

 By3DPrintDemonLikes0Downloads334

 BysolathLikes0Downloads208

 Bychris-hillLikes0Downloads268

 Bypeter-van-der-waalLikes0Downloads260

 ByhumebeamLikes0Downloads133