



CORE One/+ INDX printed parts
 Byprusa-researchLikes0Downloads2.7K
Build another version of this model.
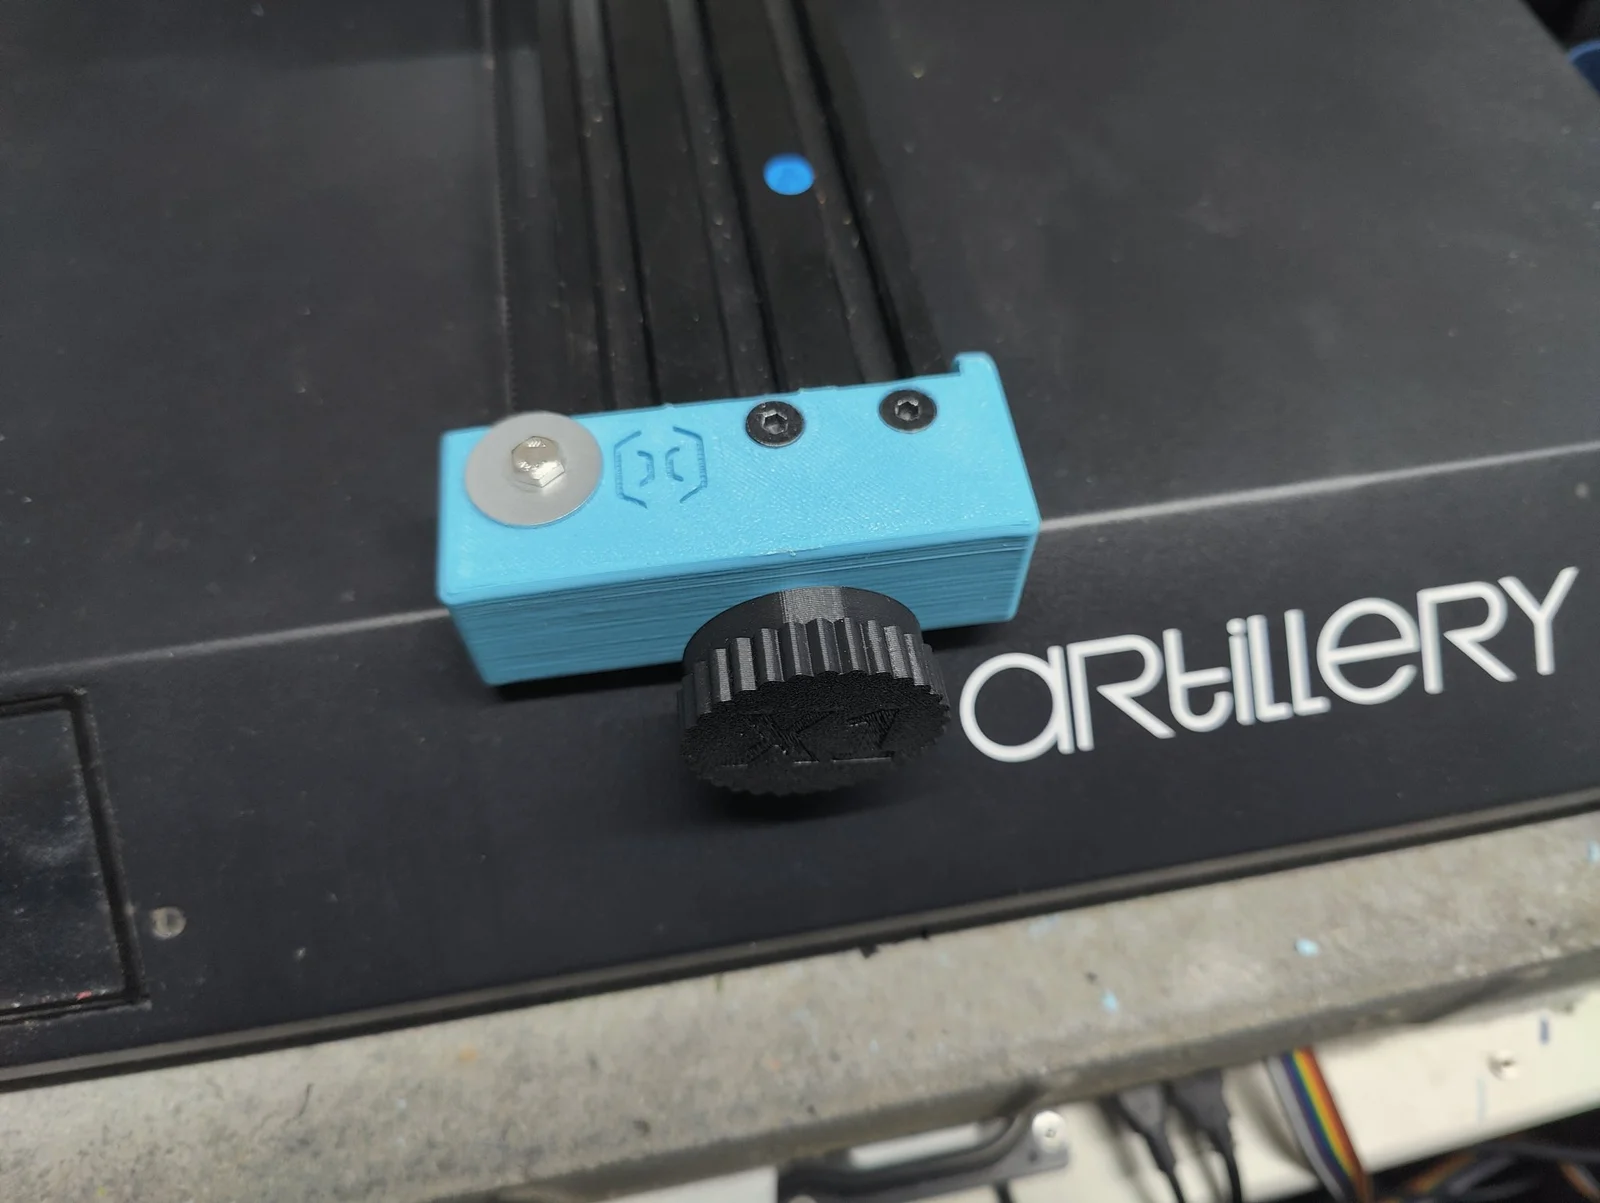
This is a Y-tensioner based on a different design with the addition of a metal nut and bolt and created the knob to turn it.
It needs an M8 nut and a 20mm M8 bolt. The knob should press-fit onto it.
There are 2 versions of the items, pick the one you like. One knob has a X1 embossed and the other has not. One bracket has the Artillery/Evnovo logo and the other has not.
Just need to print 1 knob and 1 bracket. Preferable in ABS/ASA to avoid warping over time. The existing idler can be bolted on with a washer on both sides of the plastic to clamp it and provide more strength.
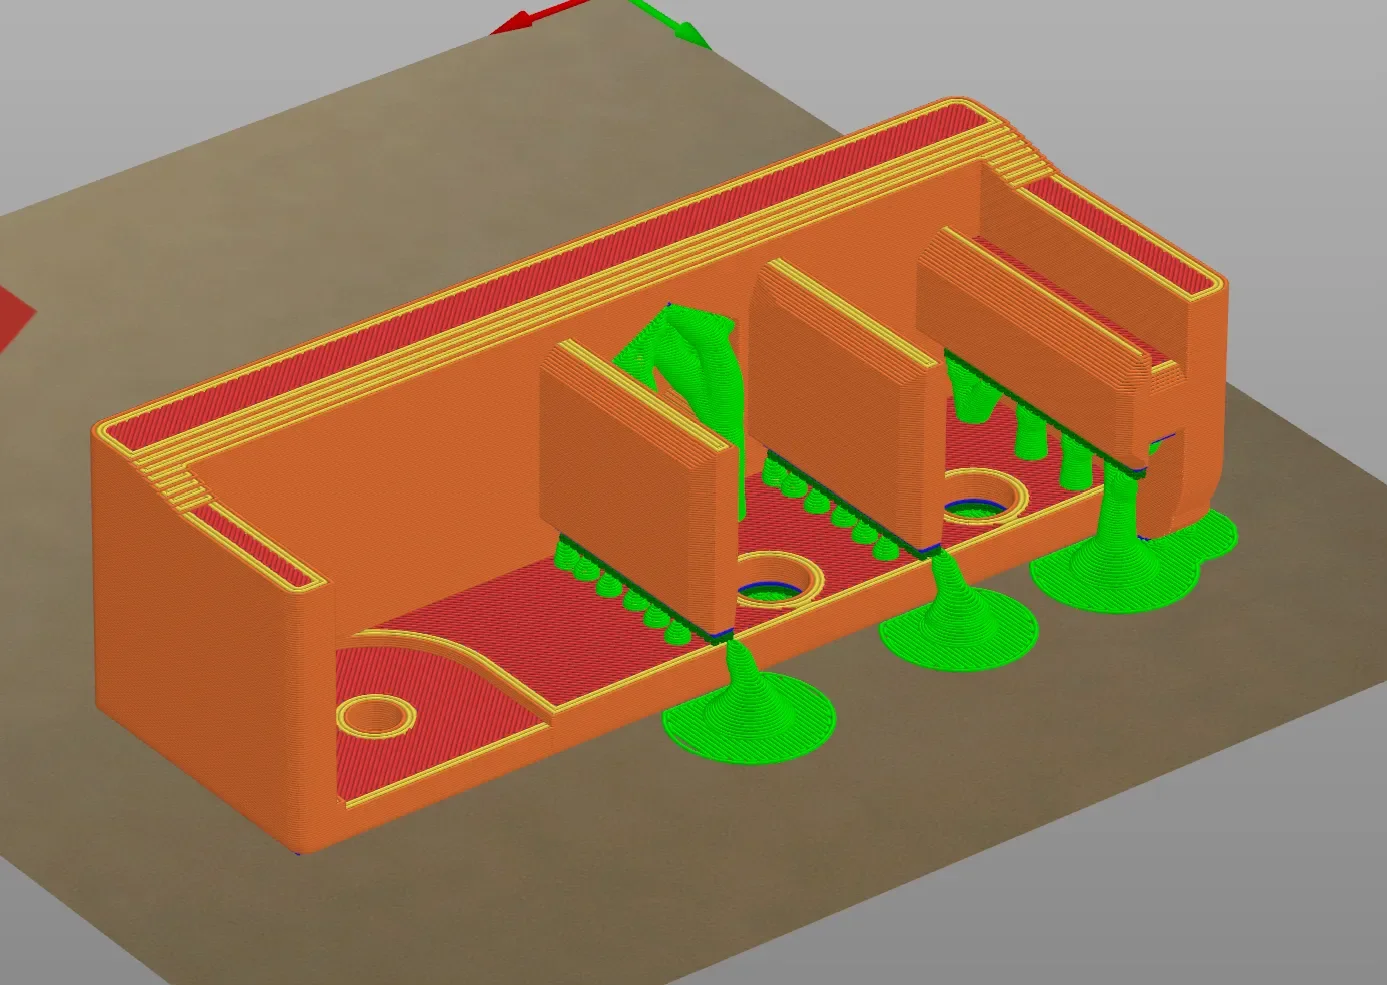
The prints are oriented in a way that you can print without support. I opted to go for the orientation like shown in the picture to have the logo side on the bed. Because of textured bed but then you probably want to use supports as shown.
For maximum strength the M5 plain washer with outer diameter of 20mm is recommended.
These can be used on both sides of the plastic. A smaller M4 washer would also work but sacrifice some strength. Pick what you like.
The standard 20mm buttonhead bolt/screw is not long enough. You should use a 25mm M4 bolt/screw for this.
To put it on the printer you need to remove the original bracket.
You also need to take the belt off the pulley at the back to create enough slack to put the bracket on.
When the belt is put around the front idler pulley the bracket can be slid into the extrusion as far as possible.
You then need to put the belt around the back pulley on the motor again. You can start by putting it over the inside of the pulley and move the bed so it turns counterclockwise and pulls the pulley around it.
Now you can tighten the knob to have the tension you want.
The original screws can then be put in again to lock everything in place.
Byprusa-researchLikes0Downloads2.7K

 Bydet-manLikes0Downloads176

 Bytinx_1344834Likes1.2KDownloads6K

 BydarienLikes0Downloads1K

 Byla-cave-au-chatLikes0Downloads973

 ByvertigomakesLikes0Downloads565

 By3DPrintDemonLikes0Downloads334

 Bychris-hillLikes0Downloads268

 Bypeter-van-der-waalLikes0Downloads260

 ByhumebeamLikes0Downloads133


 BykingnothingLikes0Downloads188