

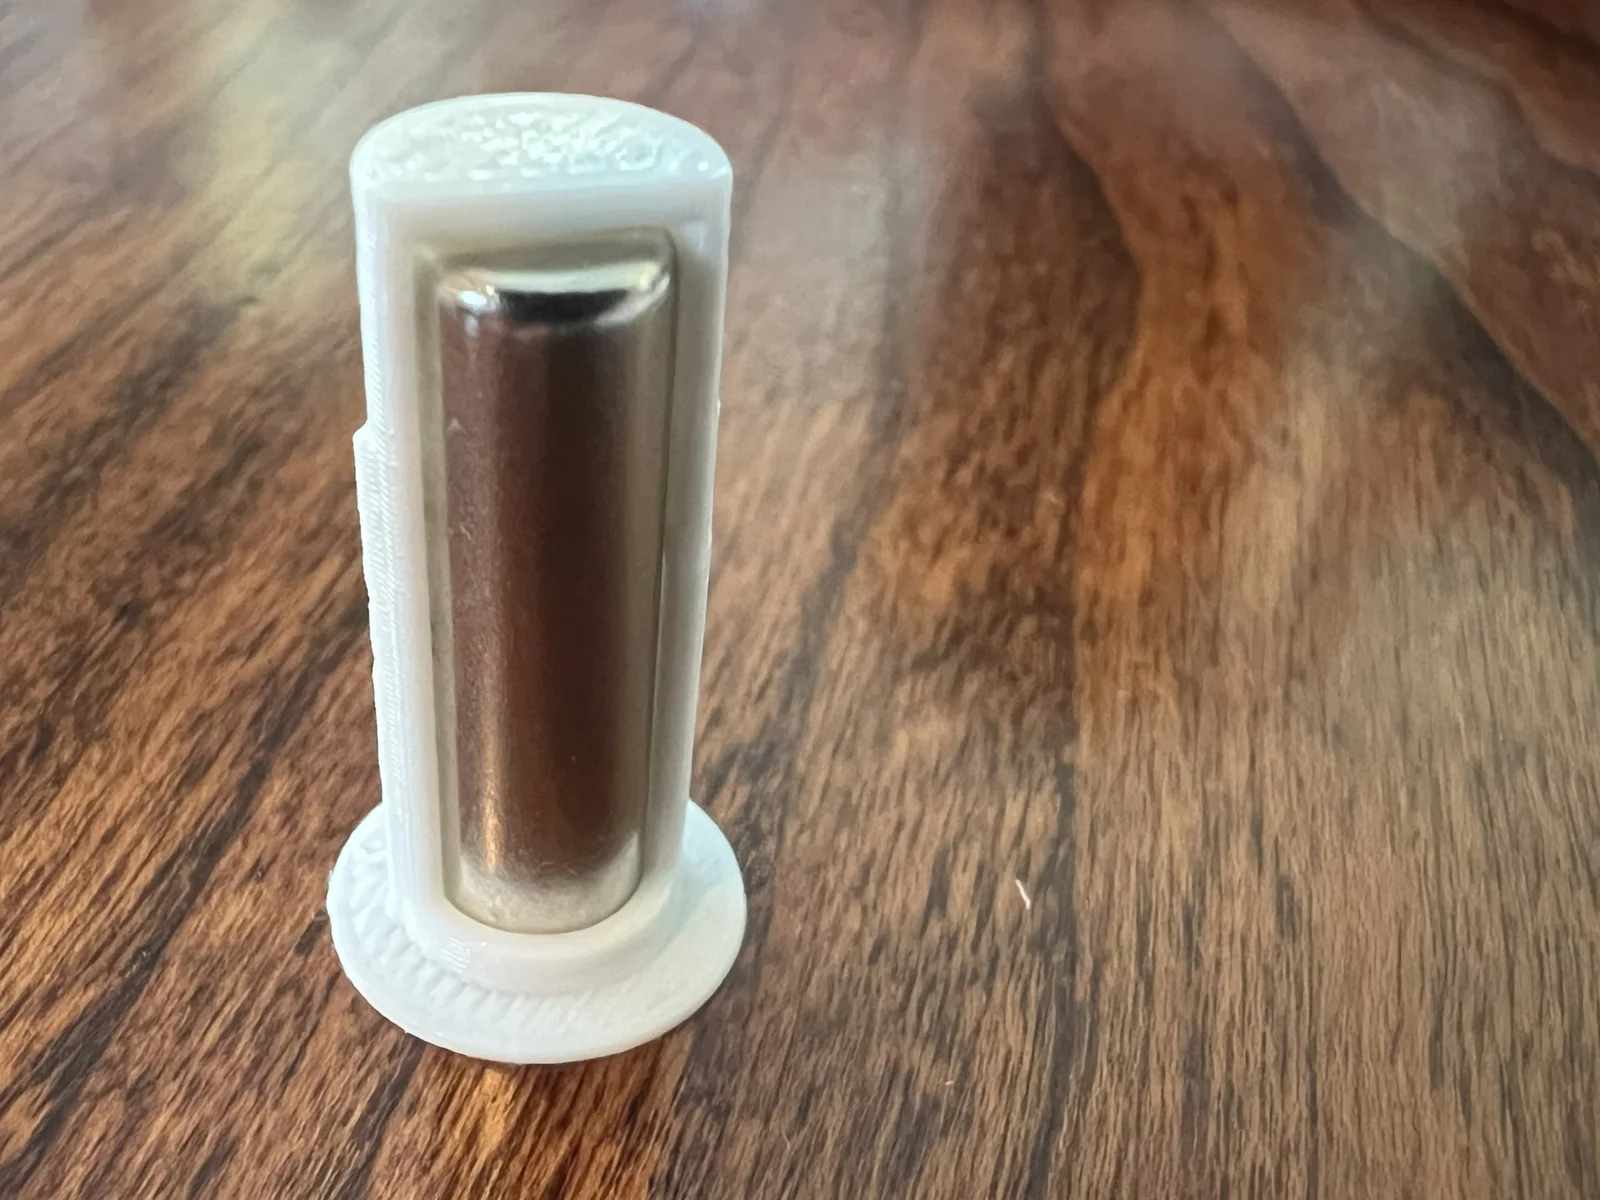


Key organizer Lite - Khung xương tối giản cho EDC
 ByAustin Wolt WoltLikes162Downloads374
Remix of Vỏ âm (Recessed Housing) cho Aqara T1 By TheStockPot
Build another version of this model.
I absolutely love @TheStockPot's recessed Aqara door sensor model, and have replaced every ugly externally mounted door sensor in my house with them! Though, I did appreciate the more visually minimal aesthetic of @mcuelenaere_4446854's 8mm magnet holder remix.
Unfortunately, the very first 8mm holder I installed in my trim failed... It installed perfectly fine, but I could not get the door sensor to actually trigger when the door was closed. Turns out: When I installed the 8mm holder, I pushed a bit too hard, bounced the magnet a bit up into the air within the door framing, and it wedged itself several mm away from the "bottom" of the magnet holder. It was no longer vertically close enough to trip the door sensor.
This model is my solution: A "shuttle" that the Aqara magnet easily snaps into, which holds the magnet securely from the top as well as from the sides. Once contained in an 8mm hole (or 5/16" if you're in the US like me), the magnet isn't going anywhere, and will be perfectly vertically positioned to activate the door sensor... yet you can also pry the shuttle back out with a putty knife and recover the magnet through the hole on the back.
See the original model for further installation instructions and the other required pieces of the model!
Drill an 8mm (or 5/16") hole
Install original Aqara door sensor magnet into the shuttle
Push shuttle into the hole. As in the original 8mm model, the side fins provide a strong friction fit.
No supports - the top will easily bridge with straight lines.
No brim needed
I used a standard PLA
ByAustin Wolt WoltLikes162Downloads374

 ByLecso_113752Likes76Downloads327

 Bytovelaermans_3355197Likes63Downloads420

 ByAlexMuLikes41Downloads323

 ByckthLikes148Downloads2.4K

 ByTangoOscarMik_505113Likes31Downloads242

 ByxsynaticLikes27Downloads207

 BySimin03Likes84Downloads194

 ByDerTapirLikes34Downloads167


 ByMichaelCurri_3940753Likes26Downloads145

 ByGrainAmerica_1447759Likes15Downloads146