



Pocket Memory — SD & microSD Case | Print in Place
 By3dwakeLikes0Downloads365
Remix of Ốp đuôi Nerf Stryfe kèm điểm gắn dây đeo (Butt-Plate with slingmount) By LoneWolf052
Build another version of this model.
Print settings:
I used 4 walls, 25% cubic, with supports for the main stock piece. 4 walls, 10% cubic, no support for the smaller M12 attachment. Print how they are oriented in the fileset.
Hardware:
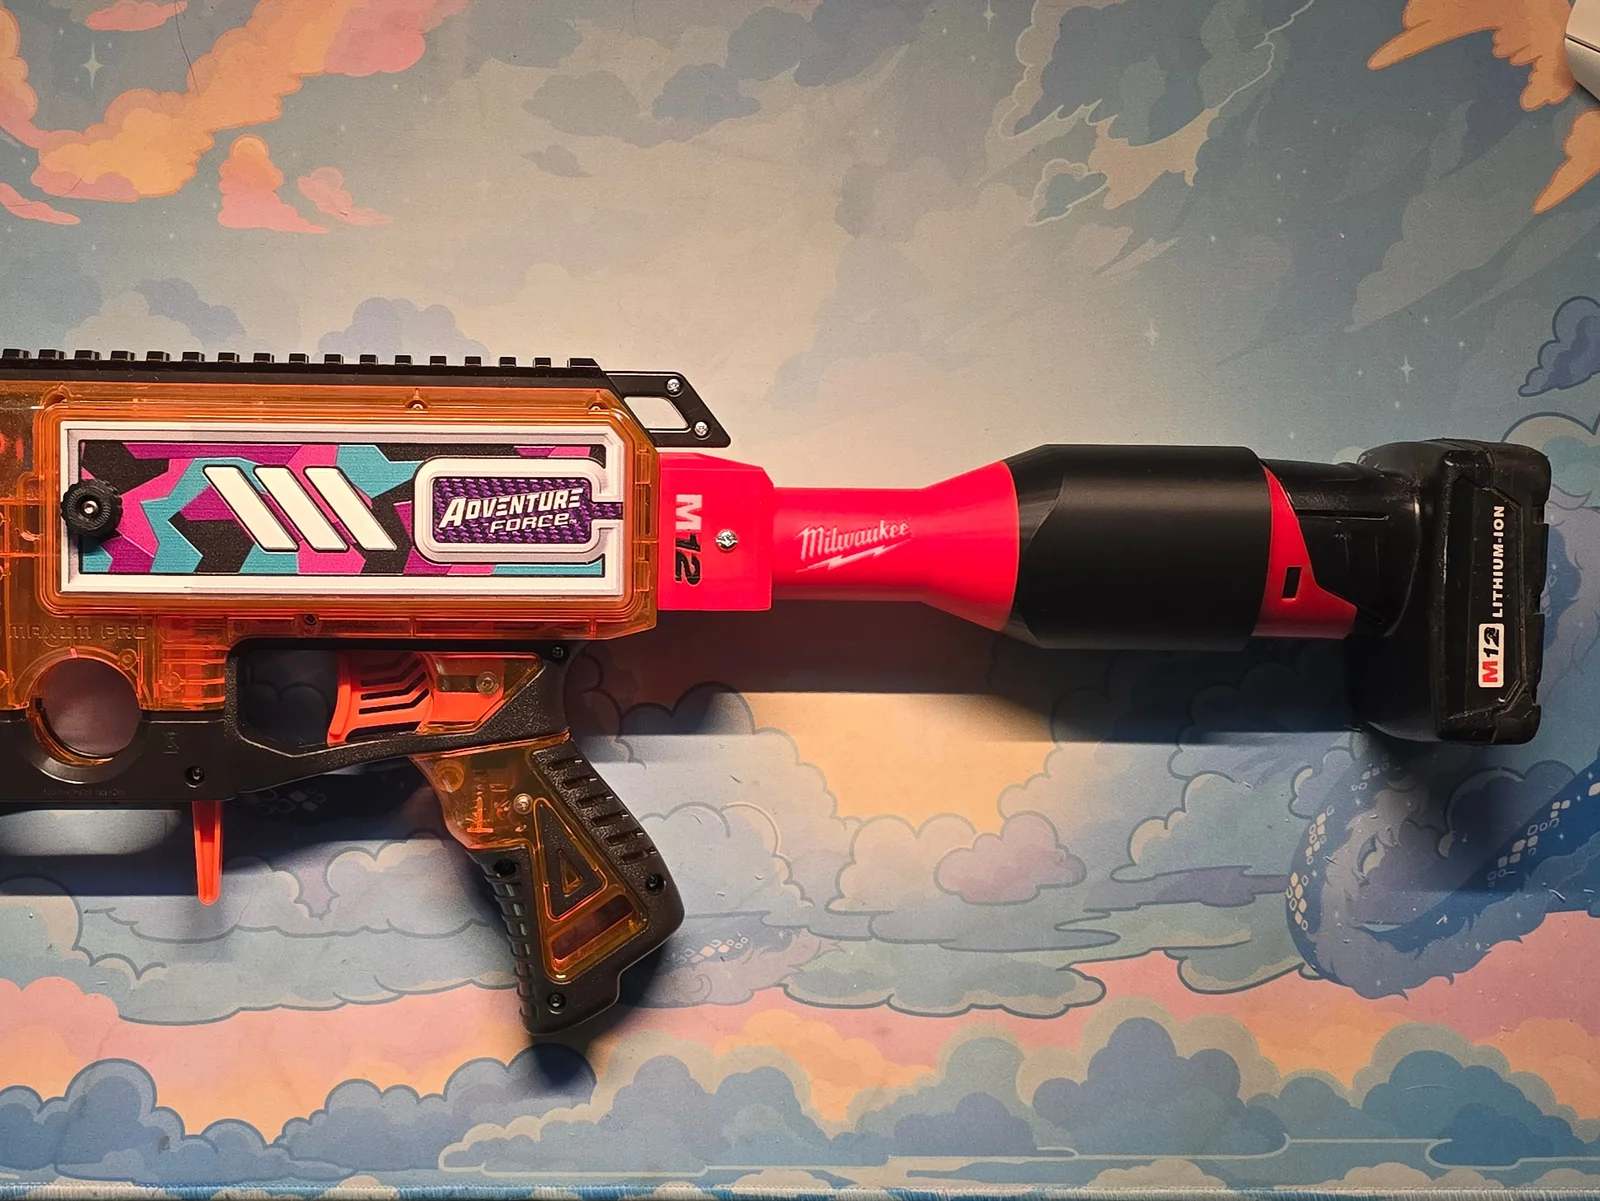
Uses this piece to attach the M12. I didn't even have to glue mine in, it just friction fit into the stock.
https://www.amazon.com/dp/B0D5YLSWLB?ref=ppx_yo2ov_dt_b_fed_asin_title&th=1
Other hardware needed:
1x - XT30 male connector
6 inches - 16 gauge wire (red/black). You don't absolutely need this, but it makes it way easier to attach the stock once the XT30's are connected.
Soldering tools/heat shrink
1x - M3x45 screw
1x - M3 hex nut
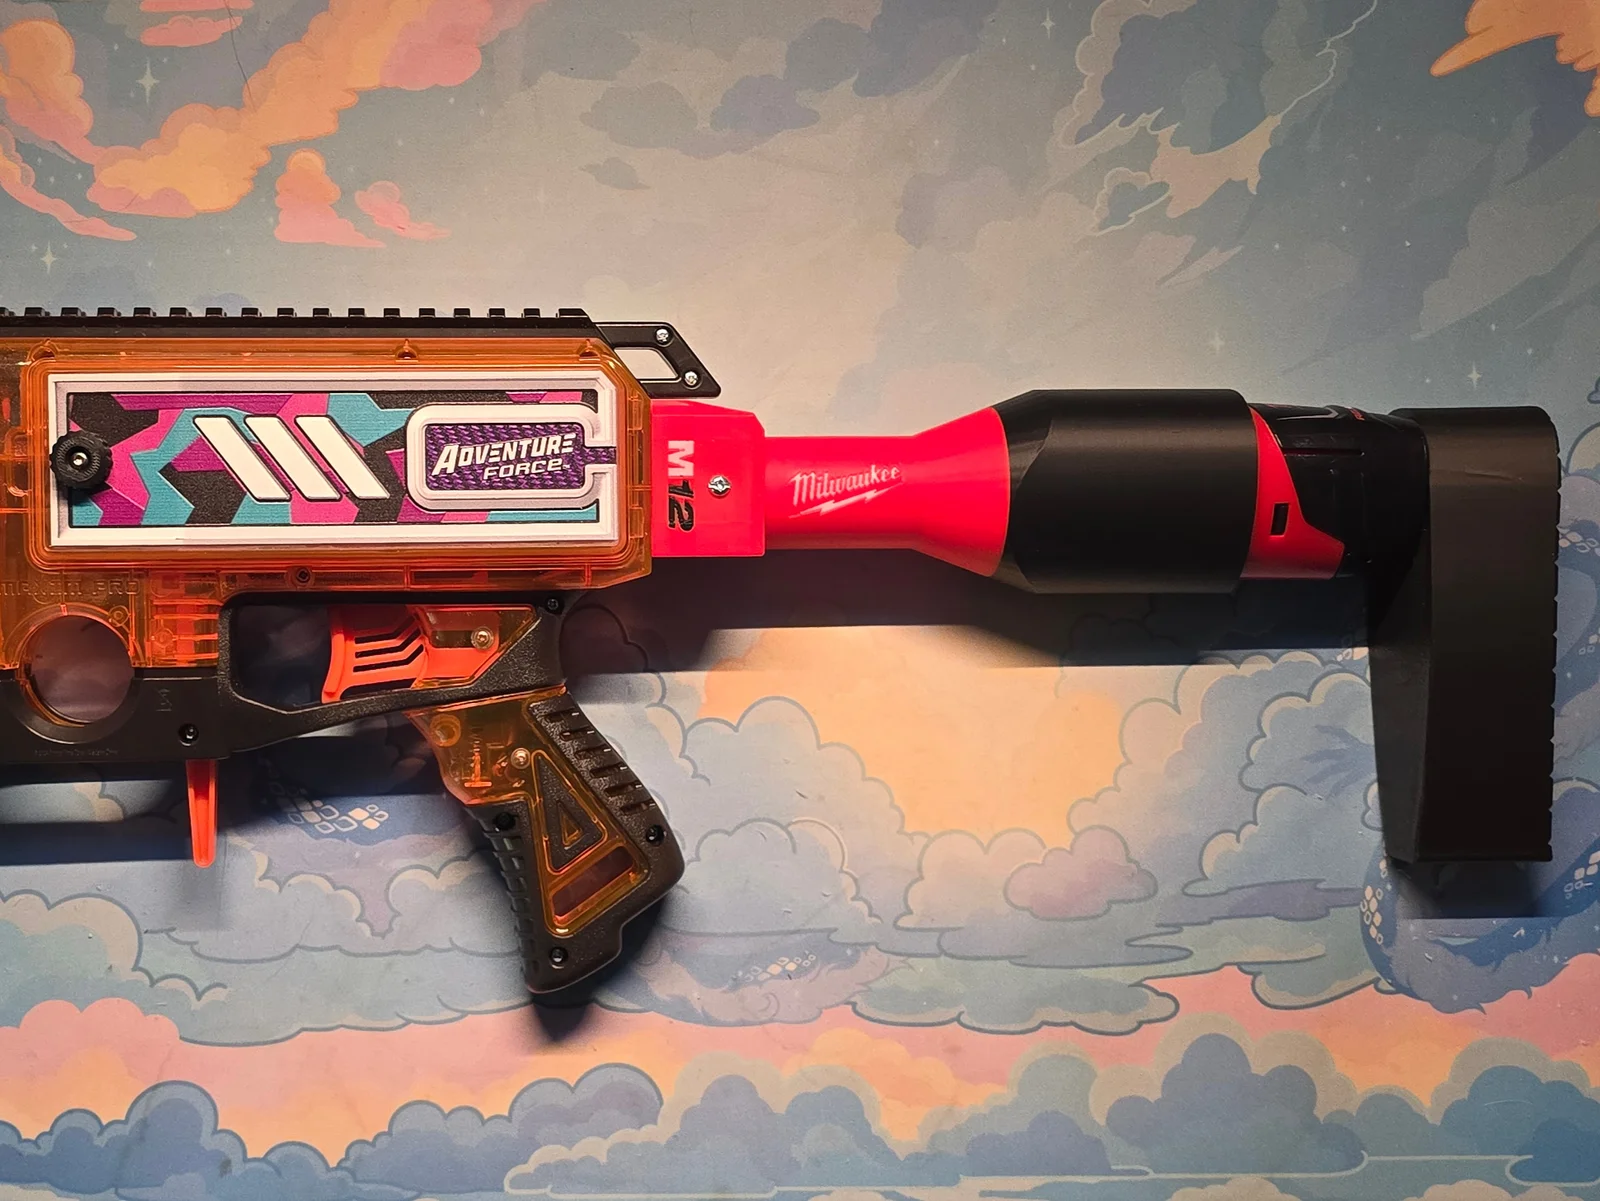
1x - Milwaukee M12 battery. I prefer to use the smaller one because I found it really rear heavy with the larger one. I have provided a file to add a comfier stock onto the smaller M12.
I cut the wires pretty close to this attachment, and soldered on 16 gauge wires because they were more flexible. I made the wire slightly longer than the stock, then soldered an XT30 connector onto the end.
I then drilled out the screw hole in the stock using a 1/8" drill bit.
Then drill or use a rotary tool to make a hole in the back between the seam so that you can feed the XT30 from the Maxim through the rear of the blaster.
You then attach the XT30 connectors together and carefully put the stock on. Make sure the wires feed nicely into the stock and don't get snagged anywhere. Once fully seated. Run your M3x45 screw through the stock hole and secure with a hex nut on the other side. It doesn't have to be super tight to be secure.
If you are using the smaller M12 battery, you have to unscrew the rear black part of the M12 where the clip is (it's just one screw). I used super glue to secure the stock piece, and then put the screw back in through the stock piece and tighten.
You now have an M12 that you can use on the Maxim! It makes swapping the battery extremely easy and is just plain cool.
By3dwakeLikes0Downloads365

 BylclabLikes0Downloads293


 BylayermodelsLikes0Downloads142

 BynasikLikes0Downloads227

 Bylarp3dLikes0Downloads1.4K

 Byrorys3DLikes0Downloads330

 ByAustin Wolt WoltLikes162Downloads384

 ByLecso_113752Likes76Downloads338

 Byjoshua-s-odditiesLikes0Downloads178

 Bytovelaermans_3355197Likes63Downloads429

 Byenigmatic-printLikes0Downloads172