


Khuôn lăn đá massage mặt 3D (Ice Face Roller) tại nhà
 Byludomatic_146245Likes60Downloads1.2K
Build another version of this model.
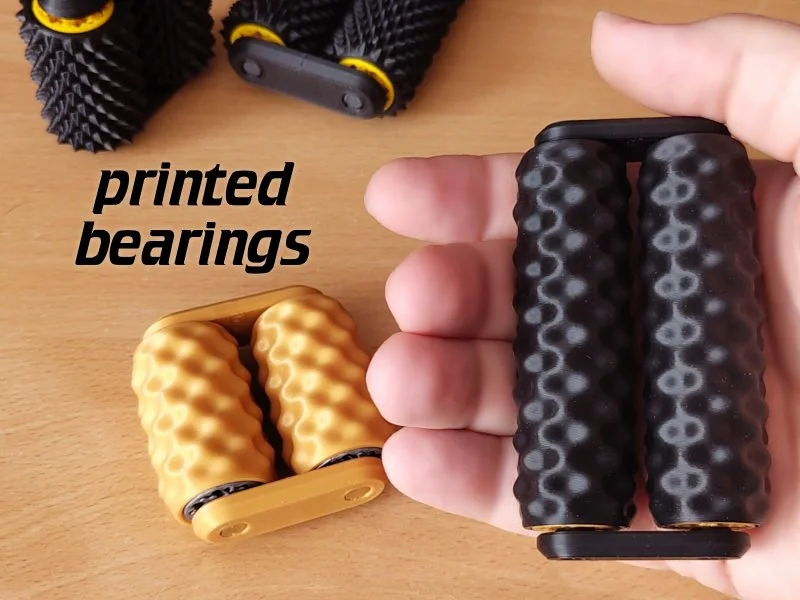
This is the non-spiky version of the spiky hand roller — instead it has a smooth wavy texture.
Some math was involved in making that texture: The waves are defined by sin(x)*sin(y), scaled, wrapped around the cylinder using polar coordinates, tapered at the end by a circular function √(r²-z²), scaled and shifted to look pleasing.
Printing:
This model requires good precision and a well dialed-in printer and filament combination!
Main parts:
bed contact area is small for the rollers, good bed adhesion is essential - otherwise try a brim.
standard settings
Bearings:
print 4 of these
0.17mm layer height
random seams
elephant foot compensation (e.g. 0.15)
if unable to break free, see tips here.
Assembly:
Break free and break in the bearings. Use one of the axles as grip to turn the gears a couple of times. Maybe apply some pressure on the outer ring while doing so, from multiples directions. I often use a power drill with the axle clamped in.
Optionally use a tiny bit of light oil as lubricant for the gears for extra smoothness.
Push one(!) bearing into a roller cylinder. Make sure it doesn't get tilted, push hard, it needs to sit flush.
Insert axle from the other side, the end sticking through the bearing.
Push second bearing over the axle into the roller. It needs to sit flush with the roller, the axle sticking out on both sides.
Do the same for the second roller
Push both rollers into one connector cap.
Attach the other connector cap
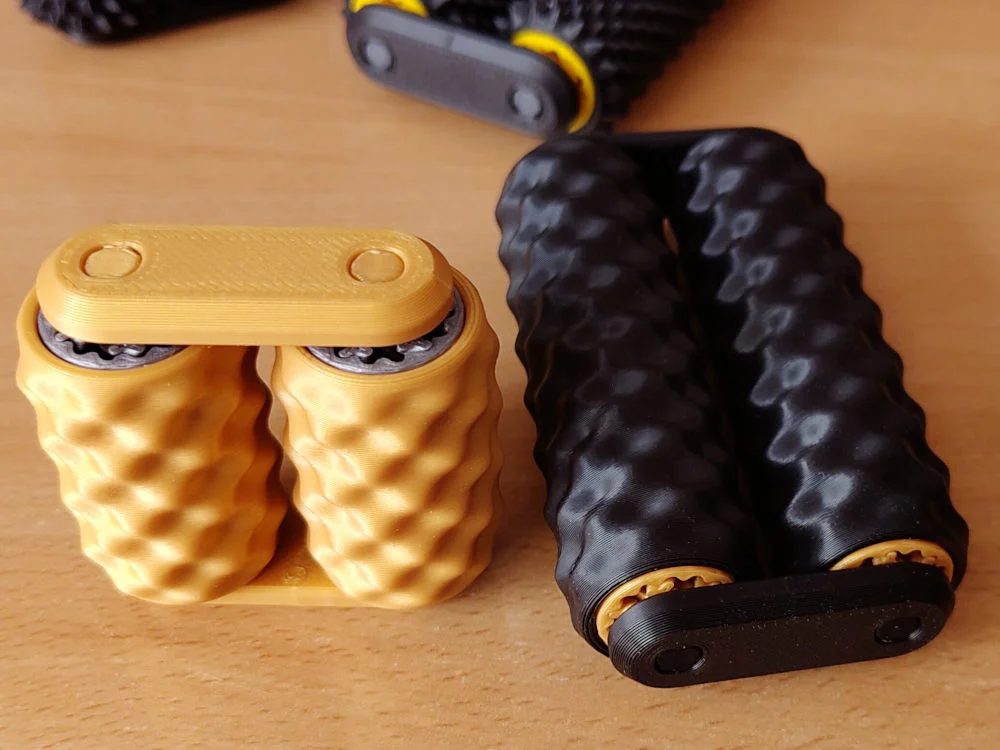
Firmly press both connector caps so they click in, the axles should sit flush in their holes, see images.
Byludomatic_146245Likes60Downloads1.2K

 ByDaan Tholenaars TholenaarsLikes461Downloads3.1K

 ByDrJonesLikes13Downloads38

 BySMACKMAXLikes1.5KDownloads3.2K

 BymfettingLikes66Downloads593

 ByReferentielLikes289Downloads2.3K

 ByKen_198787Likes185Downloads2.2K

 ByLeoganProLikes122Downloads284

 BytkachmikhailoLikes211Downloads1.7K

 Byross549Likes274Downloads1.4K

 Bynekenlight_3305158Likes227Downloads1.3K

 ByBobHayesLikes18Downloads254