



CORE One/+ INDX printed parts
 Byprusa-researchLikes0Downloads2.7K
Remix of Giá đỡ camera Raspberry Pi cho máy in Prusa MK3s By mhparsons
Build another version of this model.
 Raspberry Pi Camera v3 w/Wide-Angle Lens – Nắp che & STL moduleBythrasher · 05/03/2026
 Giá đỡ Freenove ESP32-Wrover CAM cho Prusa MK3 & MK4ByFlatBadger_33565 · 04/02/2026
 Giá đỡ camera Buddy3D cho máy in Prusa MK3, MK4 và MK4SByjeffrey892_22956 · 03/25/2026
 Giá đỡ camera Pi Cam v3 cho Prusa MK3sByselexin_167052 · 03/25/2025
2/17/24 UPDATE: I uploaded a second knob that has a longer screw thread. Use the longer one for attaching the Pi Mount to the Pivot and the shorter one to attach the Pivot to the Bracket.
11/1/23 UPDATE: I modified the bracket to be compatible with Prusa MK4 printer. So the same bracket will work for both printer models. Everything else functions the same.
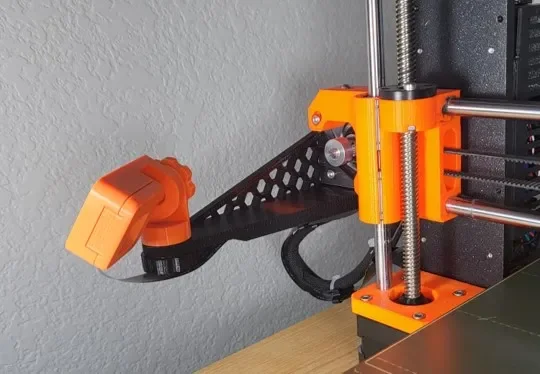
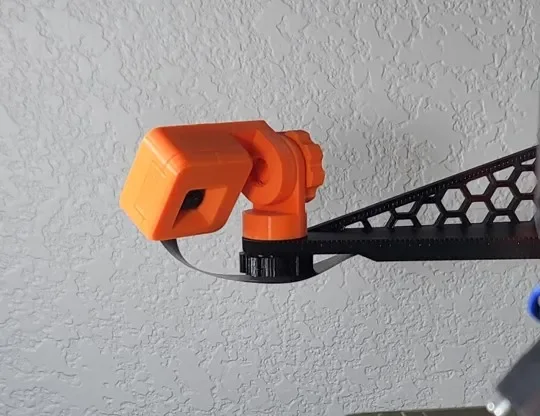
This is a mount for a Raspberry PI Camera on a Prusa Technologies MK3s 3D Printer. The mount attaches to the X-Axis Motor with a single M3x10 screw (use one from the Prusa spares package). The design is for a Raspberry Pi v2 Video Camera.
The bracket is fixed length, but the mount provides 2-axis adjustment so you can obtain the exact view you want. Print two of the Knobs. There is a slot on the bottom of the bracket that you can slide the ribbon cable through to secure it.
This is a remix of my original design. I made the following improvements:
I also designed a ribbon cable guide that attaches to the x-axis motor cable to keep the ribbon cable for being pulled out. I used three on my printer. You can get the file here:
https://www.printables.com/model/376364-ribbon-cable-guide
Finally, when it was first assembled the camera was not in focus. The factory sets the focal length to infinity. There are instructions on the internet on how to focus it. Essentially, I held the camera housing on the board carefully with needle-nose pliers and then rotated the lens counter-clockwise with a pin until it was in focus. There's a little soft cement that holds the lens secure, so you will need to push a bit past where it is in focus and let the cement spring back into it's final position.
Byprusa-researchLikes0Downloads2.7K

 Bytinx_1344834Likes1.2KDownloads6K

 Bydet-manLikes0Downloads171

 Bypeter-van-der-waalLikes0Downloads257

 BykingnothingLikes0Downloads181

 Byp3rr1ff3ryLikes0Downloads150

 BydarienLikes0Downloads1K

 Byds-printsLikes0Downloads352

 Byla-cave-au-chatLikes0Downloads967

 ByvertigomakesLikes0Downloads563

 Bydominik-chuchlikLikes0Downloads121

 By3DSourcererLikes48Downloads377