


SolderMate - Fully 3D Printed Desk Soldering Companion
 ByleonicLikes0Downloads1.4K
Build another version of this model.
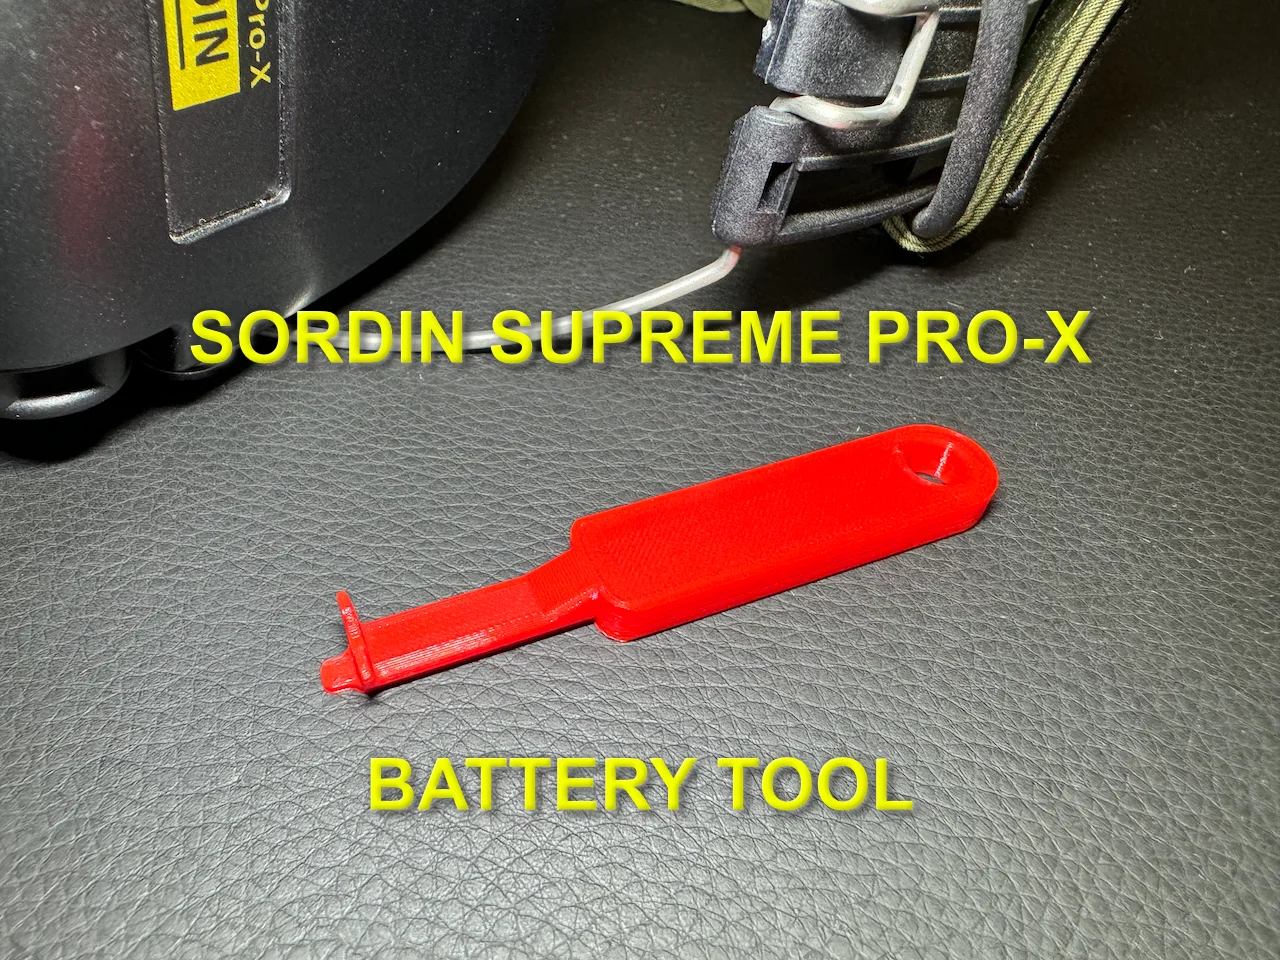
A tool to aid in the installation and removal of the lower AAA battery in a pair of Sordin (formerly MSA) Supreme Pro-X electronic earmuffs. If you own a pair of these, you know how annoying it is to change the batteries because of the design of the battery compartment. If you're like me, you prefer not to vigorously beat your expensive earmuffs against your hand to get the battery out. For this reason, I designed this tool to aid in the removal and installation of that pesky lower battery.
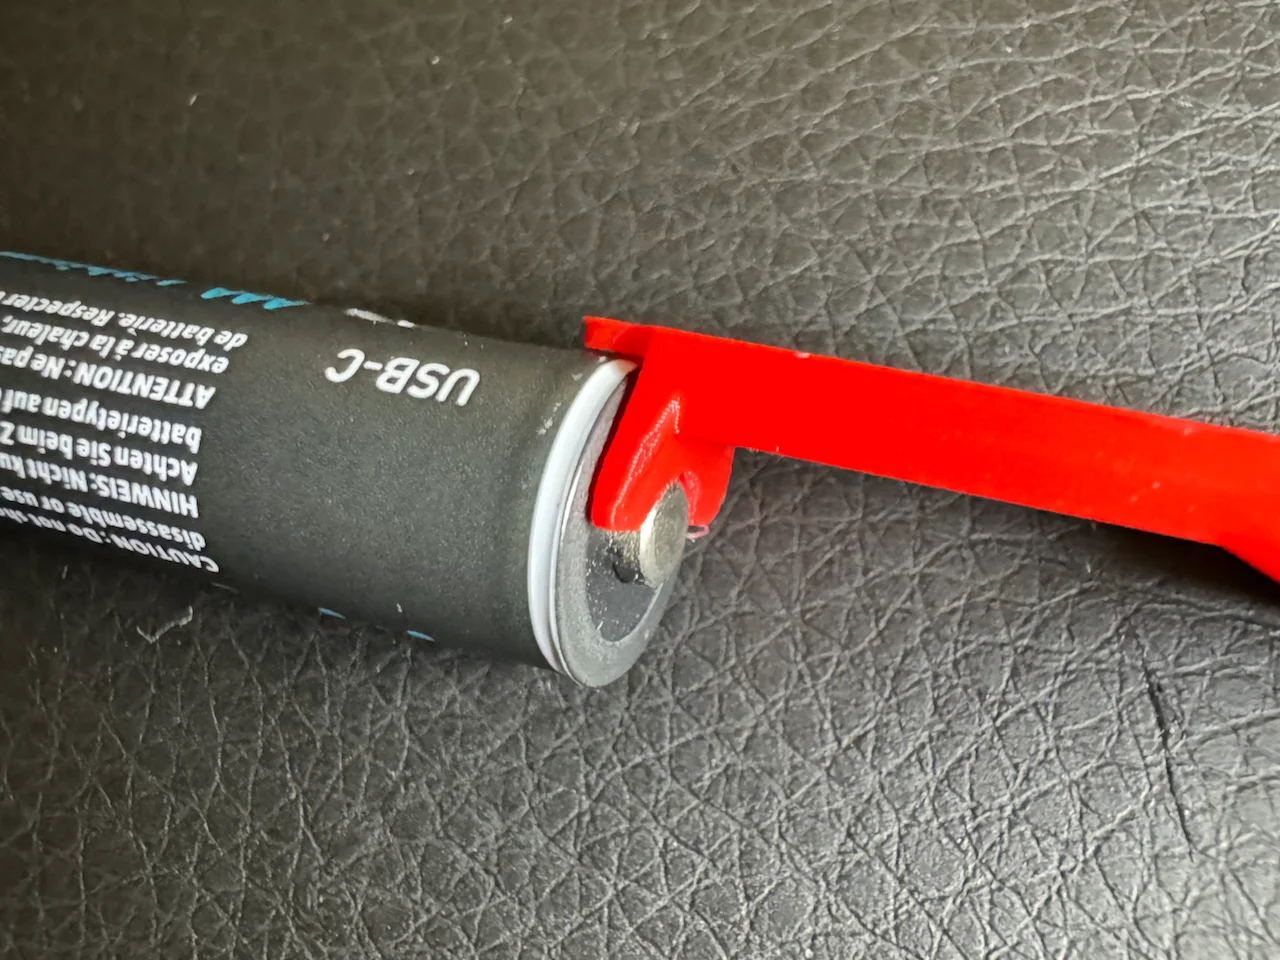
Holding the earmuffs upright, slide the tool in through the battery compartment opening until the head of the tool drops down between the battery housing and the battery (the toolhead should index perfectly on the front of the battery). Apply some rearward pressure to the front of the battery while simultaneously lifting the tool upward. This should raise the front of the battery. Once the positive (+) terminal on the battery has cleared the lip of the battery housing tunnel, you should be able to flip the earmuffs upside down and the battery should fall out.
The process to install a new battery is nearly identical to the removal of the old battery in reverse, except when inserting the new battery, hold the earmuffs upright but with a slight angle, so the rear of the battery compartment is lower than the front of the battery compartment (as you're viewing it). This will entice the negative (-) end of the new battery to drop down before the positive (+) end, allowing you to place the tool on the front (+ end) of the battery and, while applying a little rearward pressure, push the battery down into the lower socket. If you can't get the front of the battery all the way down in one go, you can place the toolhead on the side of the battery and push it down the rest of the way once the positive (+) terminal is seated below the lip of the battery compartment tunnel.
ByleonicLikes0Downloads1.4K

 ByfifindrLikes500Downloads4K

 ByVC_DesignLikes679Downloads3.6K

 ByDan Schwartz SchwartzLikes744Downloads3.4K

 Byvc-designLikes0Downloads539

 Bythorin-oakenshieldLikes0Downloads536

 Bytorii-creative-studioLikes0Downloads452

 Bychubbs8697_2027893Likes585Downloads1.7K

 Byquibeck_3353173Likes965Downloads1.9K

 Bydenis-3dLikes0Downloads268

 ByRungeKuttaLikes229Downloads1.2K

 Bydelloo2008Likes0Downloads246