



Kẹp giữ sợi Filament
 Bytinx_1344834Likes1.2KDownloads6K
Build another version of this model.
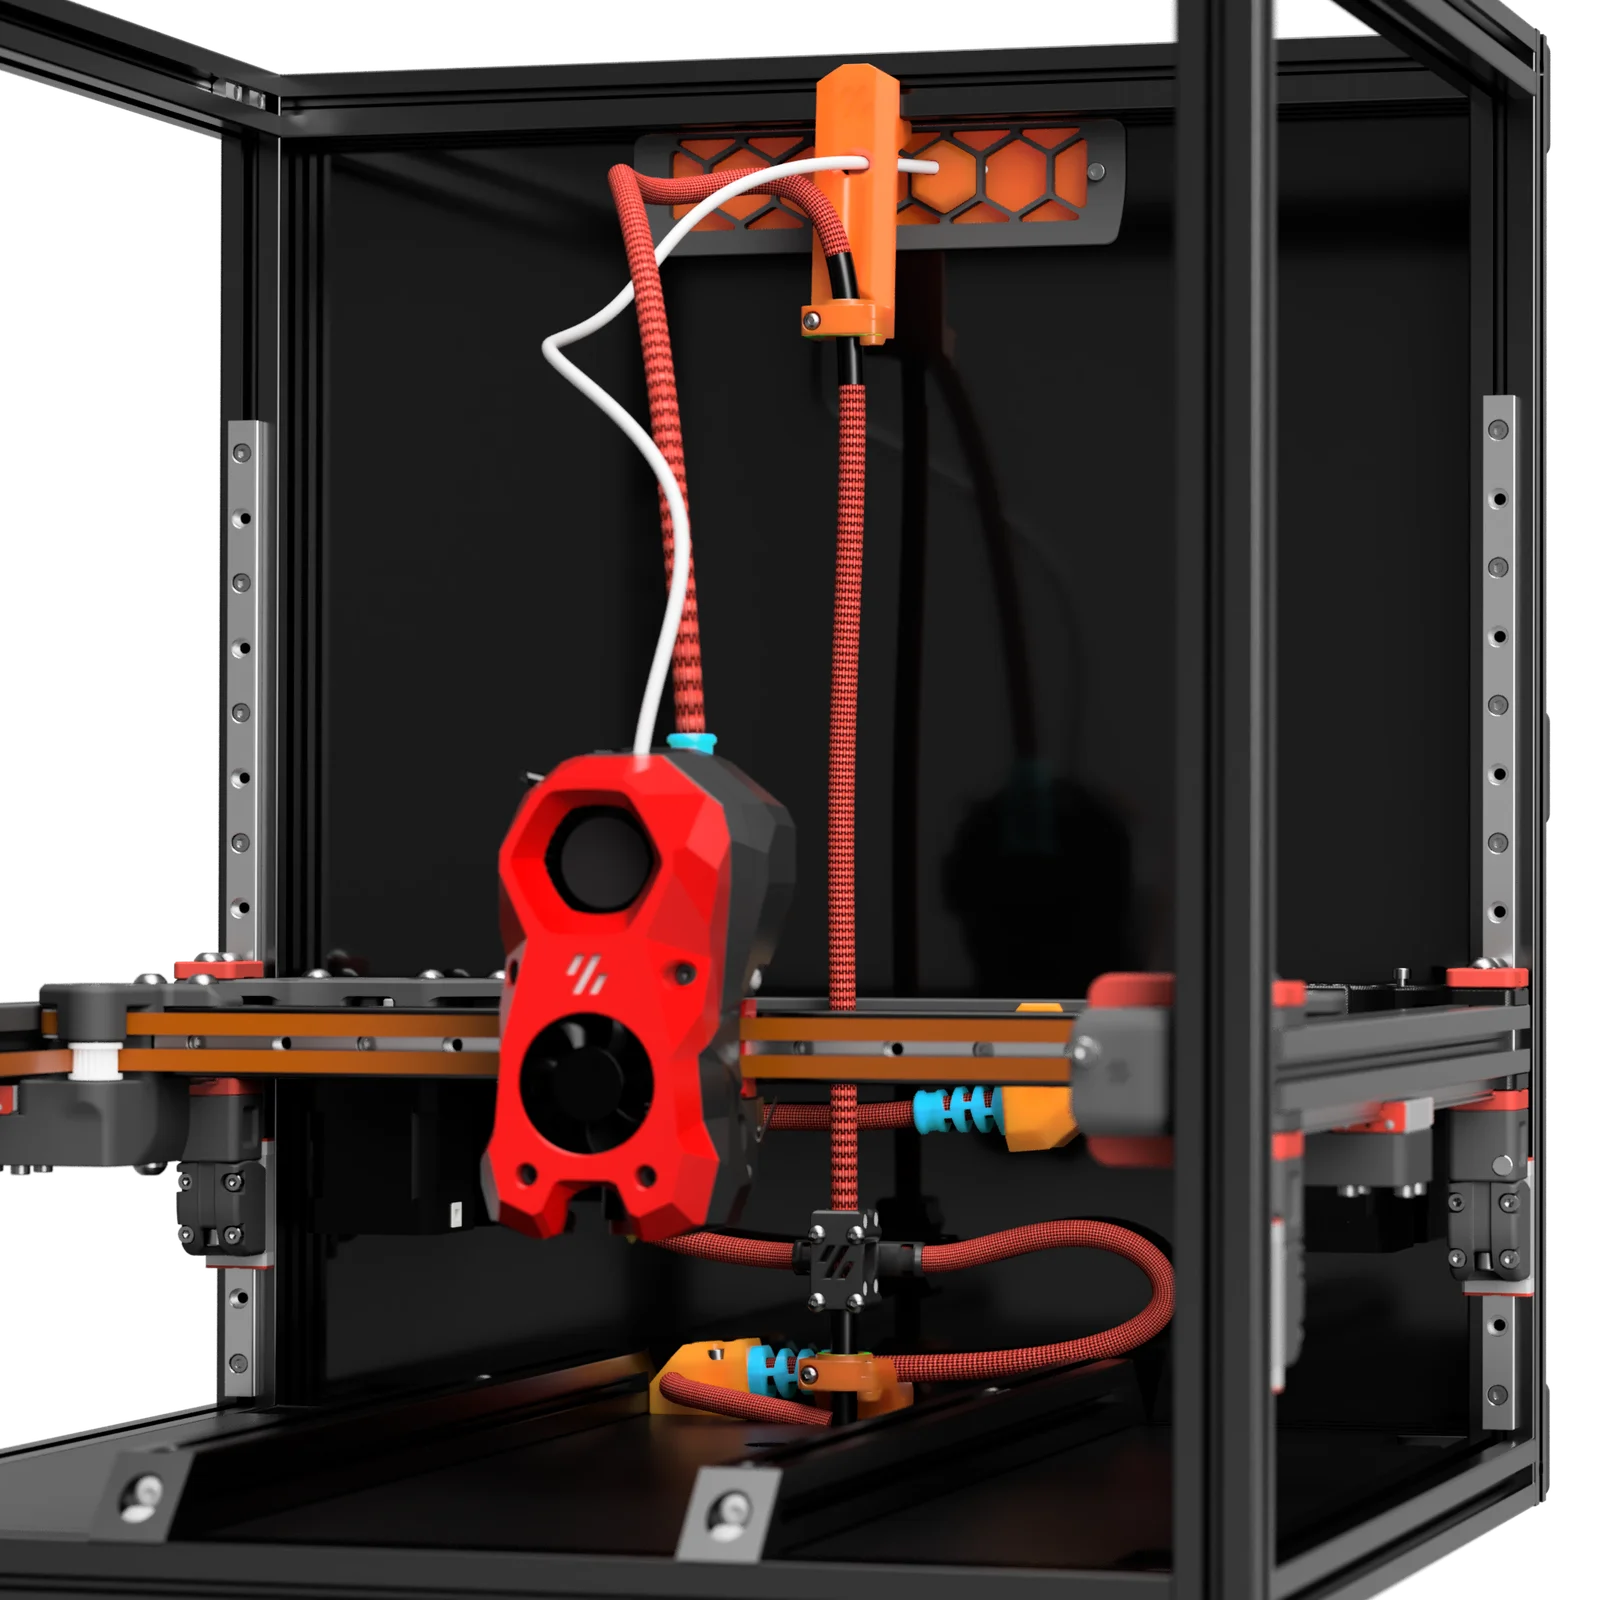
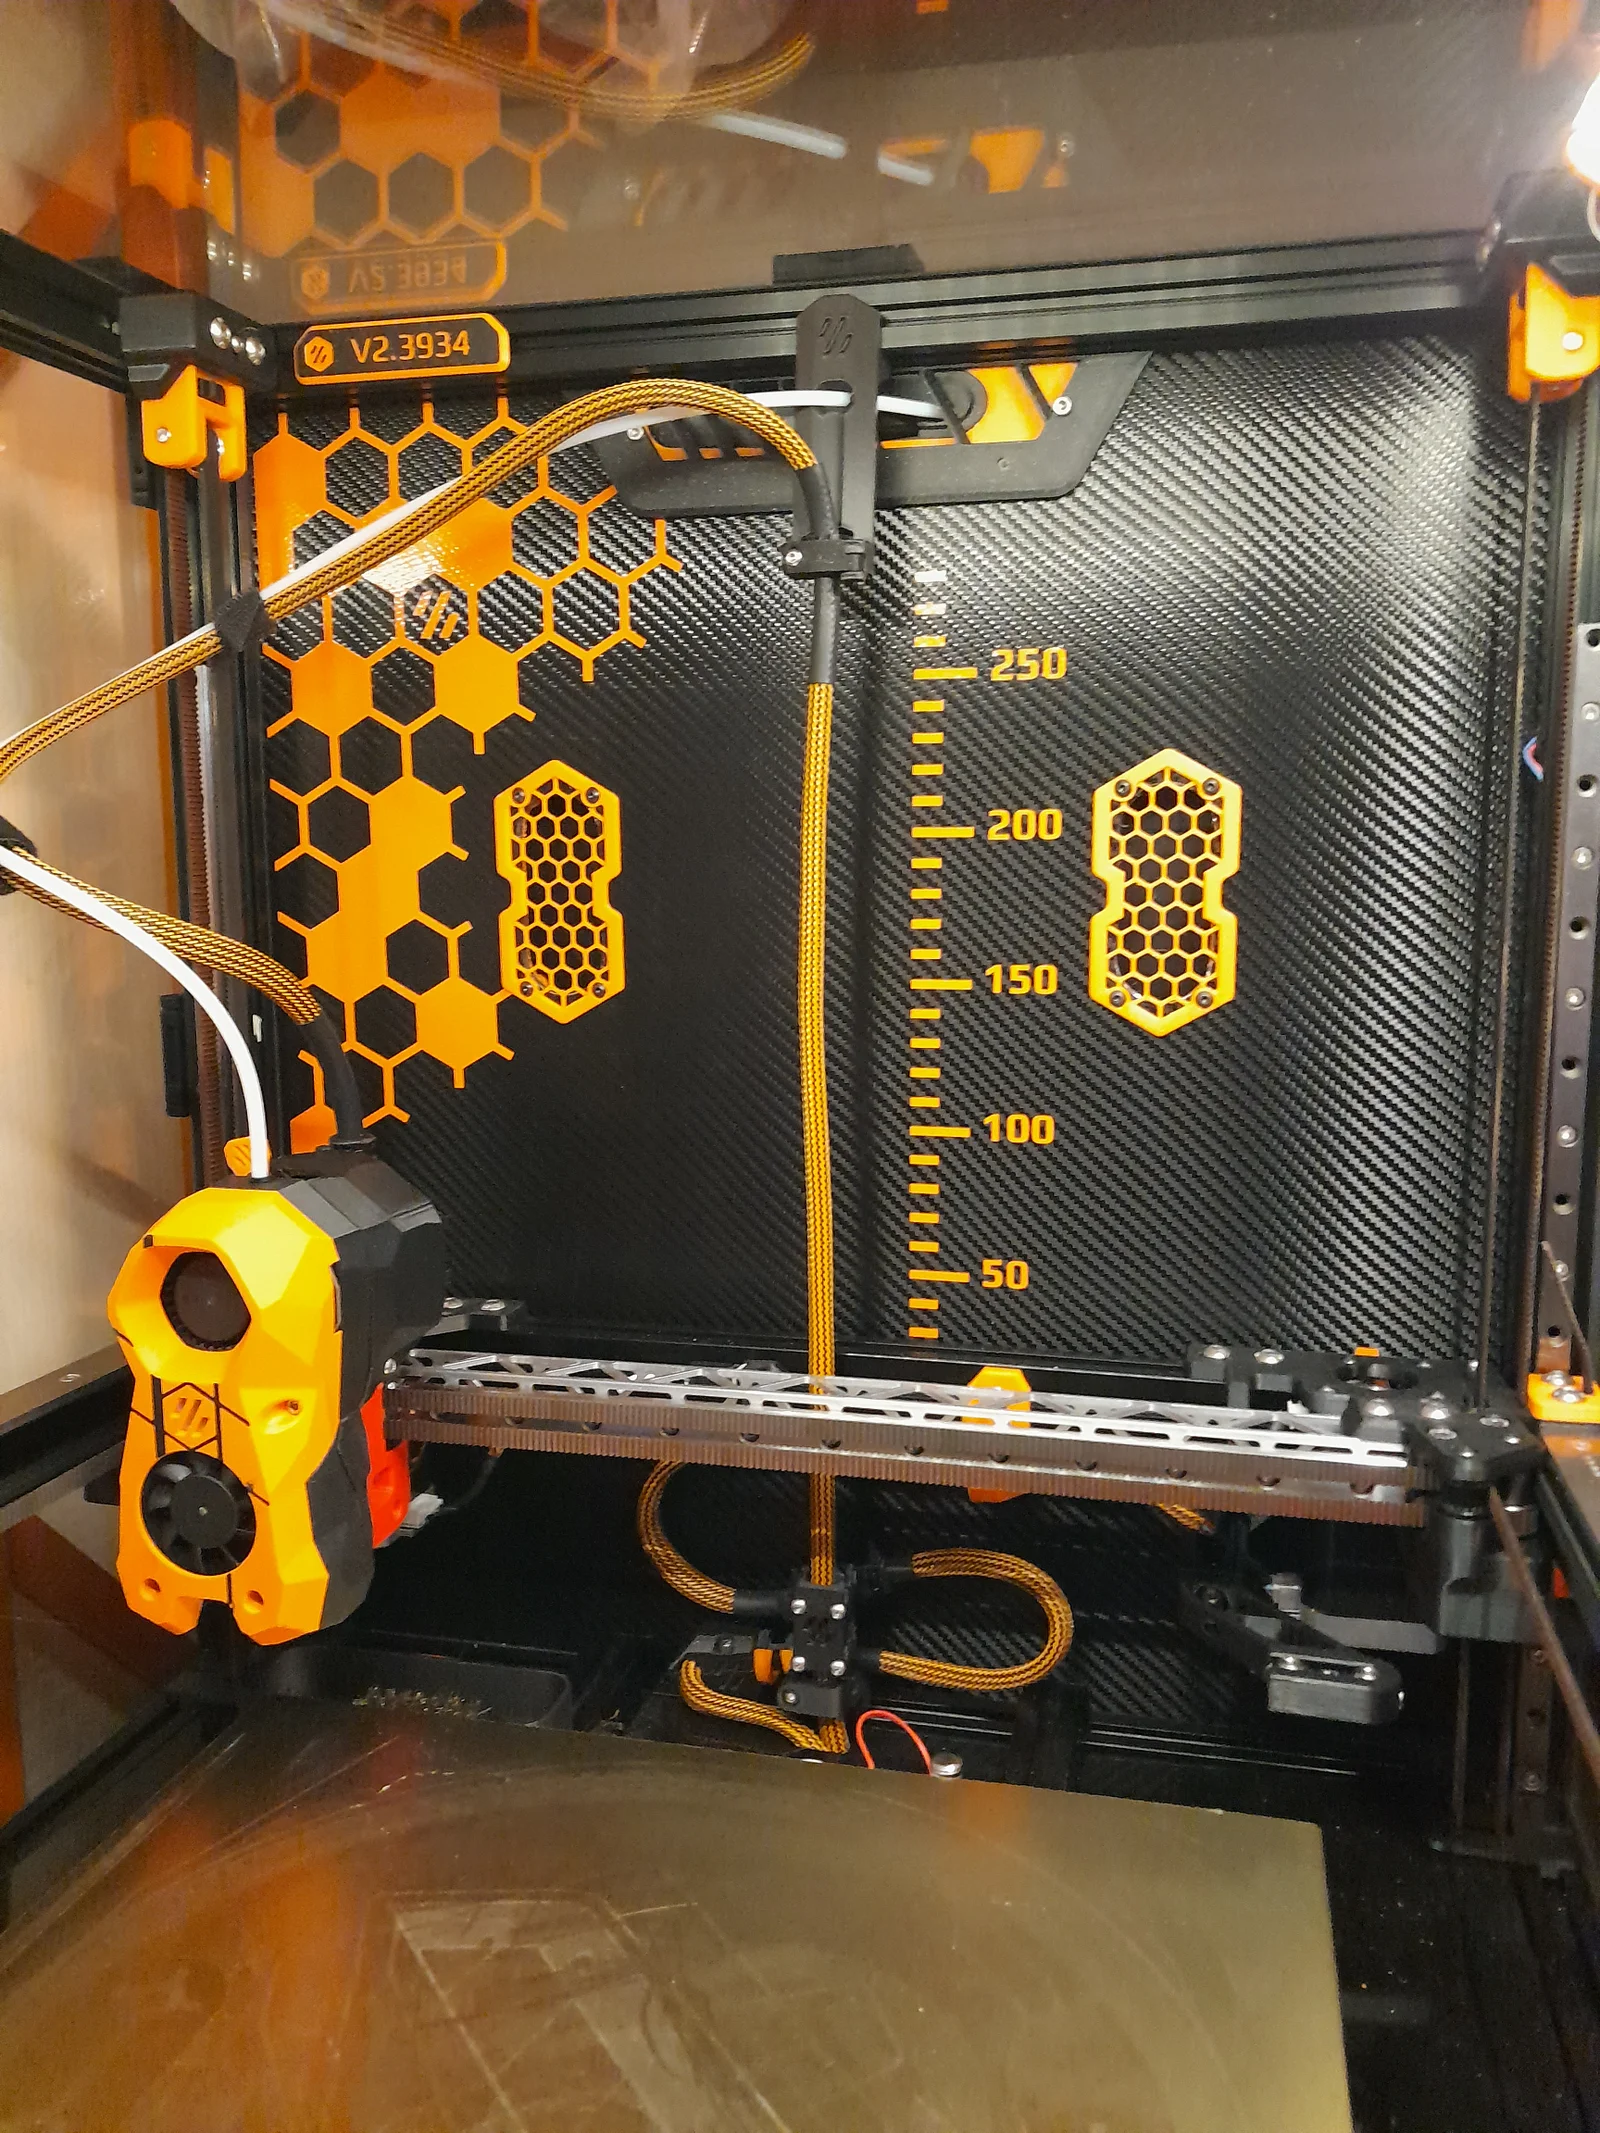
This mod was designed to remove Z-chain by a Z umbilical. another umbilical toolhead is required for this mod. TH umbilical is used as guide for Z
This is still a draft, use it with care and feel free to contact me for any error or omission.
There is no longer a chain above the gantry, but the toolhead umbilical remains and can be a problem for some mounts. Changing or adding cable in the umbilical can be a pity.
Keep in mind you do it only for Style ! ^^
Hardware
qty
Notes
cable sleeve MDPC-X Medium
~2-3m
cable sleeve MDPC-X small
~1-2m
heatshrink 16mm
~15cm
ratio 3:1 or better
heatshrink 8mm
~20cm
ratio 3:1 or better
PTFE tube OD4mm
8 x 16mm
6x3mm Neodym magnets
2
N52 is better but N35 should but fine
M3 T-Nut
1
M5 T-nut
1
M3 x 20 BHCS
4
SHCS should be OK
M3 x 16 SHCS
4
M3 x 10 SHCS
1
M5 x 10 BHCS
1
M3 Square nut
4
DIN562 - max thickness 1.7mm
Ziptie 3mm small
2
2
Shorter is better, diameter depends on your wire harness, You can use ziptie or screw version, it doesn't matter
Prepare the wire harness. The overall length depends on your printer size. To determine cable and cable sleeve length, put the gantry at the max z position and refer the sketches below.
S-shape of the cable
Preparing wire harness
This is a example but you can add much more cable as long as total diameter does not exceed 8.5 mm
Once harness is ready choose Pug against central part diameter
Steppers cable length is about the same as in Z chain.
All parts should be printed with Voron specifications.
! Do not change STLs orientation !
TO BE COMPLETED BY USERS
Bytinx_1344834Likes1.2KDownloads6K

 Byprusa-researchLikes0Downloads2.7K

 Byarhi_585078Likes64Downloads540

 ByHanzo3dLikes155Downloads413

 BydarienLikes0Downloads1K

 ByGeek5DLikes147Downloads484

 ByBrokentooth_designsLikes23Downloads407

 ByvertigomakesLikes0Downloads560

 By3DSourcererLikes48Downloads377

 Byartme-3dLikes0Downloads333

 ByWyomingWolf_261196Likes52Downloads428

 Bytopronix_2170418Likes41Downloads297