



Miếng Tile Kiểm Tra Bề Mặt (Chà Nhám + Sơn Lót + Sơn Phủ)
 ByFonnPrintsLikes4Downloads25
Build another version of this model.
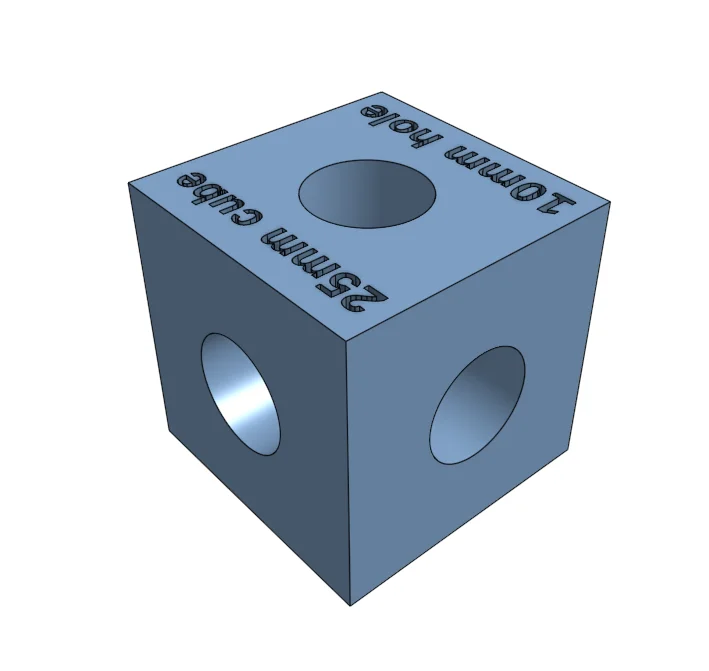
Hi, I made the model to include a hole on all three axes to give you an idea of how accurate the printer can make the hole.
That's what I was missing from the existing models.
To achieve accurate printing, it is a good idea to calibrate the printer's motor steps.
There are many nicely done tutorials, video-tutorials on the internet on how to calibrate.
Look for the one for your printer.
Always perform calibrations in this order:
1. extruder motor
2. XYZ axis motors
I have attached two models, one with sharp edges and one with chamfered edges at 45 degrees, use according to your preference.
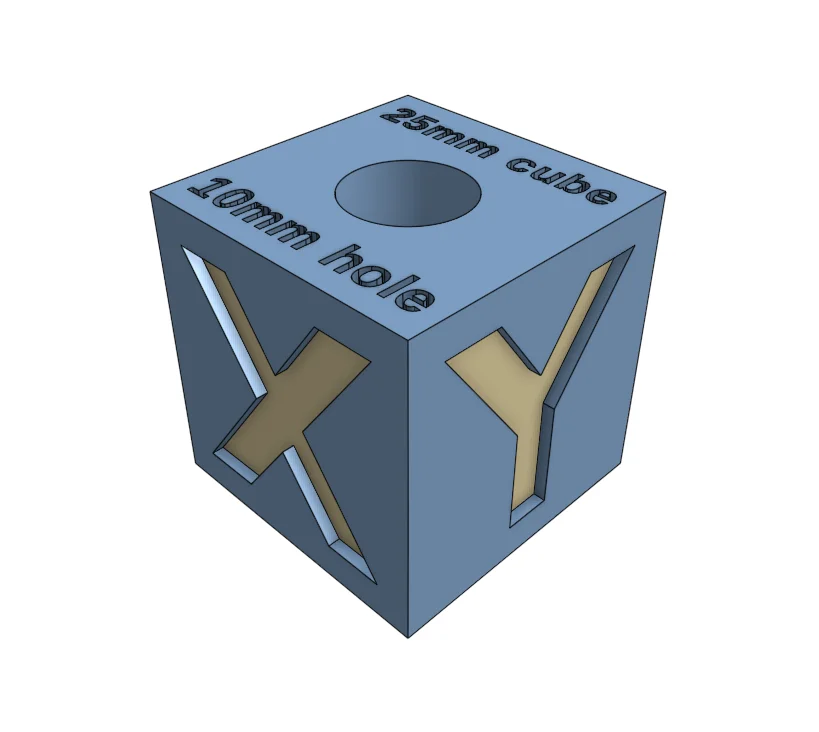
After inserting the model into the slicer, the X-shaped area is located in the front. It's like looking at the printer from the front.
Check that the model is correctly positioned on the plate as shown in the picture.
The X represents the accuracy of the X-axis. From the front view of the printer, this is a left to right movement.
The Y-axis moves towards you and away from you, so the side with the letter Y represents the accuracy of the Y-axis.
And the Z axis is the height.
Onshape model:
ByFonnPrintsLikes4Downloads25

 BylaserbaconLikes0Downloads174

 ByswimLikes0Downloads110

 Bygafyx3dLikes0Downloads122

 Bynadir-cn3dLikes0Downloads115

 ByKRYS_3DLikes8Downloads48

 BytheodorLikes0Downloads145

 Bytinx_1344834Likes1.2KDownloads6K

 ByteteomatLikes0Downloads139

 Byledglass_319976Likes0Downloads6

 Byduo3dprintLikes0Downloads156

 ByleopoldmozartLikes0Downloads140