



Bộ Chữ Cái và Số In 3D: Giáo Cụ Học Tập Hấp Dẫn Cho Bé
 BygillisLikes121Downloads2.1K
Build another version of this model.
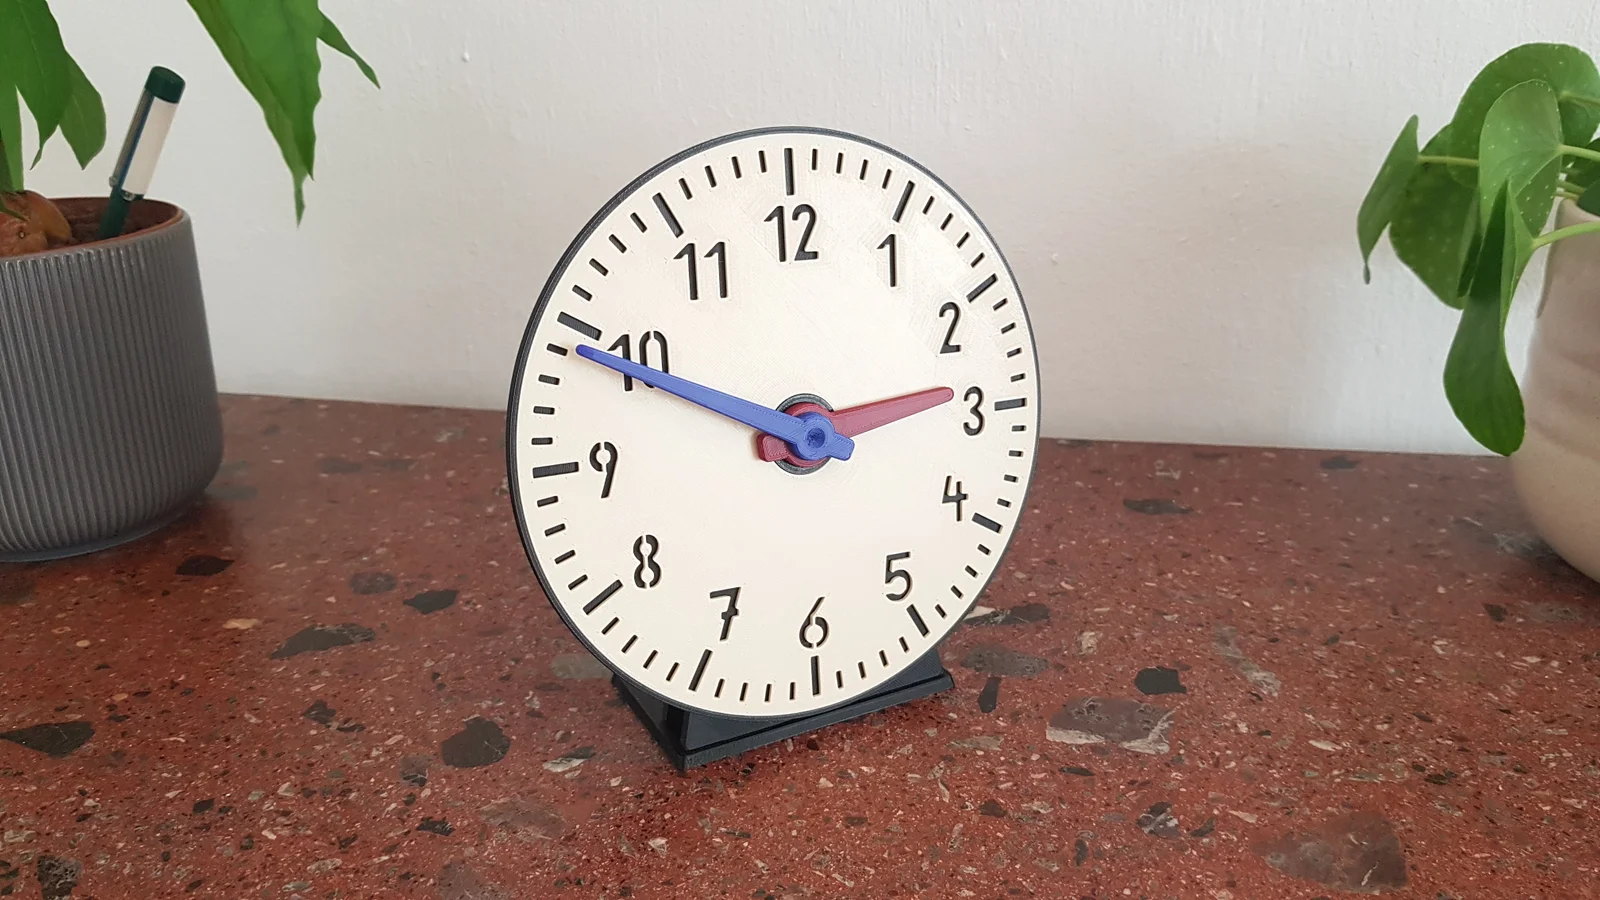
This is an educational clock to teach the analogue clock.
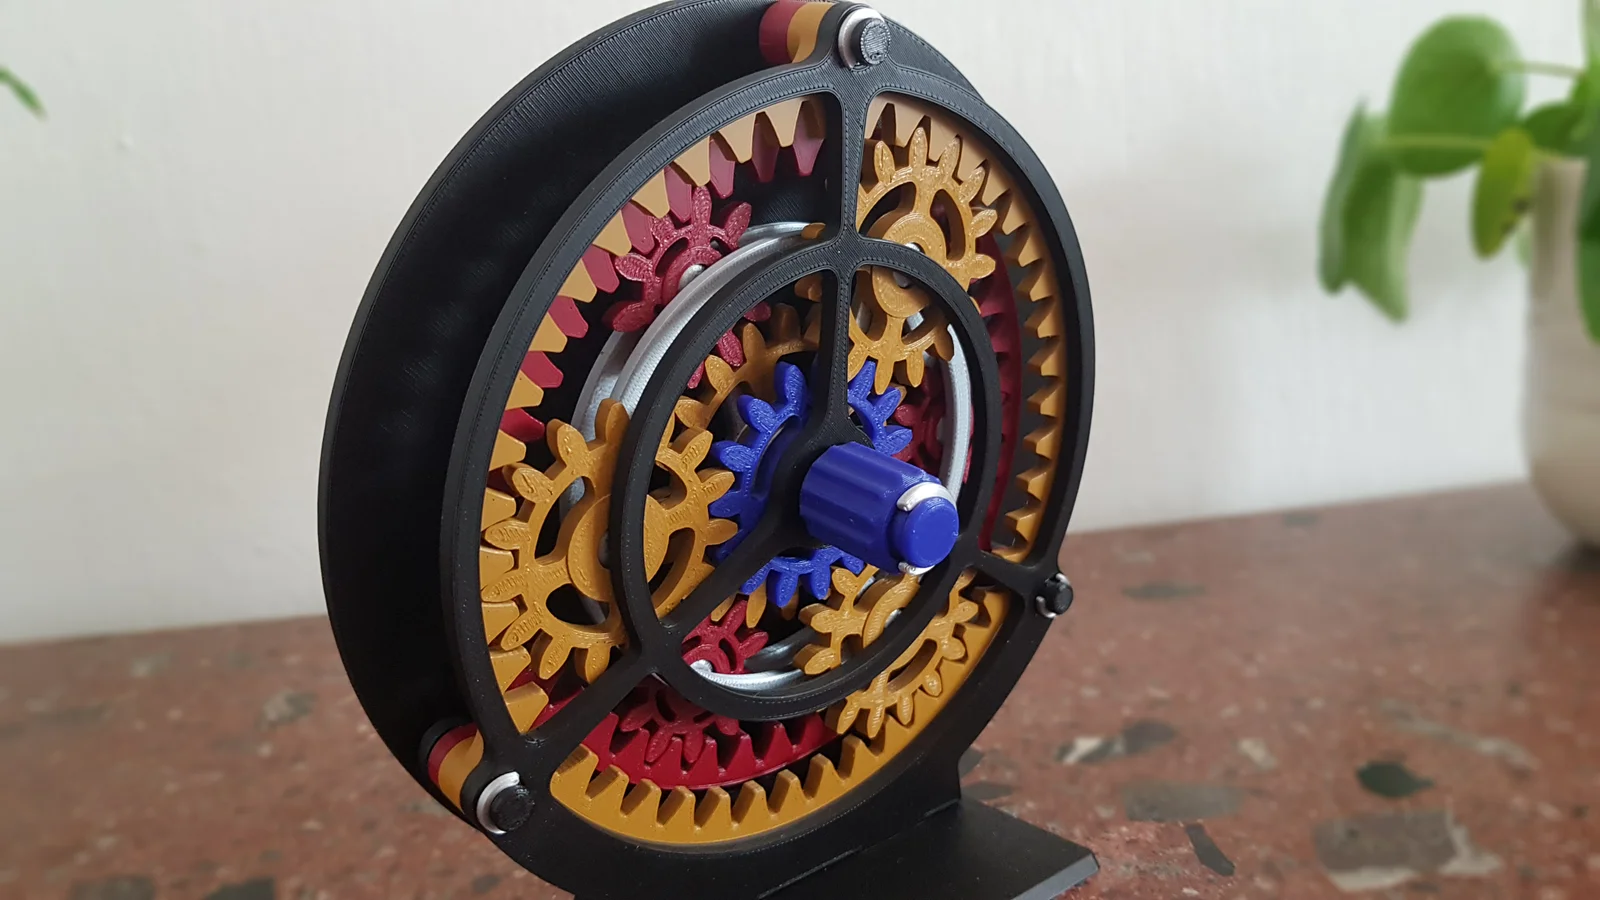
Also interesting for lovers of clockworks or gearboxes ;)
Completely printed without supports, no need for glue or screws either!
Also fits onto the Prusa mini (:
The hour- and minute hands are connected with a two-staged planetary geared clockwork on the back of the clock. Therefore they move in the correct ratio of 1:12. For a full turn of the minute hand, the hour hand will move one hour.
This can be done by directly moving the minute hand with a finger, or for a better view onto the clock face, by turning the grip on the backside of the clock.
Print specifications of the example in the pictures:
PLA, 0.2mm layer height
2 perimeters, 20% infill
about 20 hours total print time (normal print mode, with same colour separation as in the pictures, could be faster or slower with more or less filament colours)
Assembly:
BygillisLikes121Downloads2.1K

 ByzoltanfLikes73Downloads277

 ByHonzalLikes246Downloads179

 ByBoonby_1059917Likes659Downloads1.2K

 ByFabianVeileLikes414Downloads1.5K

 ByATBOT_7809Likes16Downloads262

 Bytater-zoidLikes0Downloads109

 ByMarciLikes87Downloads295

 Bystrifu_4061046Likes151Downloads1.3K


 Byleizerdesign_249154Likes62Downloads801

 ByNickBuchele_1578568Likes58Downloads104