



Kẹp giữ sợi Filament
 Bytinx_1344834Likes1.2KDownloads6K
Build another version of this model.
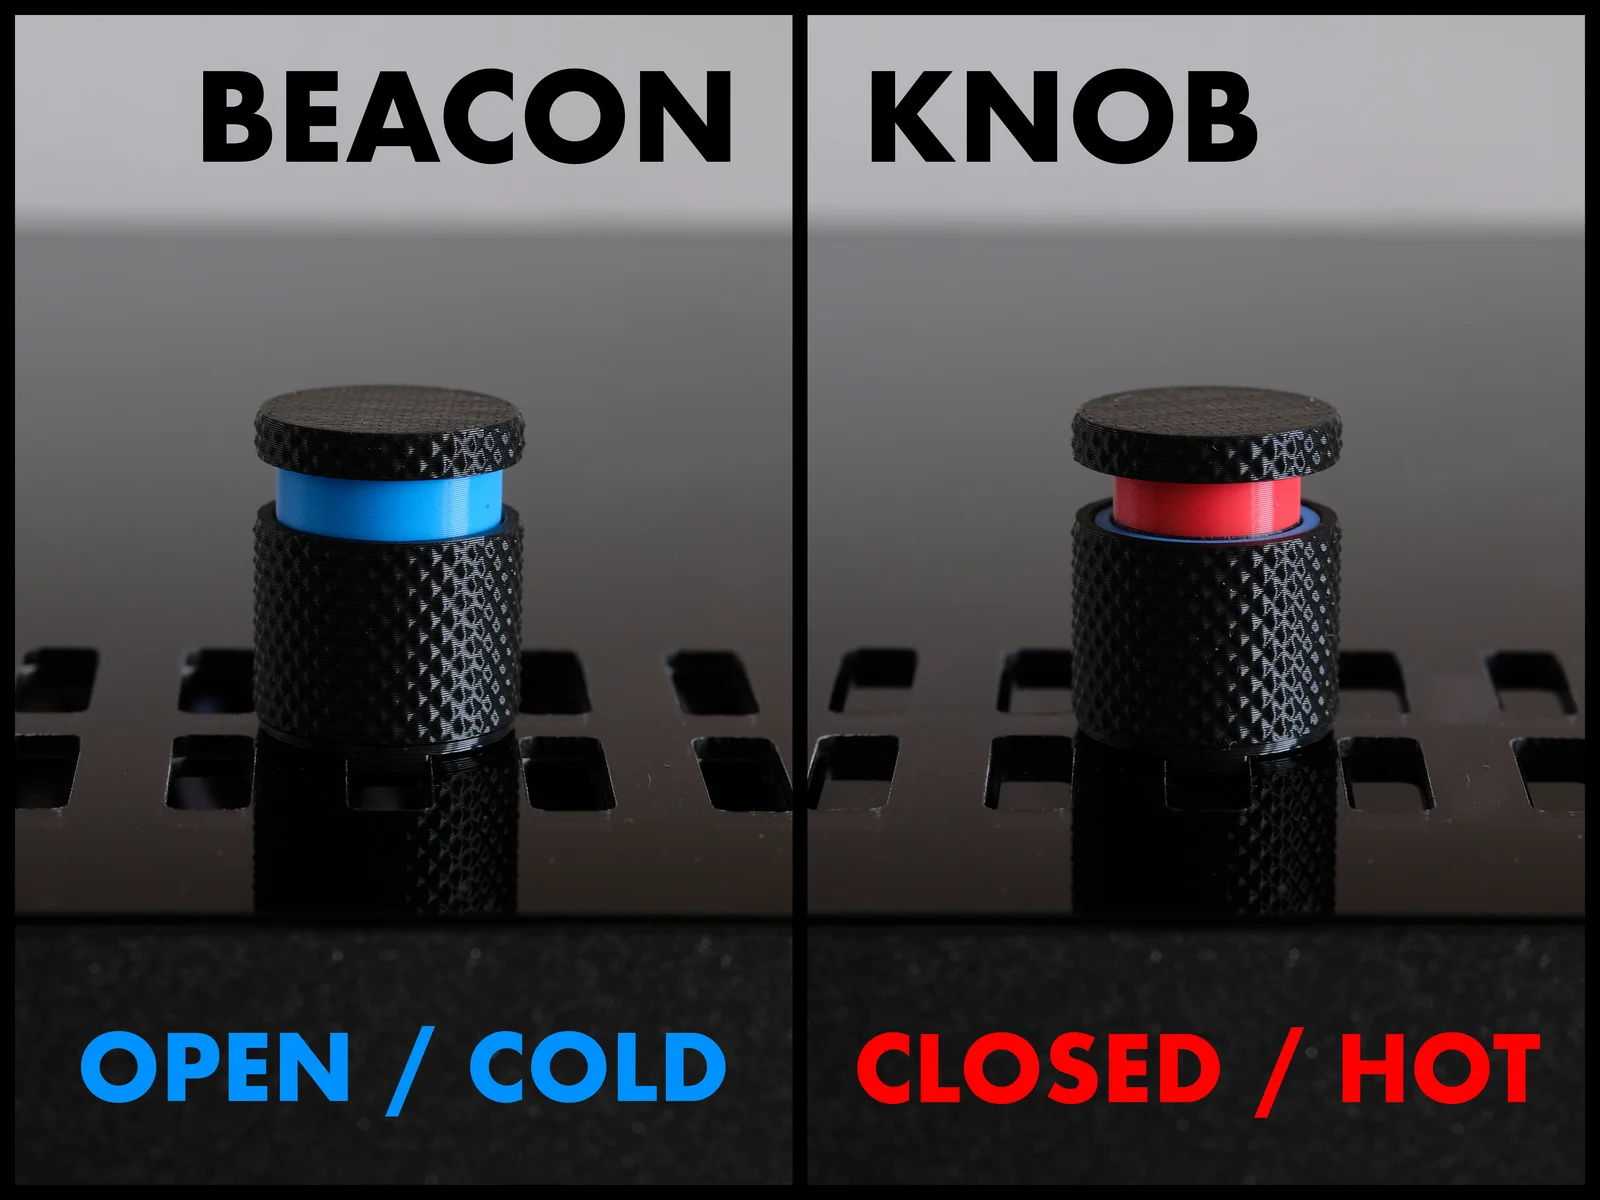
Did you forget to open the ventilation for PLA? Or to close it for ASA? With this handy beacon knob, you can check its status from far away!
Printing instructions:
Deburr any elephant foot (if present) from the knob and cold indicator, and clean any imperfections from the cold indicator to ensure smooth operation.
Clean the support from the base and ensure that the supported surface is flat. It won't be visible, so it doesn't need to be perfect.
Update 30.6.2025:
Apparently some printers have black nylon washers, which are bigger than original grey ones. Base with bigger hole for these black washers has been added to model files.
Update 25.3.2025:
The base has been updated for a tight fit with zero clearance to the acrylic plate cuts. It should work when printed in PLA. The original base with a 0.1mm clearance is available in the alternative parts folder.
Assembly guide:
Flip the middle screw upside down, keeping the nylon washer on top. Do not overtighten. Leave it as loose as it was originally.
Place the base over the nut, ensuring it fits into the notches in the acrylic sheet. Check that the nut moves freely when opening and closing the ventilation.
Place the lever onto the shaft extending from the base, ensuring it fits over the nut. It should rotate freely on the shaft.
Align the notch inside the knob with the lever for proper positioning.
Press the knob onto the base until it snaps into place. It should rotate freely on the base when opening and closing the ventilation.
Screw in the hot indicator securely.
Insert the cold indicator. When the grill is half open, the tallest side of the cold indicator should face you.
The cold indicator should slide in easily and move up and down as you rotate the knob.
Screw the cover on securely.
It should work fine as is. If you find it wobbly, use thin double-sided tape to attach the base to the acrylic sheet.
If the hot indicator or the cover is unscrewing, secure it with a drop of CA glue on the threads.
Bytinx_1344834Likes1.2KDownloads6K

 ByBretDorssers_4183352Likes19Downloads52

 ByreddLikes216Downloads2.2K

 ByJasonOlliff_519145Likes241Downloads2K

 ByJeffFaer_238746Likes31Downloads79

 By3DPDP_3140983Likes2Downloads15

 Byprusa-researchLikes0Downloads777

 BydjcodyLikes1Downloads9

 Bypeter-van-der-waalLikes0Downloads251

 Byeira132_4251734Likes2Downloads1

 Byarhi_585078Likes64Downloads540

 BykingnothingLikes0Downloads178