



New
SolderMate - Fully 3D Printed Desk Soldering Companion
 ByleonicLikes0Downloads1.4K
Build another version of this model.
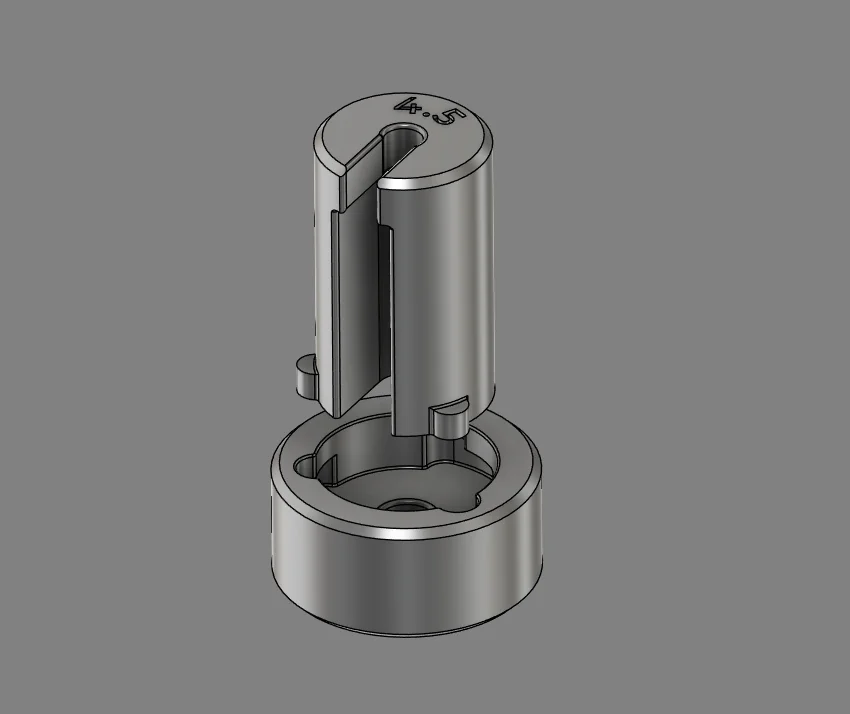
This is a tool meant for assembling and disassembling the OEM spring guide of the Springfield Armory 4.5in F and Comp.
The actual tool is too expensive to buy for a one-time job. $37+14 shipping, probably tax.
Print one of these, $4in plastic. Use it once or twice. And your ~1.2 hour print time project has paid off.
I am willing to start a 4.0 model if someone is willing to supply components or very least, validate dimensions.
This project is not a firearm component
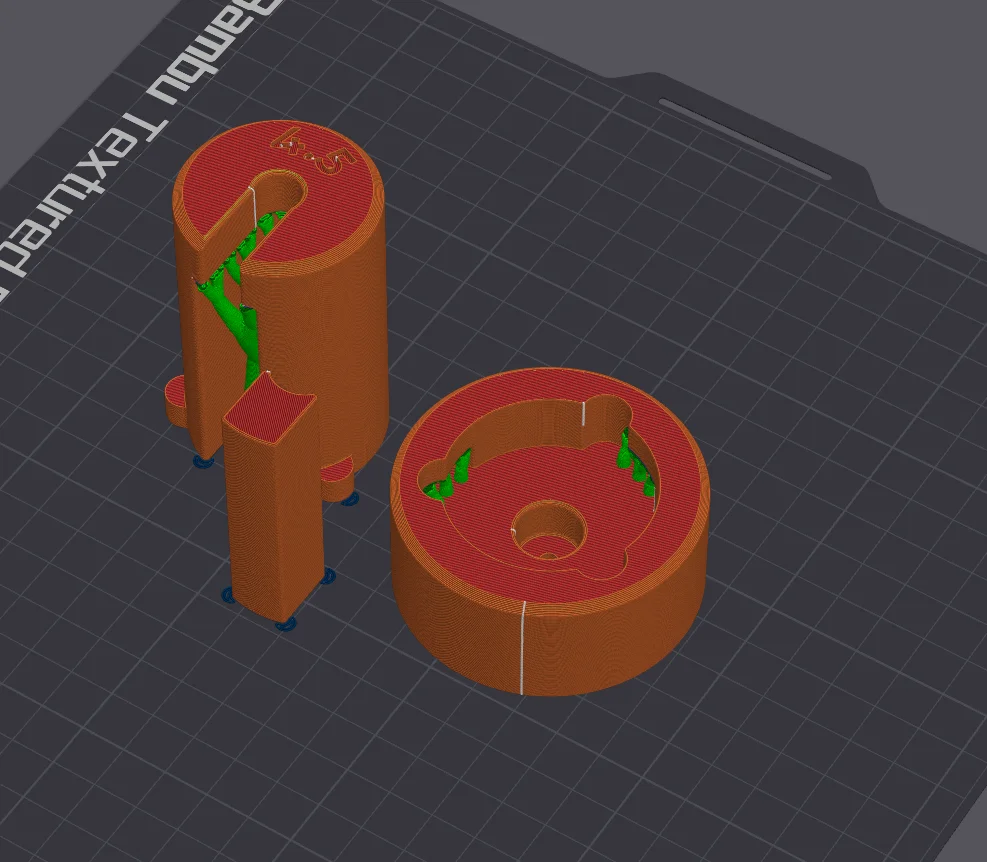
Tested on ASA, will work with PLA+
12 layers of walls,
+5mm bottom and top layers.
18% gyroid infill is fine.
Add organic supports, automatic seems to work fine on Orca + X1C
⚠: Always wear eye-pro when working on this kind of stuff. Not my fault if you lose a peeper.
⚠: Always ensure your gear is clear and safe before working on it.
OEM disassembly:
Take the spring guide put the front side into the hole in the middle of the base block.
Press down on the spring to release the two retaining flanges.
Gently and slowly release the spring.
NDZ assembly:
Have a NDZ spring guide
Insert the flanged end of the spring guide into the hole in the middle of the Base Block.
Plop the included washer on the spring guide.
Place the spring over the spring guide.
Alight the end of the spring with the Lock and Assist Block
Compress down into the base Base Block and turn clockwise to lock the assembly in place
Apply blue loctite to the spring guide and capture screw and manually screw the capture screw on.
Insert a 3/32 allen key at the bottom of the Base Block to hold the spring guide in place and torque the screw with the second 3/32 allen key.
Unlock the assembly and seperate the Base Block and Assist Block from the Lock.
Pop out the spring guide.
Have a soda, you deserve it.
ByleonicLikes0Downloads1.4K

 ByfifindrLikes500Downloads4K

 ByVC_DesignLikes679Downloads3.6K

 ByDan Schwartz SchwartzLikes744Downloads3.4K

 Bythorin-oakenshieldLikes0Downloads531

 Bytorii-creative-studioLikes0Downloads448

 Bychubbs8697_2027893Likes585Downloads1.7K

 Byquibeck_3353173Likes965Downloads1.9K

 Bydenis-3dLikes0Downloads265

 ByRungeKuttaLikes229Downloads1.2K

 Bydelloo2008Likes0Downloads242

 ByJeremyVillalo_760366Likes68Downloads769