



Kẹp giữ sợi Filament
 Bytinx_1344834Likes1.2KDownloads6K
Build another version of this model.
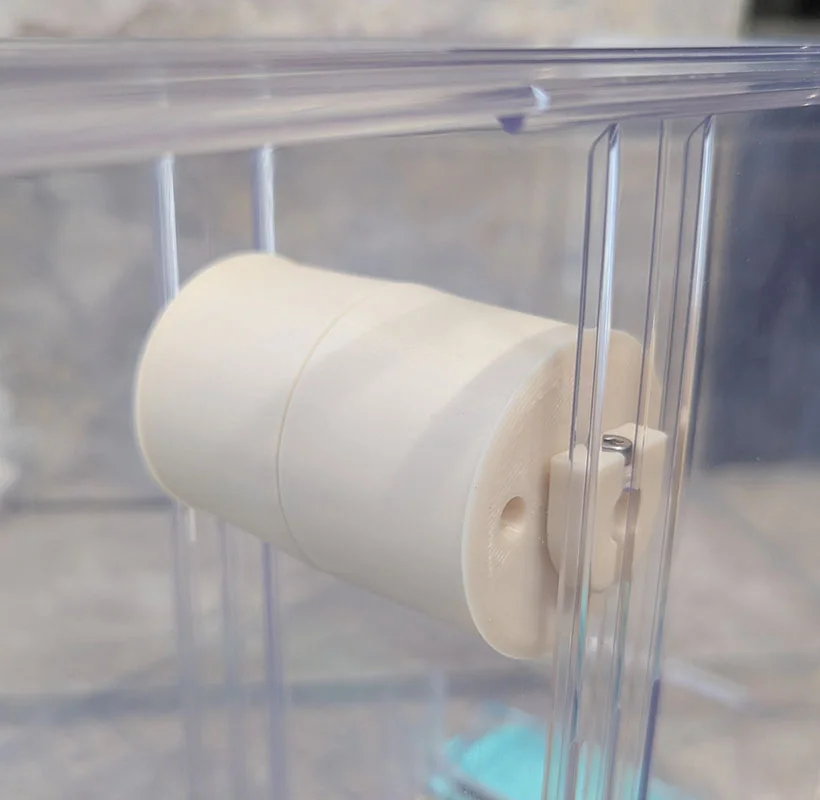
If you're doing any kind of reverse Bowden thing, you know that any resistance when pulling filament into the extruder is a bad thing. The stock plastic tube and roller shafts aren't bad but could be significantly better.
This series of parts offers a way to improve that:
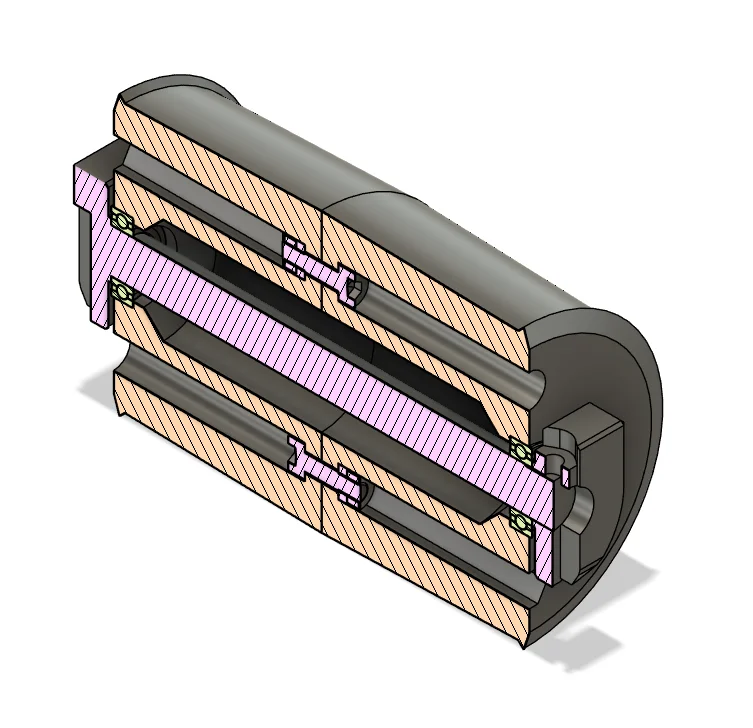
Reuse of the stock 148 bearings that come with the drybox
Lift-out/drop-in mating geometry for easy installation and removal of the filament spool
Crowned spool holder to keep the spool from walking off the holder
Heavily based on my spool holder for the Creality Space Pi with some inspiration from Clough42's ball bearing axle for the Polydryer system
To build the full assembly, you'll need
2x polydrier-pulley (thick side down)
1x wedge-with-spindle (vertical, large slotted side down; suggest higher infill density)
1x wedge-with-hole (large slotted side down)
2x M3x10 (or longer) screw
2x M3nN nut
2x 148 bearings harvested from the Polymaker drybox
(optional) 1x M3x4 screw
Advanced users may wish to experiment with cutting one of the shafts from the drybox to 83 mm long, using 2x wedge-with-hole and the modified shaft instead of wedge-with-spindle and wedge-with-hole.
To assemble, bolt the two pulleys together using the M3 screws and M3nN nuts, then tighten them down enough that the two halves won't move. Press both of the bearings into the pulley assembly, slide that on the wedge-with-spindle, then press the wedge-with-hole until it seats against the bearing - these should all be easy press fits.
Ensure the small chamfers on the pointy ends of the wedges are on the outside. The slots in the wedges should be aligned with each other, and the spindle should not stick out into the slot in wedge-with-hole. There's a small flat on the wedge-with-spindle to help align the two, and you may use the optional M3x4 screw to help hold it secure.
When printing, use a filament that'll be resistant to the temperatures you expect to run the dryer at. I recommend against PLA.
Stick the spool holder into a filament spool, get the slots in the wedges roughly aligned vertically with the ribs in the box and drop the assembly in.
Your particular bearings may need the pulley pieces aligned differently, or the wedges pressed in looser or tighter than mine did. There's an amount of experimentation and tweaking involved here, but the unloaded assembly should spin freely for at least a second or two, and much longer if a full spool is loaded.
To change the spool, just lift it out and swap the spool holder into a new one. The design keeps the hole in the spool positioned at the same height as the stock plastic tube would, and the 50mm pulley fits common spools.
Bytinx_1344834Likes1.2KDownloads6K

 BywendigoLikes0Downloads122

 Byprusa-researchLikes0Downloads780

 Byarhi_585078Likes64Downloads543

 ByanatoliikLikes0Downloads120

 ByAlex_3996727Likes29Downloads67

 BynozeLikes0Downloads133

 ByWatchfulEye_1511114Likes17Downloads48

 BydalleLikes0Downloads147

 ByjefftmlLikes4Downloads6

 ByHanzo3dLikes155Downloads415

 ByGeek5DLikes147Downloads488