



Grippy Broom Holder
 Byvc-designLikes0Downloads3.2K
Build another version of this model.
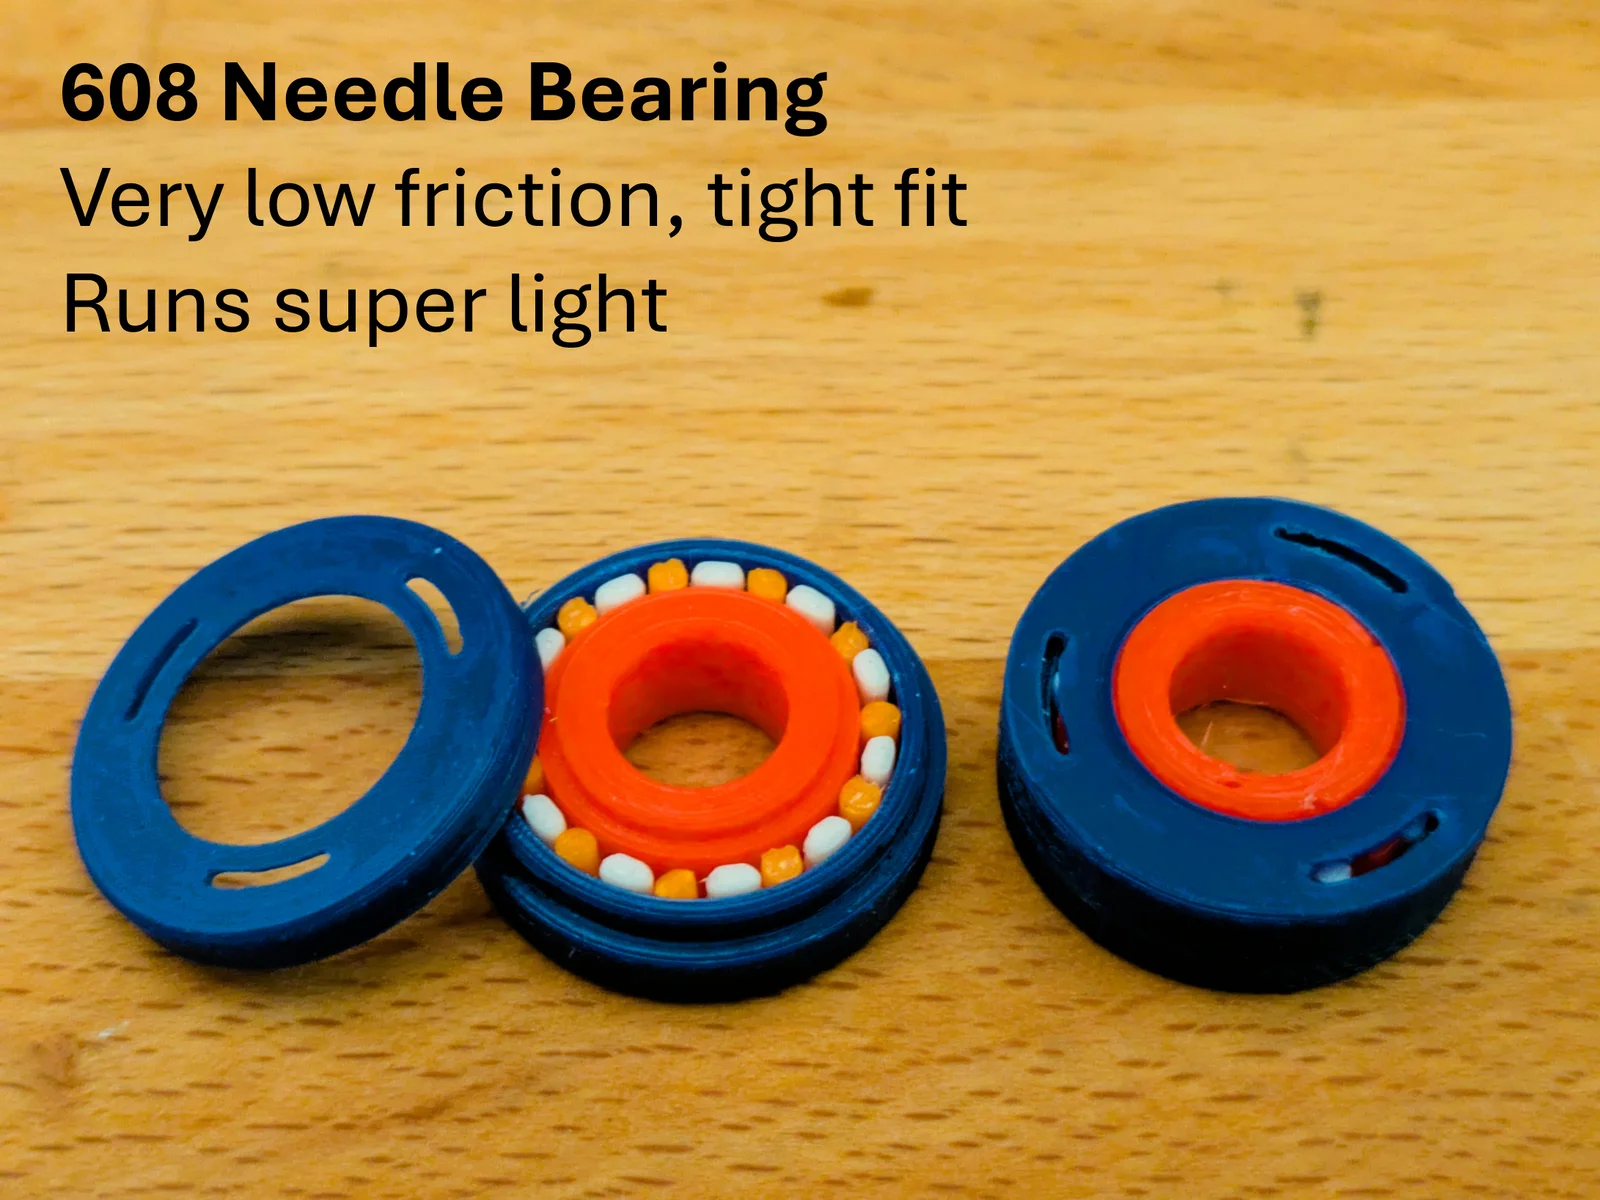
This 608 bearing is entirely made of filament, easy to assemble and customizable. It is robust, tight, and runs very light. The parts are easy to print on any regular 3D printer with a 0.4 mm nozzle.
This bearing uses filament as rollers. Filament is very tightly tolerance and consistently round without imperfections, which makes it a great roller. This design borrowed the neat idea to use filament-as-rollers from @firstgizmo's design (https://www.printables.com/model/1063080-608-bearing)
This assembled bearing is more practical than many Print-in-Place designs:
It has tighter fits, since it doesn't require printing clearances (unlike PIP).
You can inspect & finish the running surfaces if needed.
You can easily use different materials for the rollers.
You can optimize the fit for your application, balancing tightness and friction. You can disassemble the bearing and change out the inner race (different sizes are included in the STL files).
Fully functional roller bearing, with very low friction.
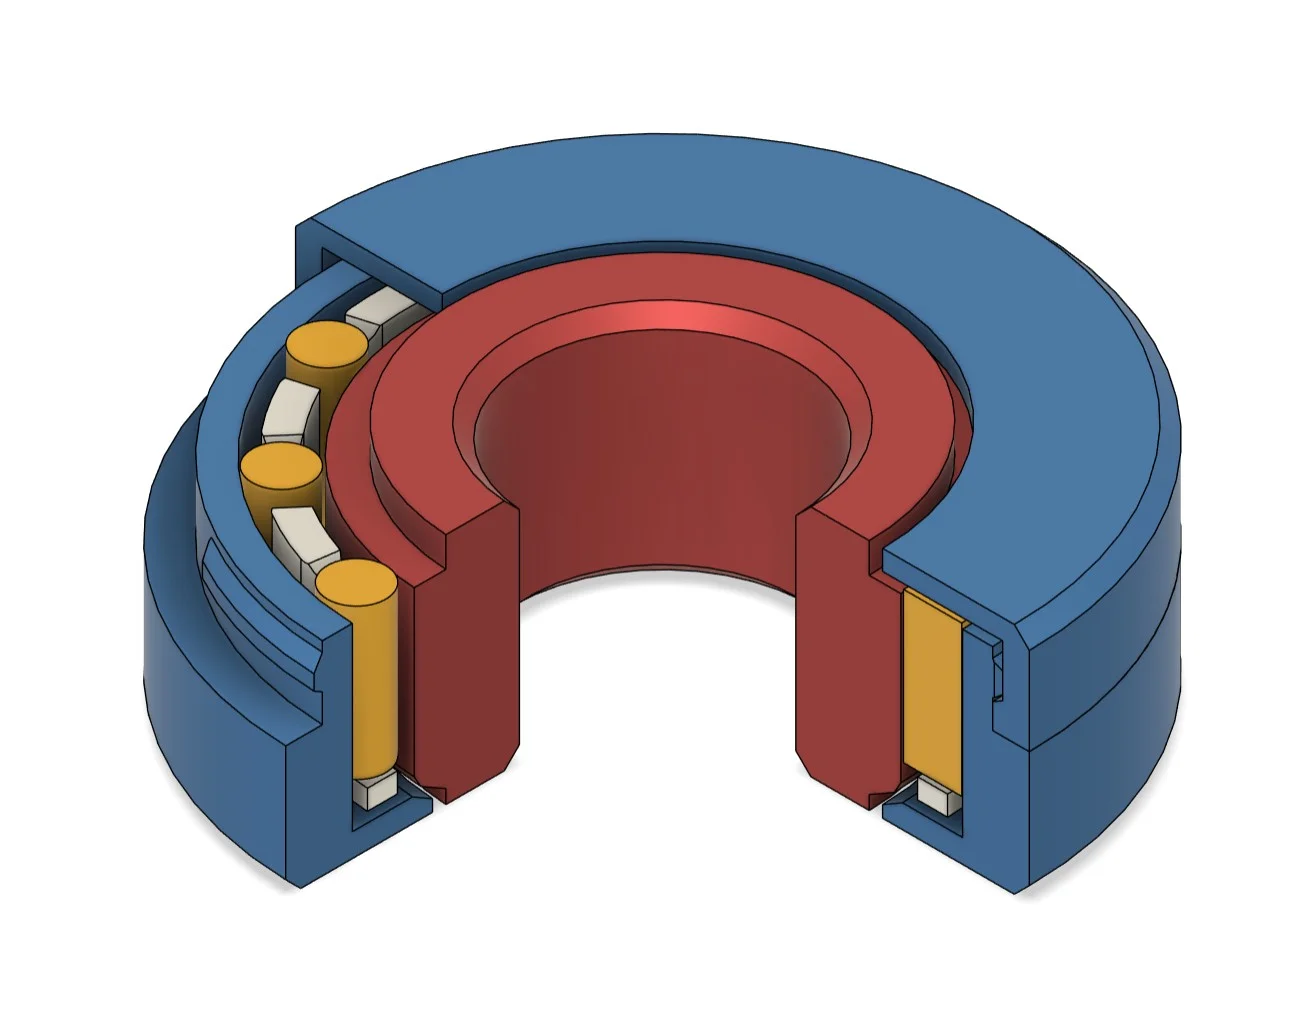
It can handle decent lateral loads, with integrated low friction slide surfaces.
Drop-in fit for any light 608 bearing application
Not intended for high velocity/force/heat applications; use a normal, purchased 608 bearing for that.
PLA recommended, other materials should work but haven't tested it
0.4 mm nozzle (larger won't work)
0.15 mm layer height
2 perimeters, 25% infill
key (Prusa)slicer settings that worked best:
Scarf joint on Contours
Scarf joint on Inner Perimeters
Check/control for elephant foot.
16 minutes print time on a Prusa Mini or Mk4
Part orientation on the build plate:
The Inner Race is asymmetric, orient it with the chamfered side down
The other three parts are self-explanatory
Check the roller running surfaces on the inner and outer race for bumps/printing artifacts. I lightly ran a small file on both surfaces to take off any artifacts and smoothen the surfaces a bit.
Cut 11 rollers to 4.5 mm length max. (anywhere in the range of 4.0 to 4.5 mm works fine). I used PETG filament for the rollers. It gives the bearing a bit softer feel and it prevents binding if the bearing sits under load for some time or at higher temperatures.
An interesting alternative is using FLEX filament for the rollers. It makes the bearing quieter, with a little more friction.
Place the Outer Race down
Place the Inner Race - makes sure the chamfered side is Down
Place the Cage, with the ring down
Place 11 Rollers (small pliers work well), they should slide in easily
Slide a tool over the edge of the Outer Race; no rollers should protrude
Place the Outer Cap on the bearing assembly, and press it down to snap it in place
Lubrication is optional, it is not needed but could make the bearing run a little nicer
To disassemble: slide a small knife in the gap between Cap and Outer Race and give a light twist, the cap should come right off. Be careful not to cut yourself.
Step 1, 2 & 3 Step 4 Step 5 Step 6
Exercise the bearing a few turns to run it in. You should be able to see the roller run through the windows in the Outer Cap. If it is too tight try printing an Inner Race with a larger gap.
There are three Inner Race parts for different roller gaps (bearing tightness): 1.75 mm, 1.80 mm & 1.85 mm. For me 1.85 ran very well & light, 1.80 mm runs good too and is a bit tighter.
There are two Outer Caps, with and without windows. Use the closed outer cap to prevent dirt/dust getting into the bearing, and keep any lubricant in.
I got back to bearing concept design after a few years and designed these assembled bearings. Also check out some print-in-place bearing designs I published earlier.
Byvc-designLikes0Downloads3.2K

 BySeppoTakaloLikes960Downloads1.9K

 ByleonicLikes0Downloads1.4K

 ByZED4EverLikes313Downloads5.2K

 ByfifindrLikes500Downloads4K

 BymoonyxLikes0Downloads701

 ByVC_DesignLikes679Downloads3.6K

 ByKNIN_CustomLikes112Downloads440

 ByDan Schwartz SchwartzLikes744Downloads3.4K

 Bythorin-oakenshieldLikes0Downloads536

 Bytorii-creative-studioLikes0Downloads452

 ByUpcrid3D_1585693Likes808Downloads2.1K