

Kẹp giữ sợi Filament
 Bytinx_1344834Likes1.2KDownloads6K
Remix of Core One Nozzle Wiper V2 kèm Thùng rác By 6d6178
Build another version of this model.
This is inspired by the excellent design by 6d6178.
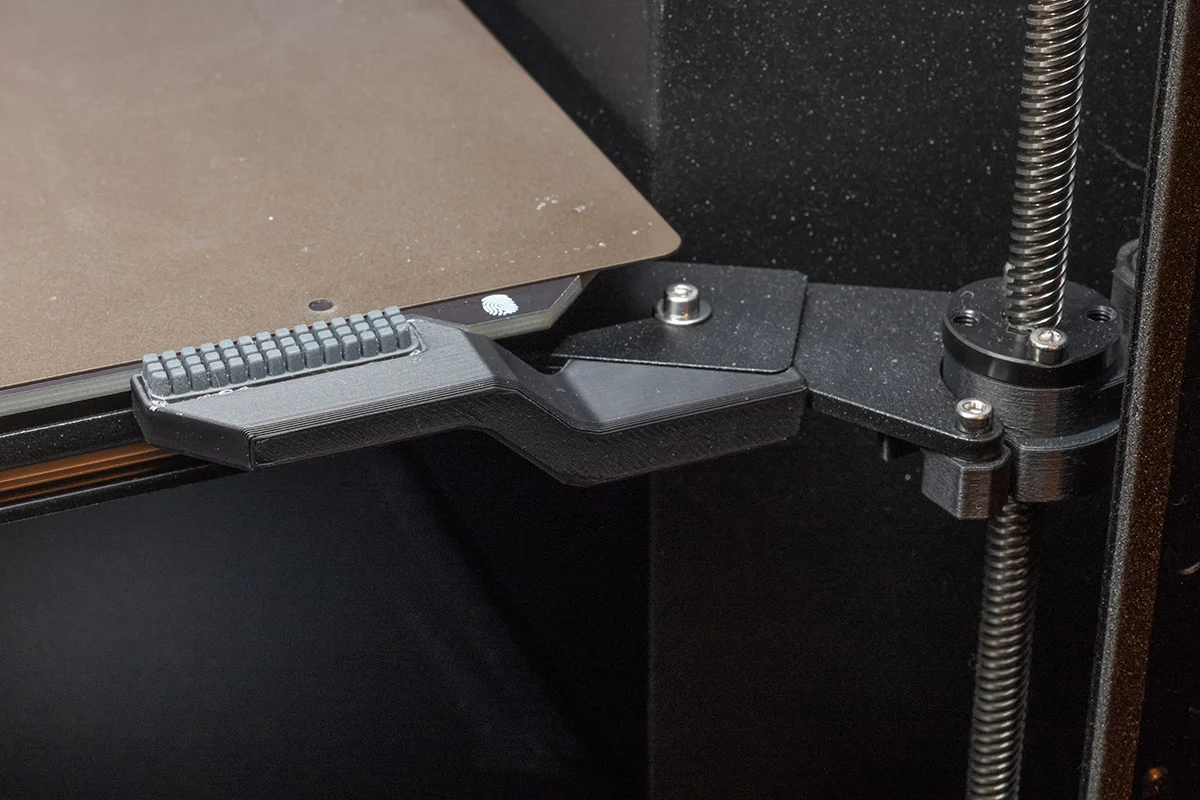
In my version the arm is attached to the bed heater support from the underside, thus allowing you to attach it on the right side of the bed (shorter path for the nozzle to travel to the wiper from parked position), while leaving enough room for your finger to remove the print sheet from the same side.
Print details:
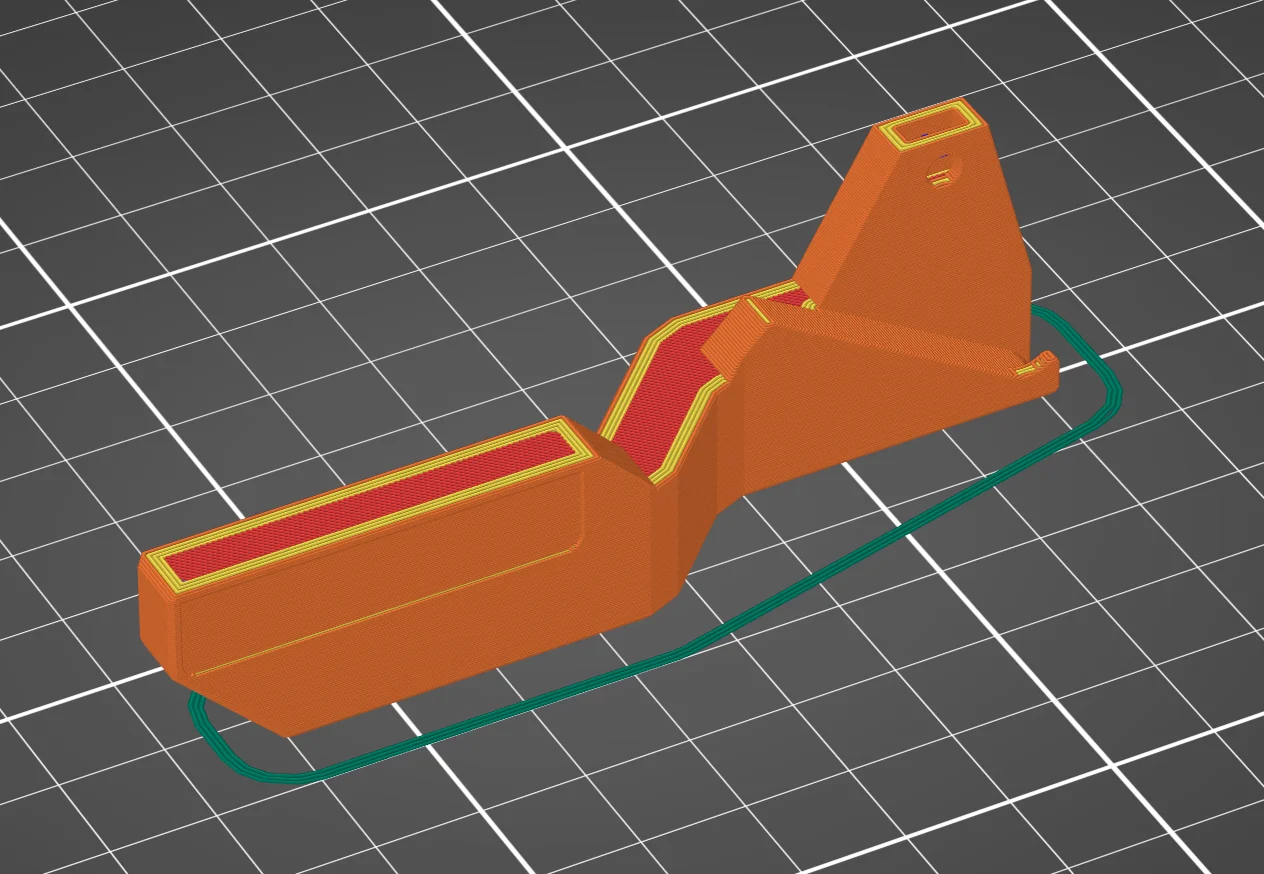
Print in heat-resistant materials such as ASA, PC (or composites), ABS, PETG, etc.! I recommend printing it on its side, as shown in the Slicer screenshot. I printed mine with Polymaker ASA at 0.2 mm layer height, 4 perimeters / top / bottom layers, and 15 % gyroid infill. It takes ~ 9 g of filament and 35 min to print.
Required hardware and installation:
1× M3×10 screw - I used one of the hex socket screw from the Prusa kit spares, but if you use a round head screw it will be slightly lower profile giving more room for your fingers when removing the print sheet. (The distance from the top surface of the support arm to the bottom surface of the M3nS nut is 8.7 mm, so a M3×8 screw could also work in a pinch. You can also use longer screws than M3×10, though it'll protrude more from the bottom, and potentially hit the floor of the printer when the print bed is at its lowest position.)
1× M3nS square nut and (optional) 1× M3 flat washer
Insert M3nS nut all the way into the slot, the screw hole should align with the holes in the wiper arm. Insert M3×10 screw through the unthreaded hole in the diagonal support arm of the heat bed, while sliding the printed wiper arm onto the metal support arm until everything aligns. When aligned properly, the wiper arm should be flush against the heated bed, the small hook at the end of the wiper arm should also be flush with the contours of the metal parts. Tighten the screw to secure everything together.
Silicone wiper pads and custom G-codes:
Though my design has a different shape than 6d6178's original design, the silicone wiper pad is at the exact same location, so you can use the same custom G-code for the original. Please refer to the superbly detailed description from 6d6178's design for information on sourcing the silicone wiper pads, as well as the custom G-code.
I bought the silicone wiper pads from Amazon (link, $6.2/3pcs). There's a cheaper version (link, $5/8pcs) but they appear to be slightly different shape and may be of lower quality, according to reviews on Amazon. I removed the double-side tape from the pads and used silicone CA glue (Amazon link, $5.4) to secure it to the wiper arm.
Bytinx_1344834Likes1.2KDownloads6K

 Byprusa-researchLikes0Downloads2.7K

 Bypeter-van-der-waalLikes0Downloads258

 BykingnothingLikes0Downloads183

 Byp3rr1ff3ryLikes0Downloads152


 By3DSourcererLikes48Downloads380

 Bydominik-chuchlikLikes0Downloads123

 Bydet-manLikes0Downloads175

 Bygummiegecko8477Likes0Downloads167

 BydalleLikes0Downloads149

 Byarhi_585078Likes64Downloads545