

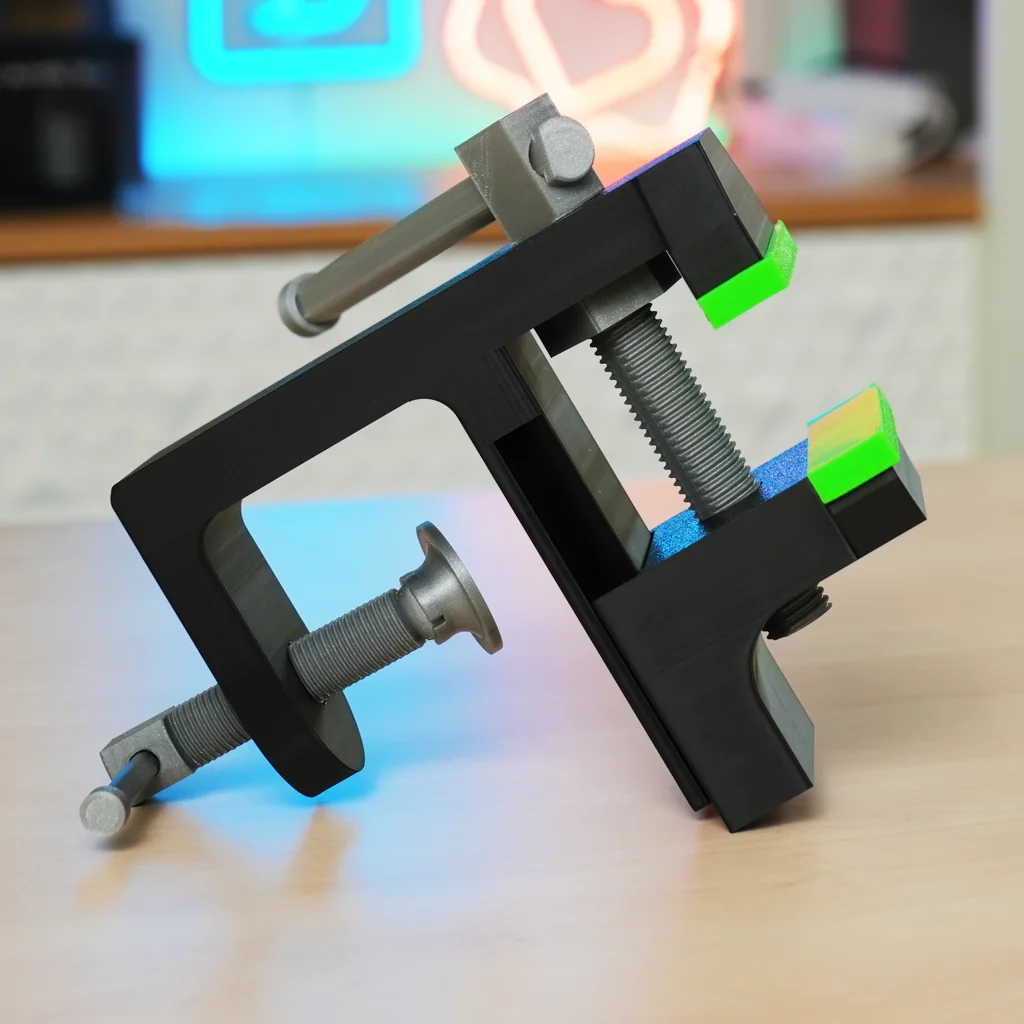


Bộ kẹp chữ C từ 1 đến 5 inch - Kẹp C cứng cáp, bền bỉ
 Bychubbs8697_2027893Likes585Downloads1.7K
Build another version of this model.
Este diseño es uno de los ejercicios de nuestro nuevo curso de diseño 3D avanzado con Fusion.
Info del curso aquí https://control3d.net/curso-de-diseno-3d-fusion-nivel-intermedio/
Suscríbete aquí https://control3d.net/registrate/
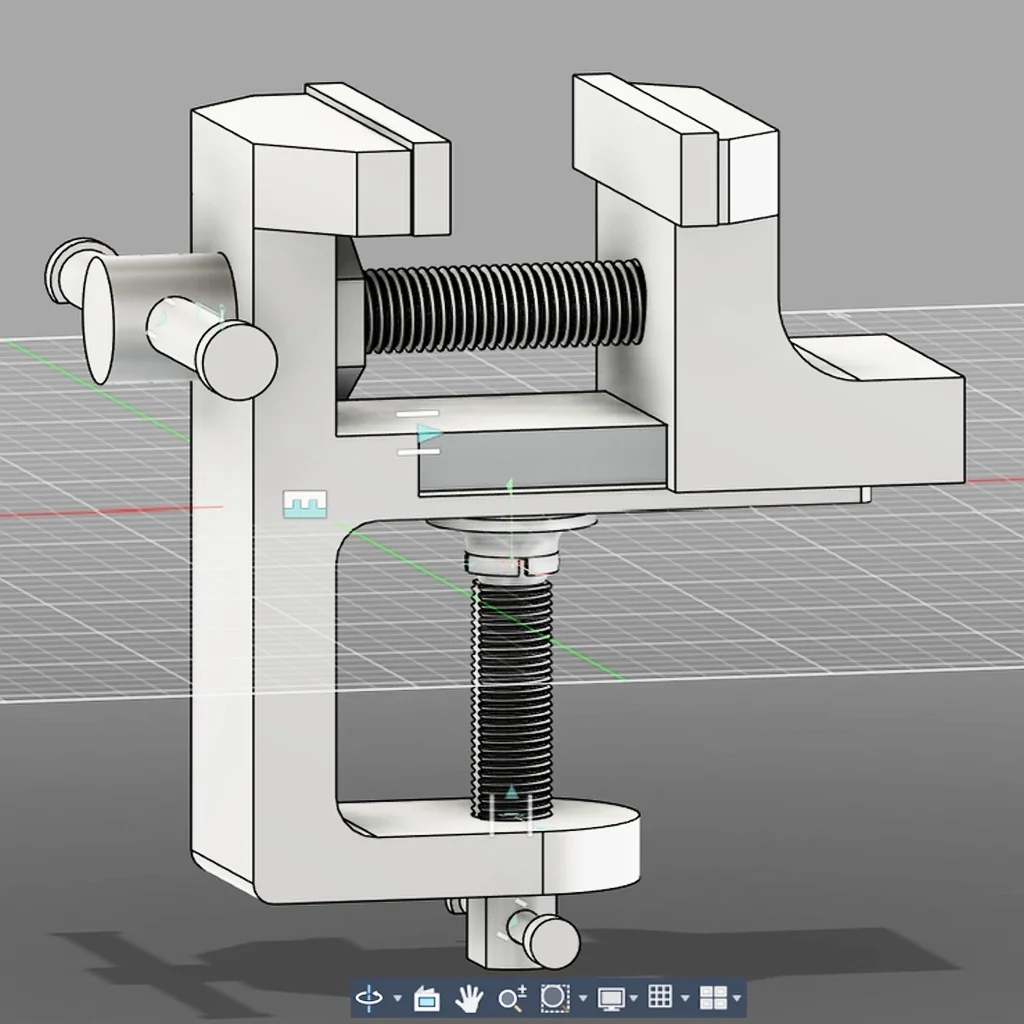
Este tornillo de banco ha sido diseñado para imprimirse, sin soportes, y con las roscas tumbadas para tener la mayor fuerza posible.
Lo más recomendable es imprimirlo al menos en PETG, con 4 paredes, y un relleno del 30%, para que tenga la fuerza suficiente como para ser funcional.
Los protectores de mordaza están impresos en TPU 95A. El modelo tiene tolerancias aplicadas en diseño, aunque siempre teniendo en cuenta las tolerancias y el calibrado óptimo del filamento.
Parámetros de impresión recomendados:
Material: PETG o ABS/ASA y TPU
Boquilla: 0,4
Altura de capa: 0,2
Perímetros: De 4 a 6
Relleno: 30 a 50%
Montaje
Introducimos el tornillo de apriete en la base.
Ponemos la contrarresta haciendo de cierre en el tornillo de apriete
Colocamos la mordaza móvil sobre la cola de milano de la base, mientras enroscamos el tornillo de apriete
Enroscamos el tornillo de ajuste
Colocamos a presión el plato de ajuste
Introducimos las palancas en sus respectivos huecos, y colocamos los tapones que los aseguran
Colocamos los protectores de las mordazas
This bench vise has been designed to be printed without supports, with the threads lying flat to achieve the greatest possible strength.
It is highly recommended to print it at least in PETG, with 4 walls and 30% infill, so that it is strong enough to be functional.
The jaw covers are printed in TPU 95A. The model has tolerances applied in the design, while always keeping in mind the filament's tolerances and optimal calibration.
Recommended Print Parameters:
Material: PETG or ABS/ASA and TPU
Nozzle: 0.4 mm
Layer Height: 0.2 mm
Walls: 4 to 6
Infill: 30 to 50%
Assembly
Insert the clamping screw into the base.
Place the retaining ring onto the clamping screw to secure it.
Position the moving jaw onto the base's dovetail slide while screwing in the clamping screw.
Screw in the adjustment screw.
Press-fit the adjustment knob into place.
Insert the handles into their respective holes and insert the caps to secure them.
Attach the jaw protectors
Bychubbs8697_2027893Likes585Downloads1.7K

 ByfifindrLikes500Downloads4K

 ByelitailLikes0Downloads128

 Byquibeck_3353173Likes965Downloads1.9K

 ByVC_DesignLikes104Downloads397

 ByChris_17729Likes138Downloads308

 ByleonicLikes0Downloads1.4K

 ByDan Schwartz SchwartzLikes744Downloads3.4K

 Bykjus_448782Likes314Downloads673

 ByBS_PB_4005052Likes48Downloads143

 Byvc-designLikes0Downloads3.2K

 BywurthLikes0Downloads190