



Miếng Tile Kiểm Tra Bề Mặt (Chà Nhám + Sơn Lót + Sơn Phủ)
 ByFonnPrintsLikes4Downloads20
Build another version of this model.
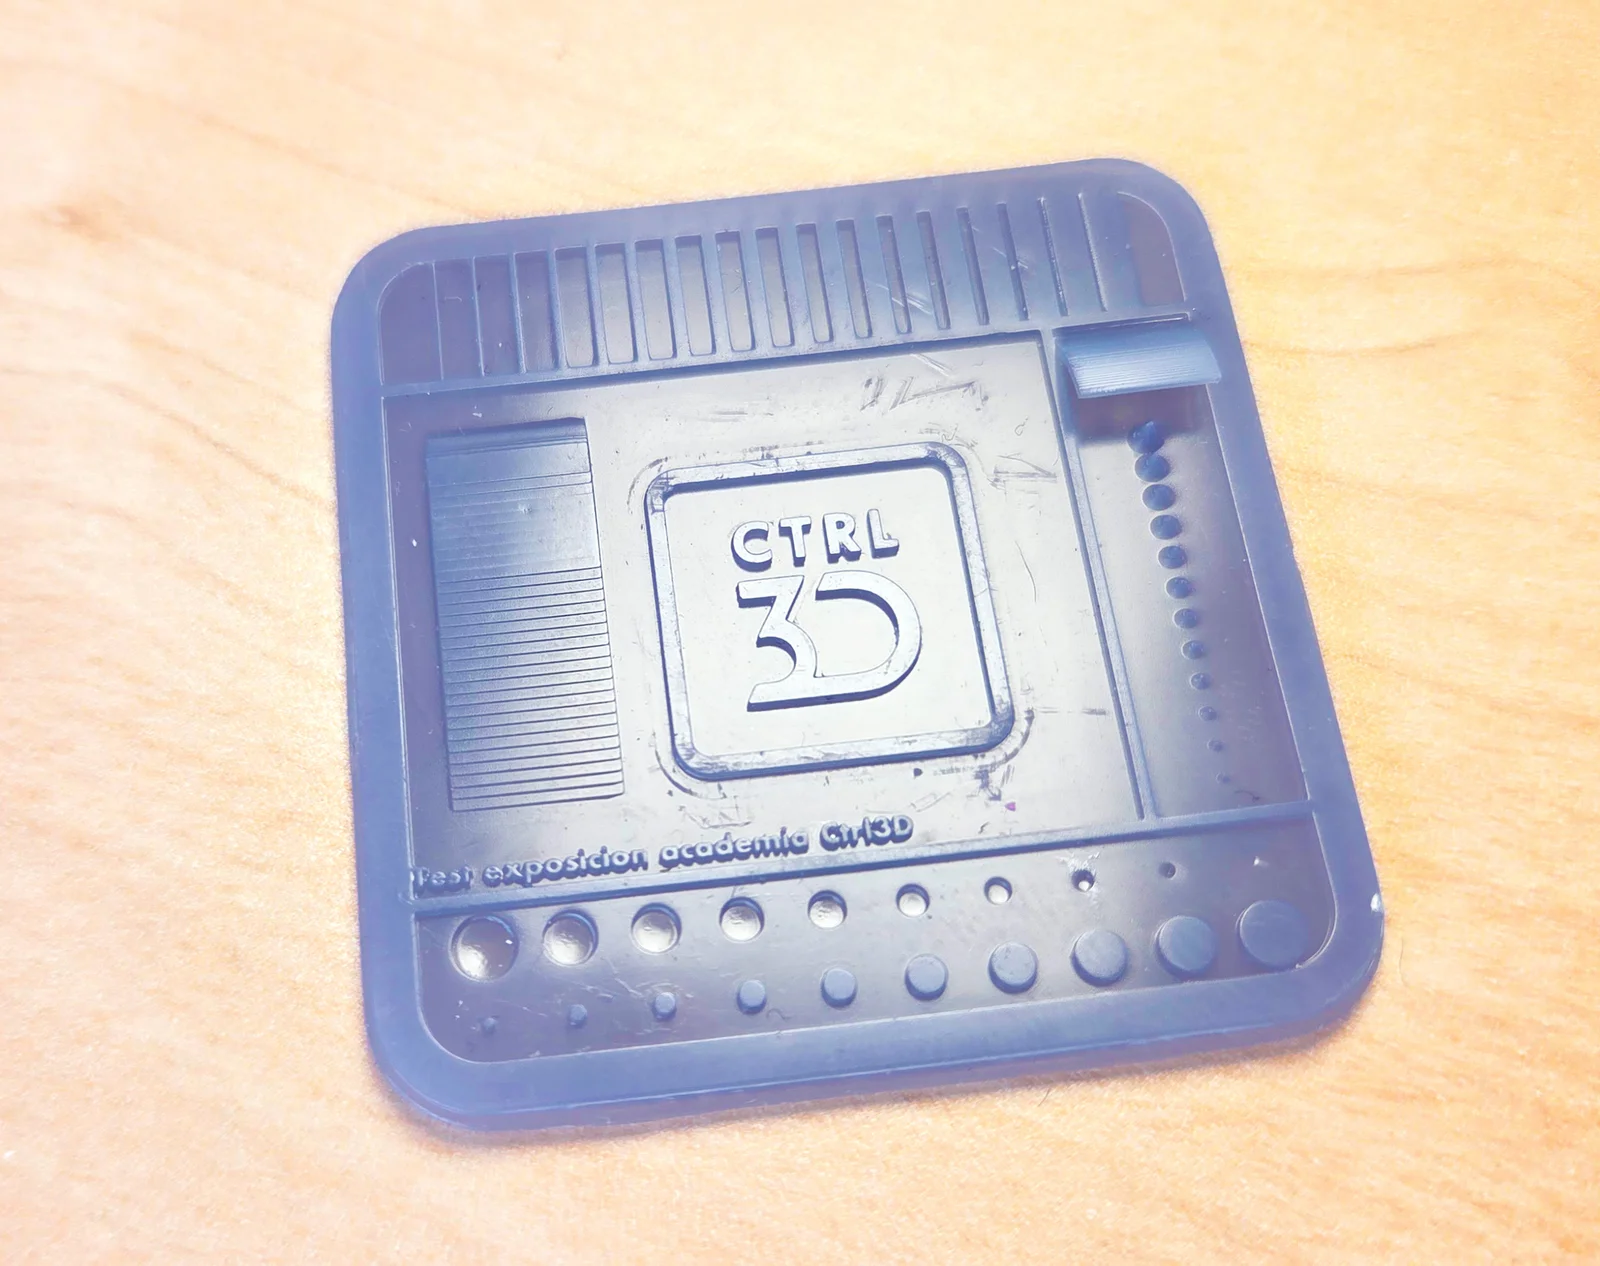
Test de exposición y tolerancias en resina Control3D
Este test se compone de 2 piezas, el “test de exposición” que consiste en una tarjeta la cual contiene diversos elementos para calibrar el tiempo de exposición idóneo para imprimir en resina.
Patrón de rayado, con distintas distancias
Patrón de conos, con distintos diámetros y alturas
Patrón de cilindros y huecos, a distintos diámetros
Texto
Logo
Rampa de elevacion, para ver las capas
Micro test de voladizos
Es una impresión que se realiza en apenas 20 minutos, y te ahorrará dolores de cabeza.
La otra pieza es un test de tolerancias, el cual es el negativo del logo central.
1. Imprimir el test de exposición, hasta que se vean bien definido el texto, todas las ranuras, el voladizo, conos, cilindros y se marquen todos los agujeros (los agujeros pueden salir “ciegos”, por apelmazamiento de la primera capa)
2. Una vez encontrado el tiempo menos de exposición, laminamos la pieza “test de tolerancia”, con las opciones de impresión obtenidas del test de exposición. Realizaremos varias impresiones, partiendo con el valor de tolerancia en 0. Si no entra, realizaremos impresiones aumentando 0.05 en cada impresión, hasta que encaje la pieza de tolerancia con el Logo de Control 3D del test de exposición que se dio por correcto.
Control3D Resin Exposure and Tolerance Test
This test consists of two parts: the "exposure test," which is a card containing various elements to calibrate the ideal exposure time for resin printing:
Scratch pattern with different spacings
Cone pattern with different diameters and heights
Cylinder and hole pattern at different diameters
Text
Logo
Elevation ramp to observe layers
Micro overhang test
It is a print that takes just 20 minutes and will save you headaches. The other part is a tolerance test, which is the negative of the central logo.
1. Print the exposure test until the text, all slots, the overhang, cones, and cylinders are well defined, and all holes are marked (holes may come out "blind" due to first layer compression).
2. Once the correct exposure time is found, slice the "tolerance test" part using the print settings obtained from the exposure test. Perform several prints, starting with the tolerance value at 0. If it does not fit, increase by 0.05 with each print until the tolerance part fits with the Control3D logo from the exposure test that was deemed correct.
ByFonnPrintsLikes4Downloads20

 Bynadir-cn3dLikes0Downloads110

 Bytinx_1344834Likes1.2KDownloads6K

 Bygafyx3dLikes0Downloads121

 Byduo3dprintLikes0Downloads153

 Byledglass_319976Likes0Downloads4

 BylaserbaconLikes0Downloads172

 ByleopoldmozartLikes0Downloads136

 Bycrawler-4613162Likes0Downloads275

 By3DSourcererLikes48Downloads377

 BytheodorLikes0Downloads142

 Byprusa-researchLikes0Downloads2.7K