



Ốp lưng cho Samsung S22 Ultra
 ByckthLikes148Downloads2.4K
Build another version of this model.
 Vỏ case QMTech MiSTer FPGA loại nhỏByRetroFrog · 12/30/2025
 Vỏ Case MiSTer Pi Nhỏ Gọn (Taki Udon và Retro Remake)ByRetroFrog · 12/30/2025
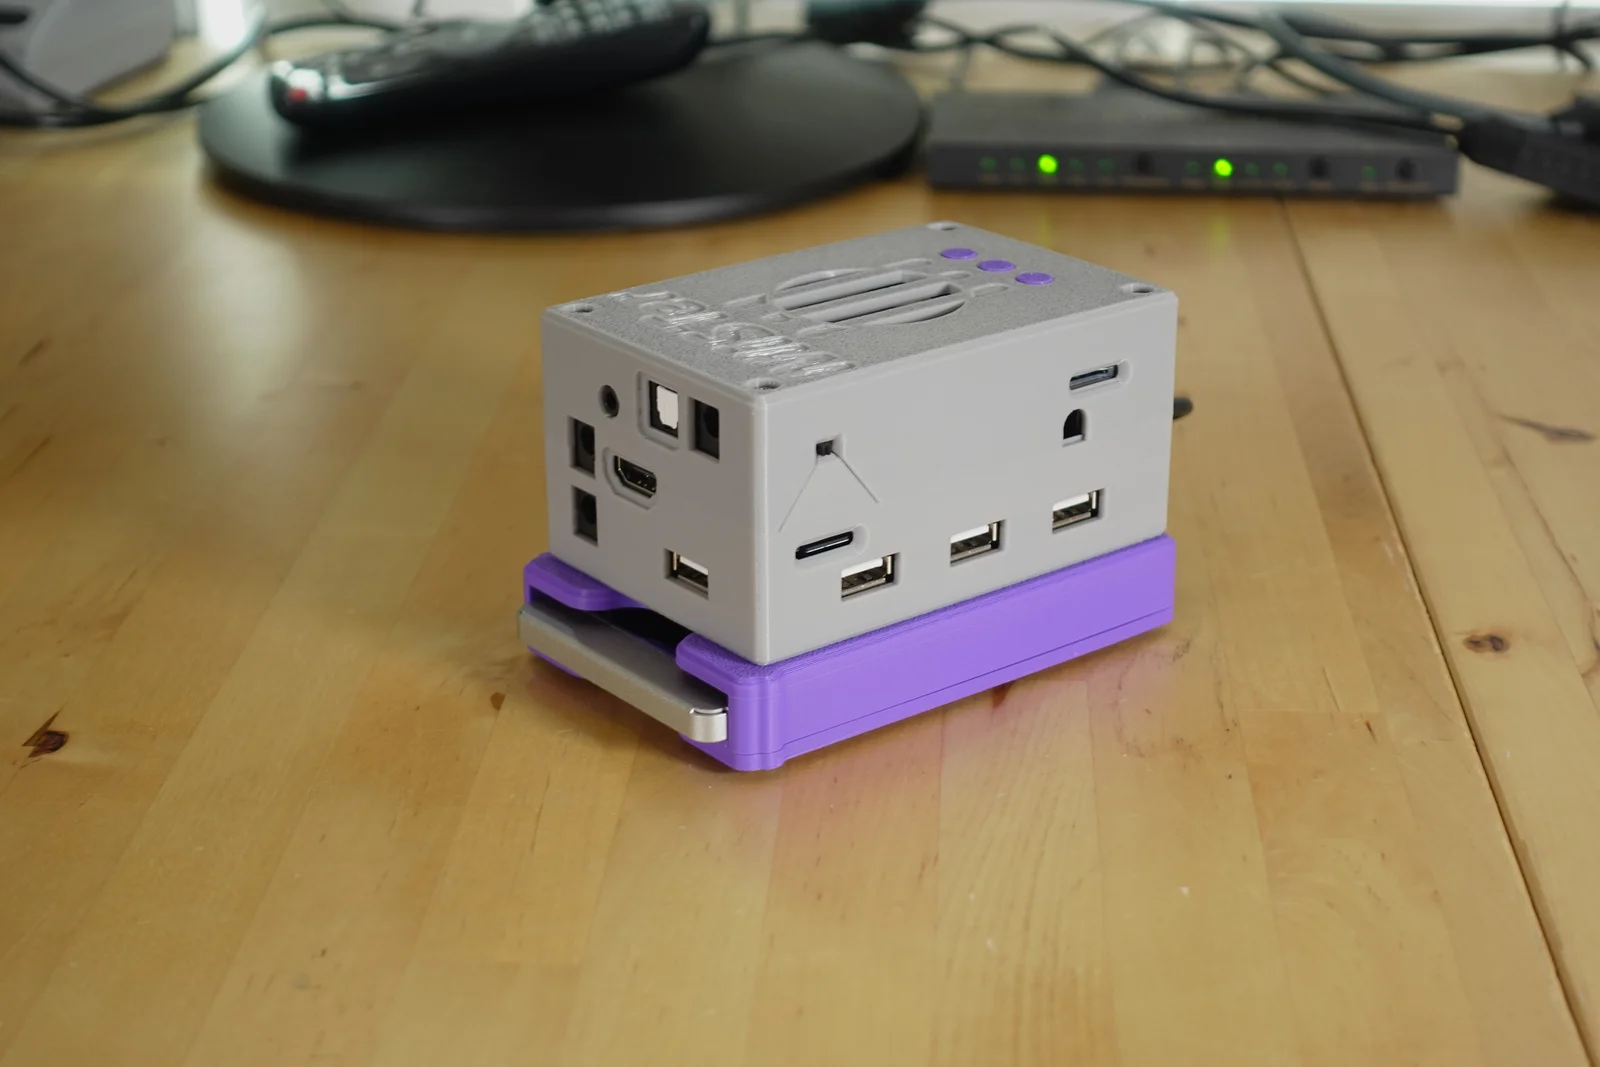
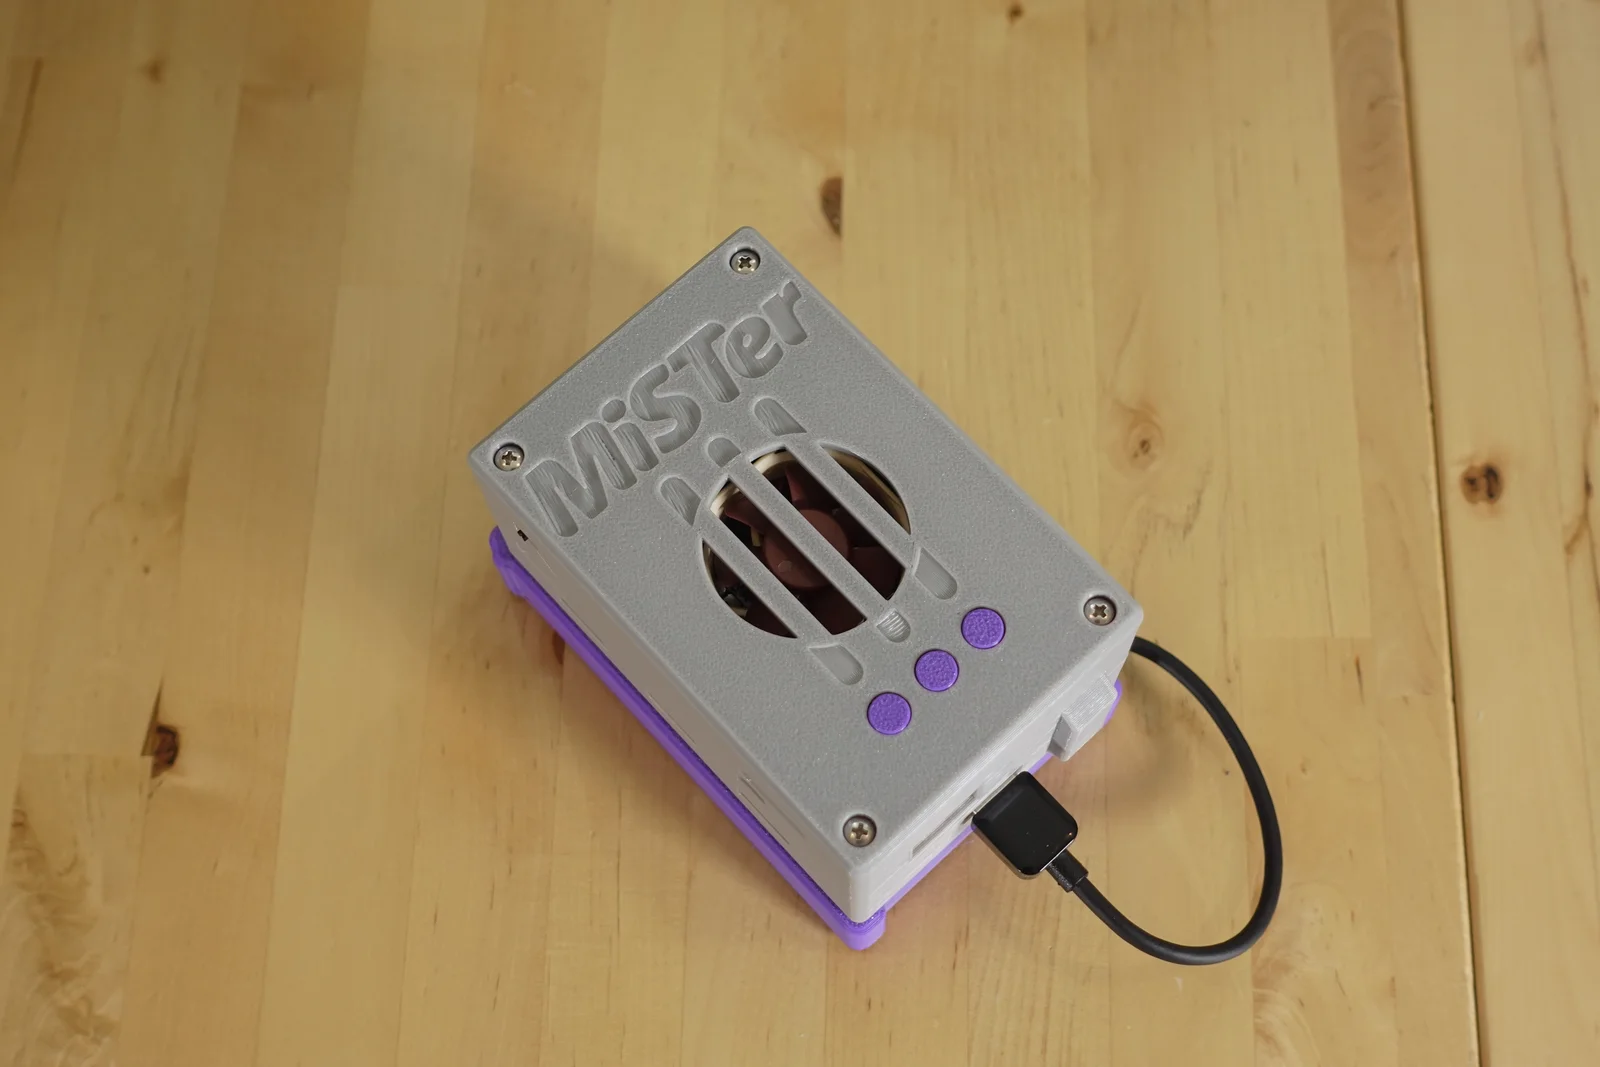
I recently designed a case for the MiSTer FPGA console and thought I would share it with you.
It supports the standard USB HUB and either Digital IO board or Analog IO board. There are different top pieces for the IO boards. It has 3 buttons that reach down to the buttons on the IO board.
It also has a channel built into the case to hide the USB bridge board bracket that connects between the DE10 -Nano and the USB hub. I tried to make it as large as reasonably possibly, but due to a variety of different usb brackets, not all might fit it. So I could use some feedback there.
You will need to print the bottom case piece, either Digital or Analog IO top shell piece and then 3 of the buttons.
To complete assembly you will need a few screws and standoffs.
Four m3 x 10 mm screws for the bottom of the case
Four m3 x 16mm screws for the top of the case
Four m3 x 14mm Hex standoffs to mount between the De10 nano and USB hub.
Something like these will work: https://amzn.to/3z2JuXH
Assembly:
Use the original 14mm Male to female standoffs included with your DE10-Nano to mount the IO plate to the DE10-nano with the male threaded part going down through the DE10-Nano. Screw on the 14mm standoffs under the DE10-nano and install the USB HUB. The 10mm screws go up through the bottom of the case and secure the USB hub in place (the hub will be a snug fit in the bottom case). Now you can take the 3 buttons and place them in the top case portion and then it should sit down onto the IO board. I would do this upside down to keep the buttons from falling out. Then install the m3 x 16mm screws to hold the top in place.
Install some rubber feet on the bottom and you are done.
So give this a print and let me know what you think. Feedback is always welcome.
Special thanks to Greg Collins of Laser Bear for his DE-10 Nano pcb model. This helped with case modeling immensely.
ByckthLikes148Downloads2.4K

 ByJac2307_889487Likes36Downloads256

 ByvladtheinhalerLikes64Downloads254

 ByUpcrid3D_1585693Likes48Downloads209

 ByJaronLikes310Downloads1K

 ByprogoonLikes0Downloads262

 Byw3rN42Likes127Downloads935

 BywallartmaniaLikes0Downloads172

 Bycapivara-3d-rsLikes0Downloads108

 ByTomDDLikes89Downloads574

 Byvitals78_1747561Likes43Downloads71

 Byrorys3DLikes0Downloads324