



mATX benchtable - Khung máy tính dạng mở
 Byw3rN42Likes127Downloads935
Build another version of this model.
Hey there!
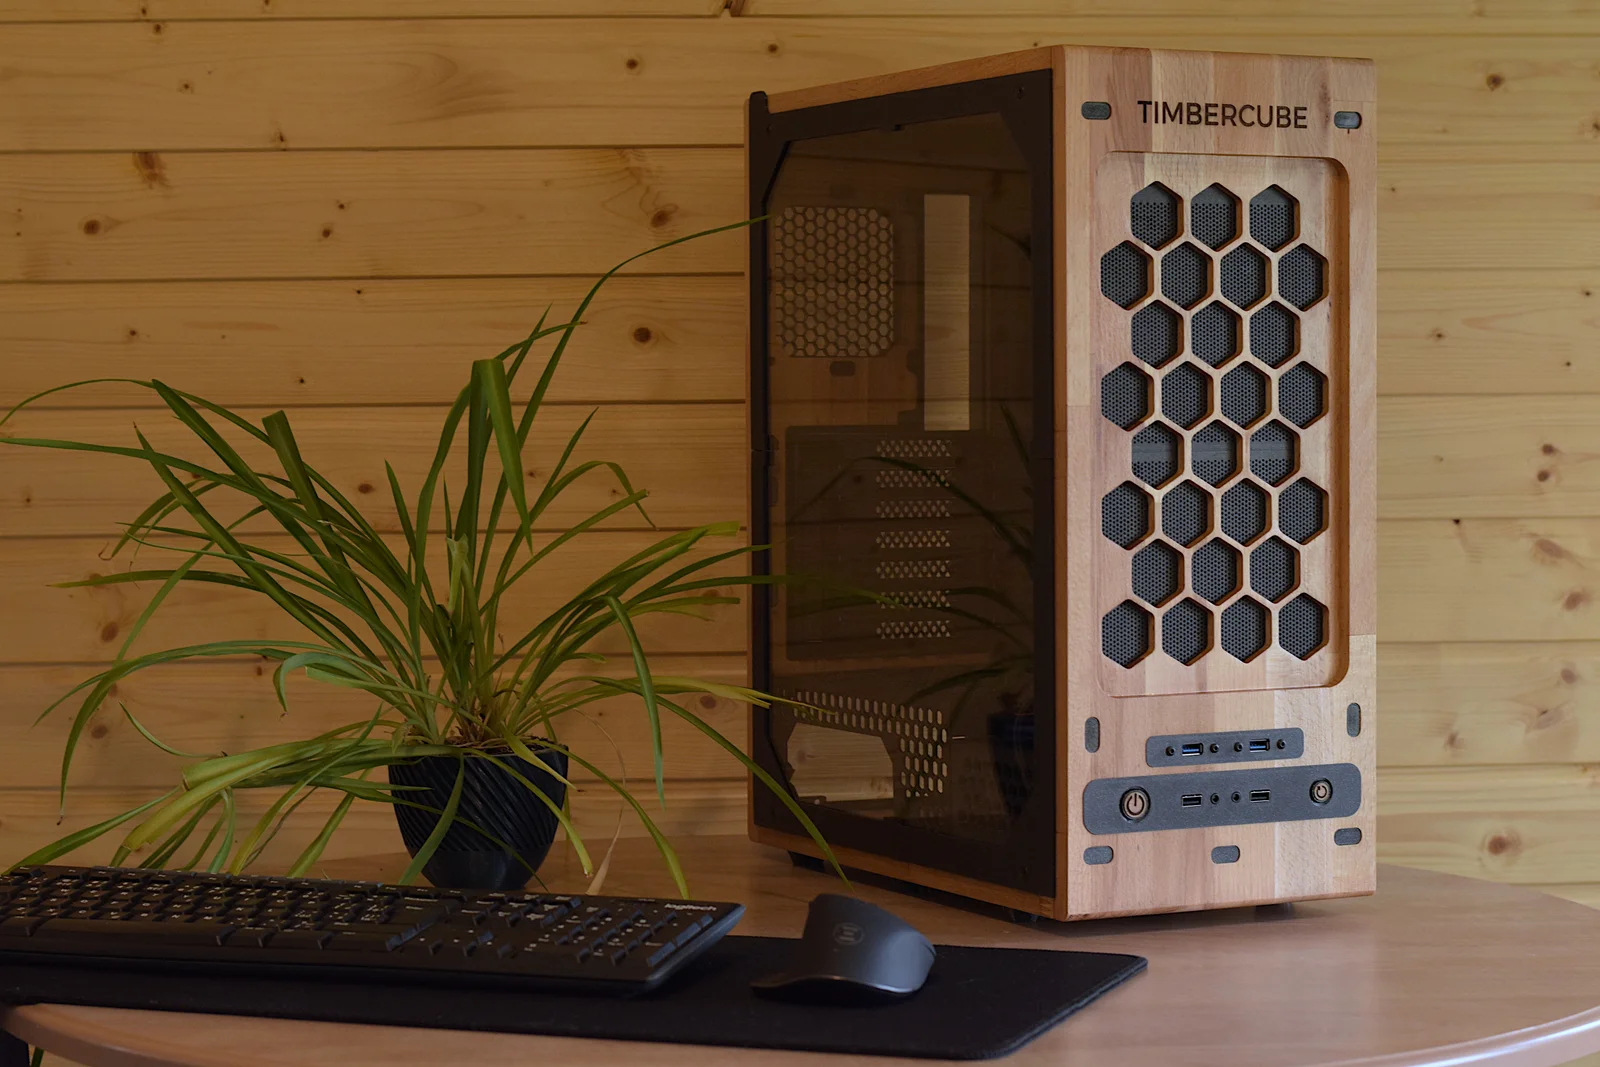
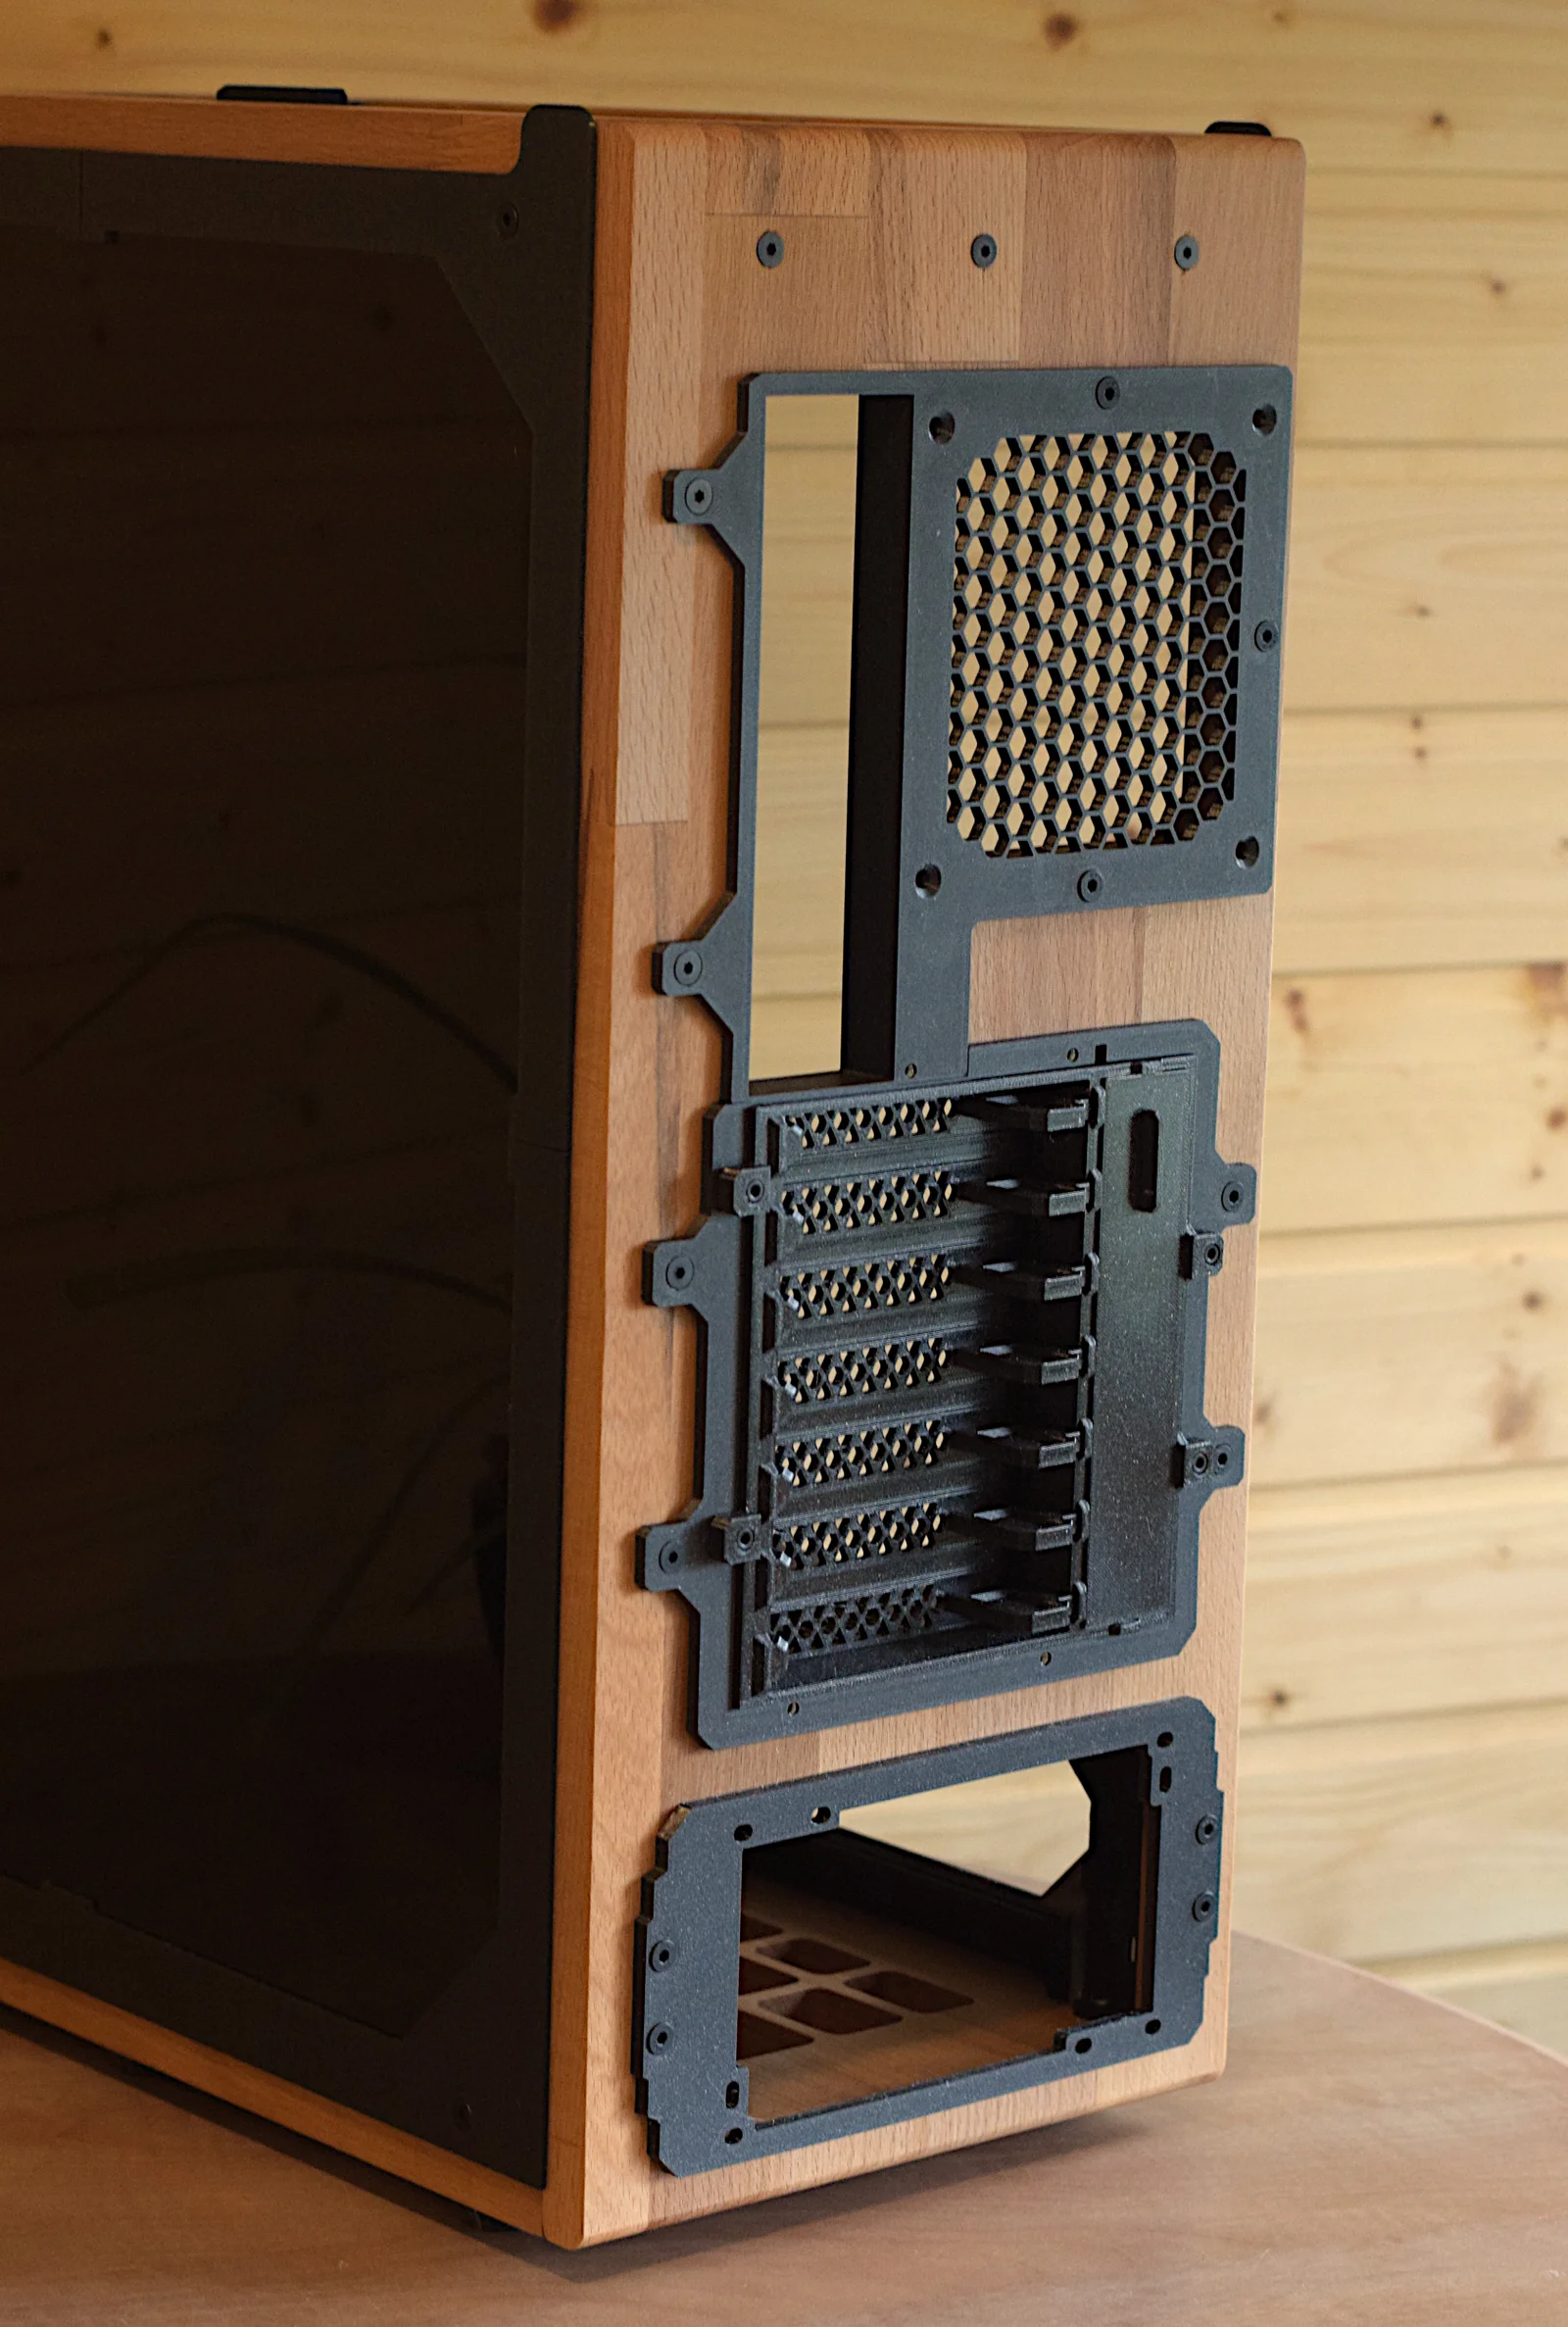
This TimberCube R2 case (codename Rhino) is a full-size mid-tower ATX PC case utilizing 3D printed joints, brackets and mounts for your PC hardware. Front, top, rear and bottom panels are made of wood (though feel free to print them too if you'd like to try) and both side panels are glass.
It's equipped with front and top radiator filters, horizontal/vertical (switchable) GPU bracket and removable HDD case for easier installation.
All printable parts have been re-designed to fit on Prusa i3/MK4/CORE One (minimal build area dimensions 250*210 mm (X*Y), it doesn't require much Z).
In case you're struggling with obtaining some below listed parts, wooden panels, glass panels, fasteners and other accessories are available on Etsy:
https://www.etsy.com/listing/4338470465/timbercube-r2-atx-case-non-printable#
In Files list you'll find an assembly guide.
Motherboard format: ATX, mATX (Micro ATX), mITX (Mini ITX)
Size: Midi tower
Outer length (mm): 432
Outer height (mm): 503
Outer width (mm): 214
Position I/O: Front (lower)
I/O configuration: Audio Jack, 2x USB 2.0, 2x USB 3.0, power button, reset button
Panel material: European beech
Connector material: PETG
Side panel (left): Glass (clear)
Side panel (right): Glass (black)
Drive bay capacity: 1x 3.5“ + 1x 2.5“ / 2x 3.5“
CPU cooler max height (mm): 155
GPU max height (mm): 157 (including 35 mm space for power cables)
GPU max length (mm): 350
PSU max length (mm): 264
PSU max width (mm): 153
PSU max height (mm): 92
GPU mount: Horizontal/vertical
Fan top (mm): 2x 120 / 2x140
Fan front (mm): 2x 120 / 2x140
Fan rear (mm): 1x 120
Fan filter: Front, top
Optional radiator on top only: 120 / 240
Optionable: GPU anti-sag gadget
Front I/O panel has standard audio ports and two USB 2.0 ports. I use this one, purchased in Czech Republic. They're probably buying them from AliExpress. This one looks almost identical.
However, if you want to use a different I/O panel or just need to adjust tolerances, feel free to download and edit its STEP file.
For the USB 3.0 port I use this one. It has two separated USB connectors on one end and a single shared 20-pin connector on the other. I just took off the metal bracket. This AliExpress one should be compatible.
Power and reset MB (motherboard) switches - for example these should fit nicely.
Power and reset buttons (those actual buttons that are mounted to motherboard switches) are laser-cut with engraved power/reset symbols. They are inserted in printed casings. As these casings made quite a lot of noise rubbing against printer button panel, I use metal inserts with PTFE-coated interior. Those are not mandatory, but nice to have. I use this one for power button and this one for reset button. If you can't obtain them locally, I'm sure that just a simple plastic injection molded hollow cylinder would work too, though it would have to have the right dimensions, but again, it's not necessary to have.
Glass panels are made of 4 mm thick glass. Both panels need precise dimensions of 360x430 mm. Right glass panel has black coating.
The 3x5 mm cylindrical neodymium magnets shouldn't be hard to get, I found some here for example.
And lastly you might need the 20 mm round foam pads so the case doesn't scratch your table. These pads are standardly used for chairs. Again, I obtained them locally, but they should be easy to get.
M3 square nut (DIN 562) - 48 pcs
M4 square nut (DIN 562) - 54 pcs
M3x16 screw (DIN 7985) - 9 pcs
M3x6 screw (DIN 912) - 12 pcs
M3x8 screw (DIN 912) - 11 pcs
M3x10 screw (DIN 912) - 9 pcs
M3x16 screw (DIN 912) - 3 pcs
M3x30 screw (DIN 912) - 5 pcs
M4x14 screw (DIN 912) - 20 pcs
M4x12 sunk screw (DIN 7991) - 4 pcs
M4x14 sunk screw (DIN 7991) - 8 pcs
M4x16 sunk screw (DIN 7991) - 11 pcs
M4x25 sunk screw (DIN 7991) - 4 pcs
M4x50 sunk screw (DIN 7991) - 4 pcs
M3x6 screw (ISO 7380) - 4 pcs
M4x12 screw (ISO 7380) - 4 pcs
M4x25 screw (ISO 7380) - 3 pcs
For wooden panels I use 15 mm thick European beech wood. All geometry can be cut with a 6 mm Flat Endmill. Corners were designed to minimize bit friction. There are embedded printed M4 nut adapters and feet in the wooden panels, which have a nice, snug fit. It's possible that these tolerances won't work well for your setup. Feel free to adjust offsets in available STEP files.
The only laser-cut parts are both power and reset button inserts (with engraved symbols) for which I used 8 mm thick wooden board. Feel free to 3D print these inserts if you don't have a laser.
For engraving and cutting I use xTool D1 Pro 20W. Engraving at 60% power at 80 mm/s, 250 lines per mm. Cutting at 100% power at 6 mm/s, 4 passes. These settings vary greatly based on your machine and wood used.
Use at least PETG. I do not recommend using PLA due to its low temperature resistance. All parts are tested with Prusa MK4, 0.4 mm nozzle and IS 0.2 mm SPEED print profile. I use solely Prusament PETG and therefore its default filament profile as well.
Prepare at least 1.3 kg of filament.
I designed as many parts as possible support-free except for:
In the assembly manual you'll find pictures where to place supports, so I recommend reading the Before you begin chapter before you start printing.
Fan filters and fan holders have embedded magnets. You'll find more information on how to print them in the assembly manual.
And that's it! If you find this design valuable and would like to see more in the future, I'd really appreciate your support at Buy Me A Coffee https://coff.ee/jemmorai which will help me keep at it :) Thanks!
Byw3rN42Likes127Downloads935

 ByJaronLikes310Downloads1K

 ByckthLikes148Downloads2.4K

 ByBrokentooth_designsLikes30Downloads225

 Byjodinskylab_3390035Likes144Downloads166


 ByTomDDLikes89Downloads574

 ByJwidessLikes34Downloads375

 ByBroBuilds3D_4455044Likes32Downloads454

 Byrhn_3626299Likes3Downloads19

 Bynexgen-3d-printingLikes0Downloads392

 ByToxicGoblinLikes0Downloads118