

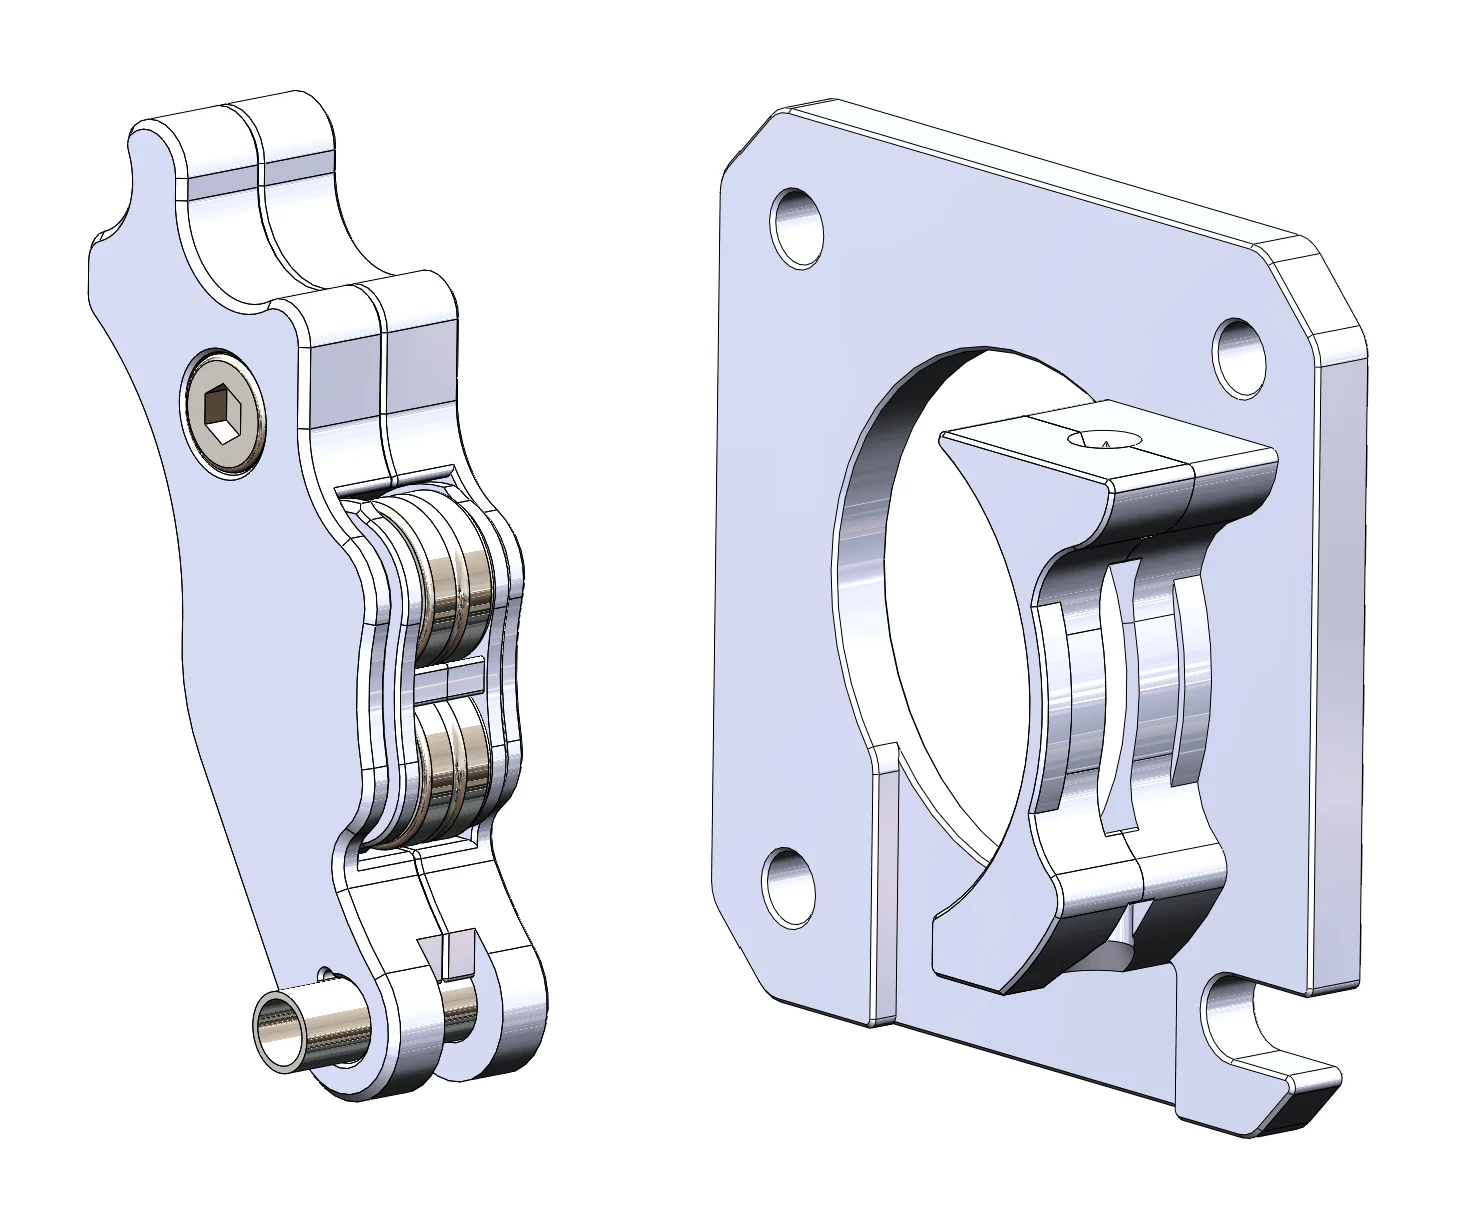


Kẹp giữ sợi Filament
 Bytinx_1344834Likes1.2KDownloads6K
Remix of Tấm đế chính Nextruder được sửa đổi By gpom_857695
Build another version of this model.
 MK4S / XL / CORE One Bogie Idler Xoay Nhiều HơnByIPIND3D · 11/04/2026
 Tấm Plate Chính Nextruder Cho Bogie Idler XLByKocourMour_2487045 · 12/26/2025
 Prusa Ultimate Gearbox (Nâng Cấp Chất Lượng Cuộc Sống)Bygomi · 12/21/2025
Updates
25-10-22
“Idler_6-7_R3” dimensions adapted to the Main Plate R4 with angled Swivel. This update is more angled than the previous design to align the screws horizontally and minimize the screw tread friction in the heatsink.
“Main_Plate_9-10_R4” have tighter tolerance to the Gear and modified filament guiding at exit to the nozzle.
“Idler_1-2_R2” have some minor changes
“Idler_1,2,11_R2B” is optional. it's an alternative design to “Idler_1-2_R2” with a stronger beam between part 1 and 2.
Changed material from PETG to PCCF.
Printing
Printing on MK4S. Material PCCF. Nozzle 0,4 and layer 0,2. I use original presetting’s for Prusament PCCF structural except for part 1-2 where I changed seam position to nearest.
The design requires fine tolerances. Check your x-y belt tension and use dry filament.
Idler assembly
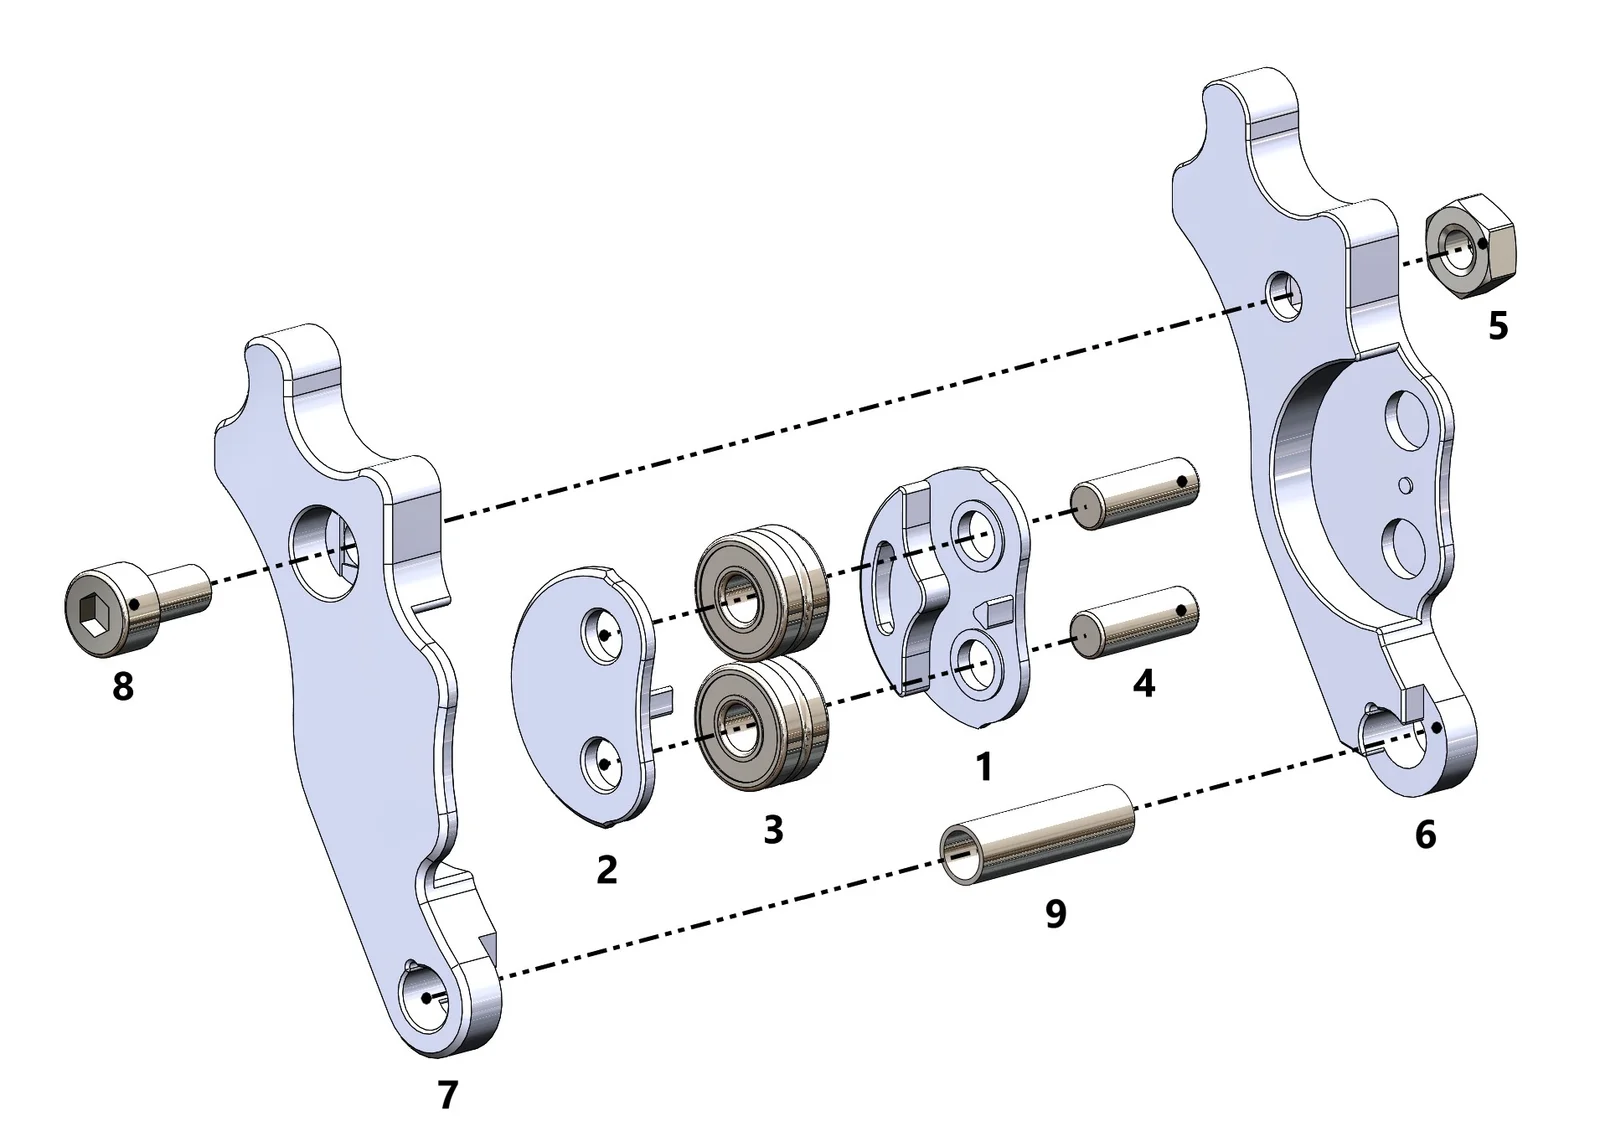
The numbers refer to the pictures. No glue is needed.
Press bogie parts 1&2 together. Place original bearings 3 (693 2RS) into the bogie and press original pins 4 (3x8.5) in place. Fix a nut 5 (M3) in the idler lever 6. Place the bogie assembly between idler lever 6 and 7. Tighten firmly with screw 8 (M3x6). Don’t overtighten the screw! Push the original tubular spacer 9 (13.2x3.8x0.35) into 6 and 7.
Main Plate assembly
The numbers refer to the pictures. No glue is needed.
Press together part 9 and 10. Check that the total height of the filament guide is not exceeding 10 mm (see picture). The two parts will keep together when assembled in the Nextruder.
Bytinx_1344834Likes1.2KDownloads6K

 Byprusa-researchLikes0Downloads2.7K

 Byarhi_585078Likes64Downloads542

 ByHanzo3dLikes155Downloads415

 BydarienLikes0Downloads1K

 ByGeek5DLikes147Downloads485

 ByBrokentooth_designsLikes23Downloads409

 Byla-cave-au-chatLikes0Downloads967

 Bycrawler-3903250Likes0Downloads907

 ByvertigomakesLikes0Downloads563

 By3DSourcererLikes48Downloads377

 Byartme-3dLikes0Downloads334