

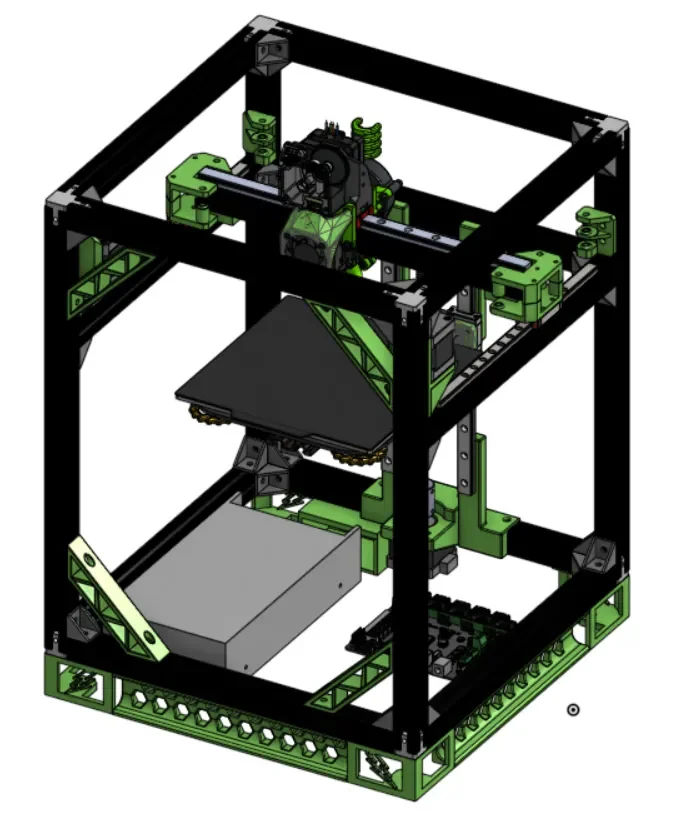
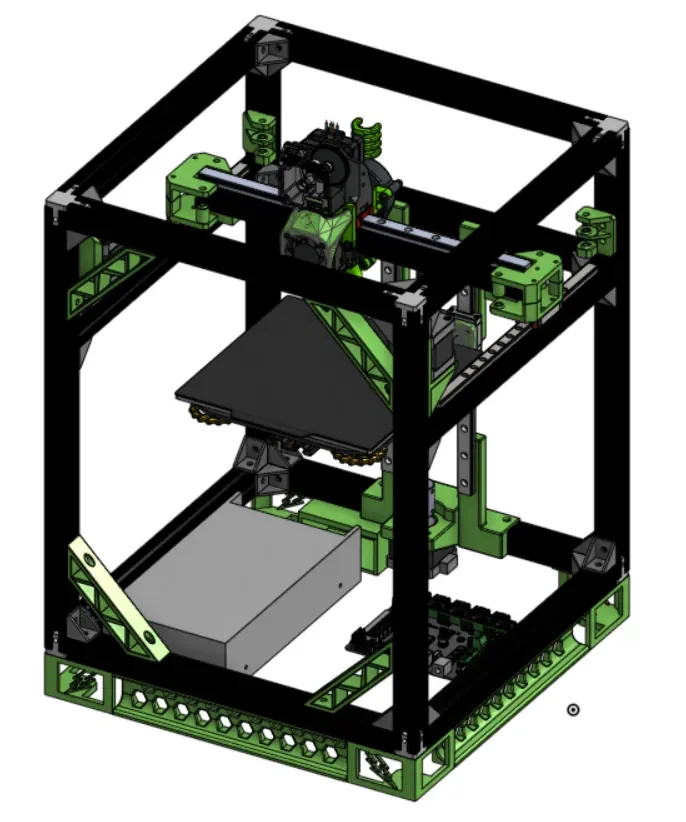


CORE One/+ INDX printed parts
 Byprusa-researchLikes0Downloads2.7K
Remix of Mô hình CAD Simplecore 180mm cho máy in 3D By Mitsubishi_497237
Build another version of this model.
First off, thanks to Rolohaun as he designed the original simplecore that the KP Core V2 was based off.
IGNORE THE STEP FILES IN THE MODEL FILES SECTION, USE THE CAD TO REFERENCE WHAT PARTS TO PRINT.
This CAD is a work in progress right now but it still fully usable. Here is a link to the live CAD that is up to date with all the latest changes: https://cad.onshape.com/documents/83740fe21302ed65470da12b/w/abee4852ea54ed98cd79d2f0/e/f532c3e45053bf849d9eb5aa?renderMode=0&uiState=64d1f22c1cdd0d1f4c8420dd
This is the KP Core 180 V2. It is a simple, cheap, fast and enclosable CoreXY conversion for the Kingroon KP3S range of printers. This will work as a scratch build as well but is optimised to work with the KP3S parts. If you require help with the build join the Kingroon discord server (https://discord.gg/ryeTUUuXmN) and I'll be happy to give you a hand.
This printer is based of Rolohaun's SimpleCore Legacy printer but I have shrunken the frame to accommodate the 180mm build volume. I have also removed the triple z axis leadscrew and rail setup in favour of a smaller and cheaper cantilevered bed like the Kingroon KLP1. Even though it is cantilevered, the KP3S bed is quite light and doesn't affect print quality at all. The STEP file I have uploaded includes everything except the cantilevered bed mount which i am working on and will be released soon. If you would still like to use the triple z axis bed mount check out Mitsubishi's original CAD design here https://www.printables.com/model/492787-simplecore-180mm-very-messy-and-bad-cad
Thanks to Mitsubishi for providing the STEP file.
The KP Core V2 uses the EVA 2.4 toolhead but you can easily upgrade it to EVA 3 if you choose. I'm only using EVA 2.4 because it's compatible with the Titan extruder.
The KP Core V2 is very easy to build and will require less than 80 USD worth of extra parts if you use the parts from your KP3S to build this. I will include a BOM (with Aliexpress links) for people who want to buy the extra parts needed for this and the frame lengths. It uses an assortment of fasteners so just use whatever you have lying around.
BOM:
12x 300mm 2020 extrusion
https://www.aliexpress.com/item/1005001598712011.html
4x 450mm 2020 extrusion
https://www.aliexpress.com/item/1005001598712011.html
10x F695 bearing (the one I linked works) https://www.aliexpress.com/item/33001186278.html
8x 3 way corner connector
https://www.aliexpress.com/item/1005005167882618.html
40x corner bracket
https://www.aliexpress.com/item/1005004046737959.html
4 metres of 6mm GT2 belt
https://www.aliexpress.com/item/902692789.html
1x MGN12H 250mm linear rail for X
https://www.aliexpress.com/item/1000007480470.html
2x MGN9H 250mm linear rail for Y
https://www.aliexpress.com/item/1000007480470.html
Wago connectors
https://www.aliexpress.com/item/1005005460033283.html
Stepper motor cable extension
https://www.aliexpress.com/item/1005004743149932.html
M3 & M4 T nuts
https://www.aliexpress.com/item/1005003319627257.html
Optional:
120mm extra part cooling fan (side mount)
https://www.aliexpress.com/item/32552473578.html
40x20mm fan for bottom electronics cooling
https://www.aliexpress.com/item/4001080434013.html
Buck converter (for extra bottom electronics fans)
https://www.aliexpress.com/item/1005004850634227.html
Your choice of hotend and extruder. I'm using a Bambu clone hotend with a titan extruder.
The printed parts can be found in the CAD, (They are all in green). They should be printed with 3 perimeters (for a 0.4mm nozzle, use 2 for 0.6mm nozzle, use more perimeters for extra strength if you choose to). They should ideally be printed in ABS or ASA. You can try using PLA or PETG if you do not plan to enclose the machine but the parts that will experience heat, such as the motor mounts and hotend shroud, should be printed in at least PETG.
You can print whatever toolhead parts you like to suit your needs. They can be on either the EVA 2.4 or EVA 3 website. Be aware that EVA 3 uses heat inserts and EVA 2.4 uses trapped nuts.
The electronics can be mounted however you would like, I have mine mounted in the bottom.
Byprusa-researchLikes0Downloads2.7K

 Bydet-manLikes0Downloads177

 Bytinx_1344834Likes1.2KDownloads6K

 BydarienLikes0Downloads1K

 Byla-cave-au-chatLikes0Downloads973

 ByvertigomakesLikes0Downloads565

 By3DPrintDemonLikes0Downloads334

 Bychris-hillLikes0Downloads268

 Bypeter-van-der-waalLikes0Downloads260

 ByhumebeamLikes0Downloads133


 BykingnothingLikes0Downloads188