
F3D
Máy ép cuộn in 3D để dán nhãn và bề mặt in 1

1 image

Máy In 3D

Máy ép cuộn in 3D để dán nhãn và bề mặt in

By dflemstr

Downloads
113
Likes
37
Views
1,435

Files 7 1.1 MB

  • roller-press-spring-knob-v2_1766521825.stlSTL · 49.7 KB
  • roller-press-cylinder-attachment-v3_1766521826.stlSTL · 63.4 KB
  • roller-press-holders-v2_1766521827.stlSTL · 237.4 KB
  • roller-press-pipe-attachment-50mm-v1_1766521828.stlSTL · 184.7 KB

Make a variant with AI

Build another version of this model.

Open Studio

Description

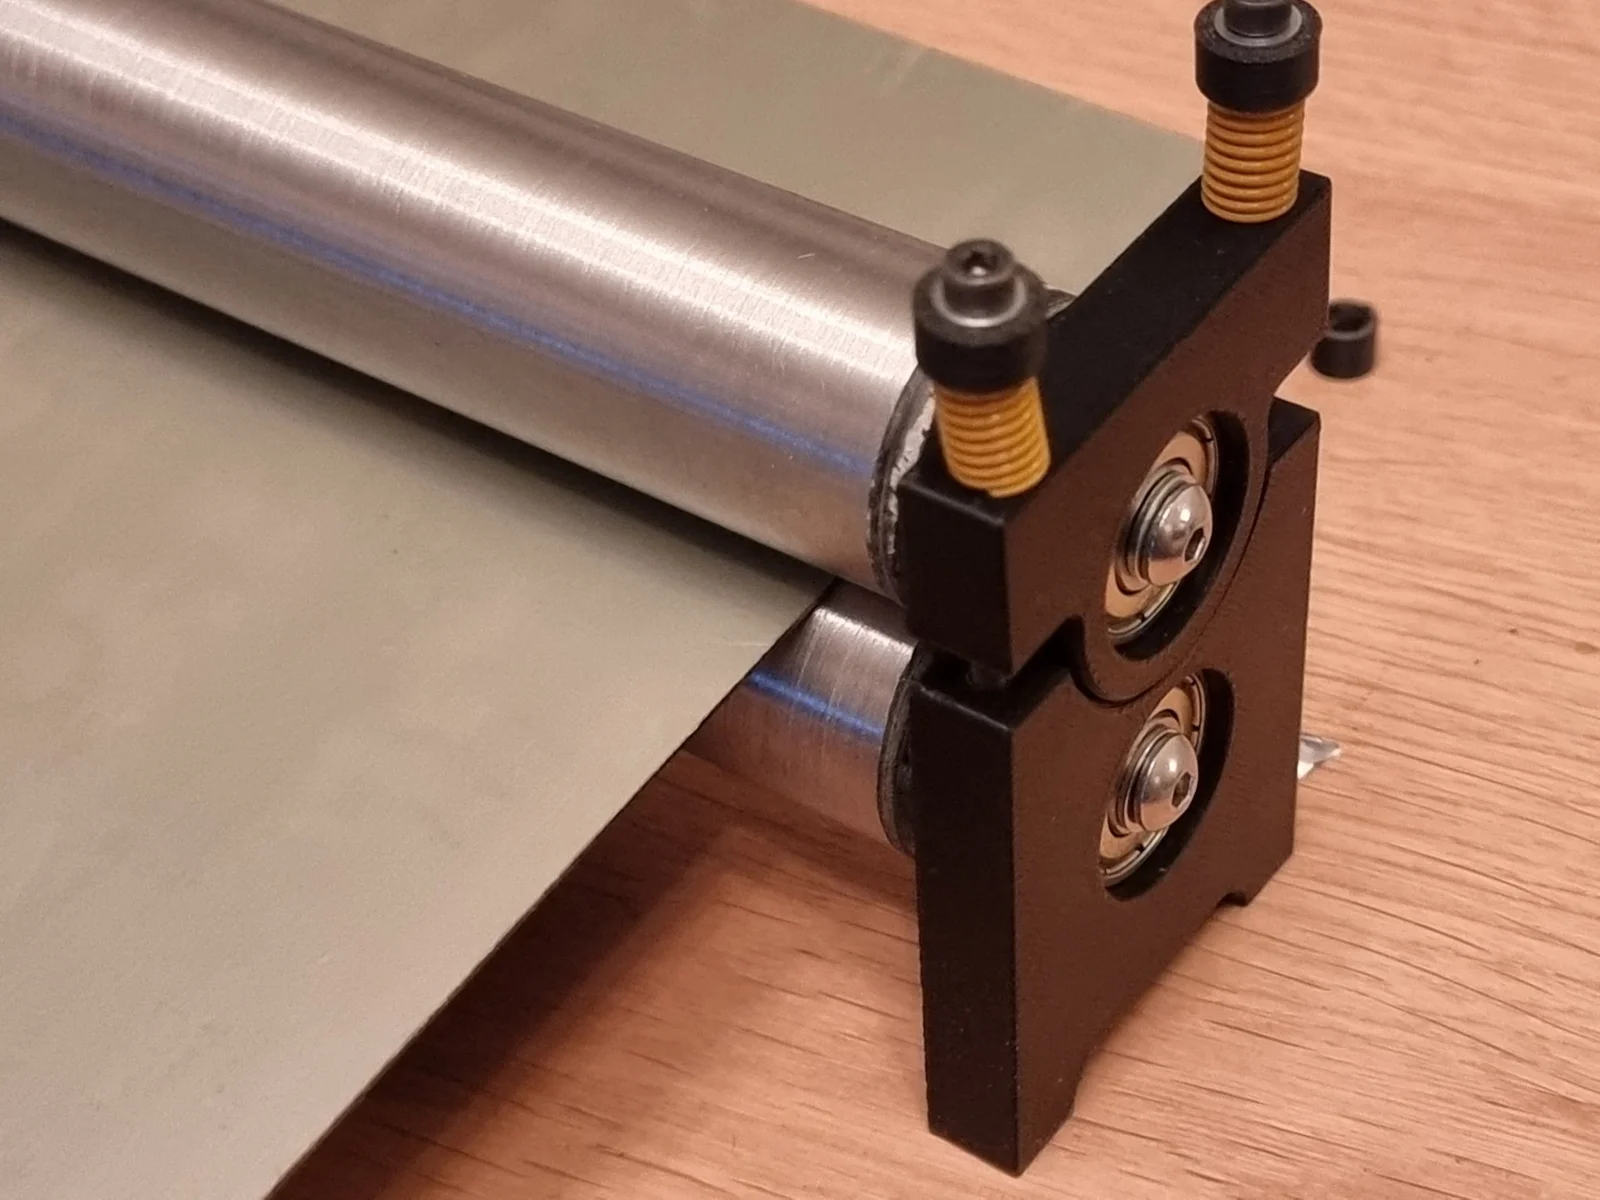
A roller press for applying stickers, 3D printing surfaces, etc.  Whatever needs pressing together that's not too thin; this design can have a precision as good as <0.1mm if assembled correctly.

Parts needed

  • Strong 2-part epoxy, I use Loctite Power Epoxy.
  • Masking tape
  • 2x parallel solid steel cylinders of equal length, diameter ≥ 30mm
    --OR--
    2x parallel steel pipes with 30mm outer diameter, 22mm inner diameter, 4mm walls.
    • You can use thicker pipe; you might need to customize the mounts in that case.
    • You may optionally directly tap M5 holes in the centers of the cylinders if you have the machinery for that, and then you can skip the M5 heat set inserts and user a longer M5 bolt instead.  However, if you have a lathe/drill press, you likely don't need this roller press in the first place :)
  • 4x springs, < 8mm OD, 3.5-5mm ID.  You can find these as “3D printer bed springs” online, usually mustard yellow for some reason.
  • 4x M3 40-50mm bolts (longer is better; would recommend cylinder head bolts for being more wear resistant)
  • 4x M3 long heat-set inserts, 4.6mm OD, 5.7mm long.  CNCKitchen sells good quality ones.  Do not use Voron-style heat set inserts as these have a smaller surface area and might not handle the load.
  • 4x M3 washers (optional)
  • 4x M5 16-18mm bolts if using solid cylinders
    --OR--
    4x M5 30, 40, 50, or 60mm bolts if using pipes.
    (button head or cylinder head both work)
  • 4x M5 short heat-set inserts, 7.1mm OD, 5.8mm long.  CNCKitchen sells good quality ones.
  • 4x M5 washers (optional)
  • 4x 608Z/608-2RS bearings or equivalent. ID ~8mm, OD ~22mm, thickness 7-9mm.

What to print

  • 2x roller press holders in a stiff non-creep material, like PETG, ABS/ASA, PC, etc.  The STL consists of two parts, print both parts twice.
  • 4x spring knobs in whatever stiff material (same materials as above or PLA works too)
  • 4x roller press cylinder attachments in a strong flexible material, like a soft TPU.  I used Ninjaflex but I'm sure other options work
    --OR--
    4x roller press pipe attachments, in the same material as the press holders.  Use the STL matching the length of bolt that you want to use, longer is better.

Assembly

This is a bit involved, so I have broken down the assembly process in a few sections:

Cylinders

  1. Insert M5 heat set inserts from the bottom of the cylinder/pipe attachment 3D printed parts.  Make sure the insert is completely flush with the surface.  If in doubt, press it in a bit further so that it definitely isn't sticking out proud of the surface.
  2. When the heat set insert has cooled off, make sure the hole is clear all the way through for a bolt to pass through.  Try screwing in one of the M5 bolts to remove any gunk.  If there is a severe amount of gunk, a M5 tap can be used to carefully remove excess.
  3. If using solid cylinders:
    1. Thoroughly clean the cylinder attachment and the end caps of the ≥30mm steel cylinders, for example with soap and water and/or isopropanol.
    2. Add a tiny piece of masking tape to cover the entrance to the heat set insert on every 3D printed cylinder attachment; this is to prevent epoxy from seeping in later.  This masking tape will stay there forever, so make sure it is as small as possible to increase the epoxy gluing surface.
    3. Mix 2-part epoxy thoroughly and apply a layer on the underside of all the cylinder attachment parts, and the ends of the cylinder.
    4. Attach the cylinder attachments to the cylinders, making sure they are centered.  If the cylinders are exactly 30mm diameter, you can wrap some masking tape around the assembly to align the centers properly.  Don't worry about making a mess; any excess can be sanded off later.
  4. If using pipes:
    1. Mix 2-part epoxy thoroughly and apply a layer on the outside of the pipe attachment 3D printed parts, on the surface that will end up inside of the pipe.
    2. If possible, do the same on the contact surface on the inside of the pipe
  5. Apply pressure and let the epoxy cure completely.
  6. Sand off any stray epoxy or other debris on the cylinders/pipes, making sure they are completely smooth when rolled against each other.
  7. You may additionally want to sand the ends of the cylinders/pipes slightly more than the center, to create convex cylinders.  This can help push out bubbles from the center later.  Definitely not necessary for the design to work, though.

Holders

  1. Insert the M3 heat set inserts from the top of the lower holder part, in the two appropriate holes on each part.
  2. Press in some 608 bearings in the holes of the holders, from the side where there's no flange on the 3D printed part.  Make sure the bearings bottom out and are engaged towards the flange in the 3D printed part.
  3. Push the ends of the cylinder/pipe assemblies through the bearings of the holders, making sure they are inserted from the side with the bearing flanges, so that the flanges prevent the assembly from falling apart.  One cylinder/pipe is attached to both of the lower parts of the holders, and one to the upper parts of the holders.
  4. Insert the M5 bolts with washers through the other side of the bearing/holder assembly, and tighten.  If you have used a very flexible material, make sure to not over-tighten, as the bolt might push in too deep and push against the epoxy layer.

Tensioning

  1. Take the M3 bolts, and first add a washer, then a spring knob 3D printed part with the open end outwards, and then a spring.  Make sure the spring fits into the hole of the 3D printed knob.
  2. Stack the two cylinder/pipe holder assemblies on top of each other so that the steel cylinders/pipes touch, and line up the M3 bolt holes.
  3. Insert the M3 bolts + springs from above the holders, and tension them loosely so that they engage with the M3 heat set inserts.
  4. Tension the bolts somewhat equally.  This can be accomplished roughly by making sure that the spring knobs stick up the same distance as each other above the holders.

Usage

Use the press however you want.  Here's how I do it when applying stickers:

  1. Put the sticker with the backing paper still on on top of whatever surface you want it to end up on.
  2. Position it exactly where you want it to be in the end (still with the backing paper on).
  3. Roll the sticker through the press a little bit.
  4. Unpeel the backing paper from the sticker on the part that now sticks through the roller press and “tuck it in” under itself
  5. Pull this part through the roller press again so that the part you just dealt with gets attached to the underlying surface exactly where you want it.
  6. At this point, you may want to add a solvent to the surface to help the sticker stick/remove bubbles more easily.  Soapy water, isopropanol, or other similar solvents that evaporate work well for this.
  7. Now, unpeel the rest of the backing paper, slowly feeding the exposed area through the press as you do so.  You may want to roll the exposed area through the press multiple times to make sure no bubbles appear.
  8. Finally the sticker should be super well attached to the surface with no bubbles!

To watch a pro do this, reference the videos by the.sign.guy on TikTok or YouTube (arbitrary example linked here):

Read more Show less

Print spec

Formats
stl
Model files
7
Total size
1.1 MB
Largest file
237.4 KB

0 comments

See all