




Creality K2 SE Poop Chute
 Byds-printsLikes0Downloads353
Build another version of this model.
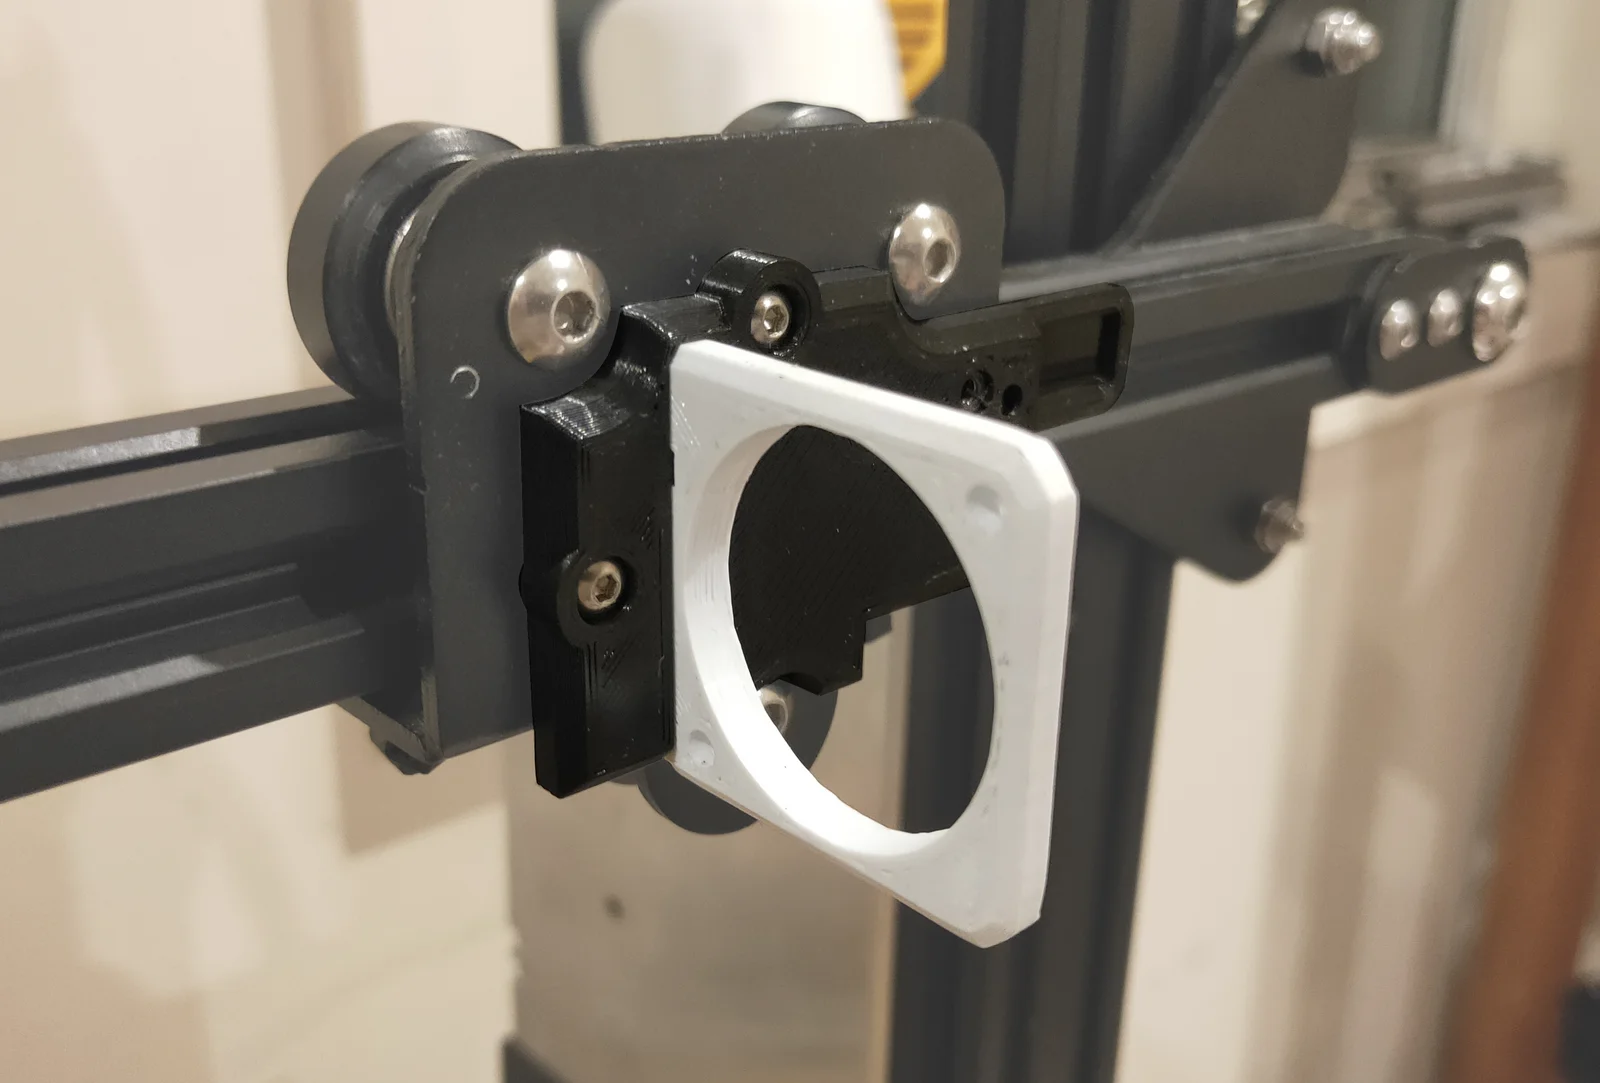
Reclaim lost build volume on your ender 3 with the thinnest mount out there! This mount is only 5mm thick while still being rigid enough to handle relatively fast accelerations without too much wobble.
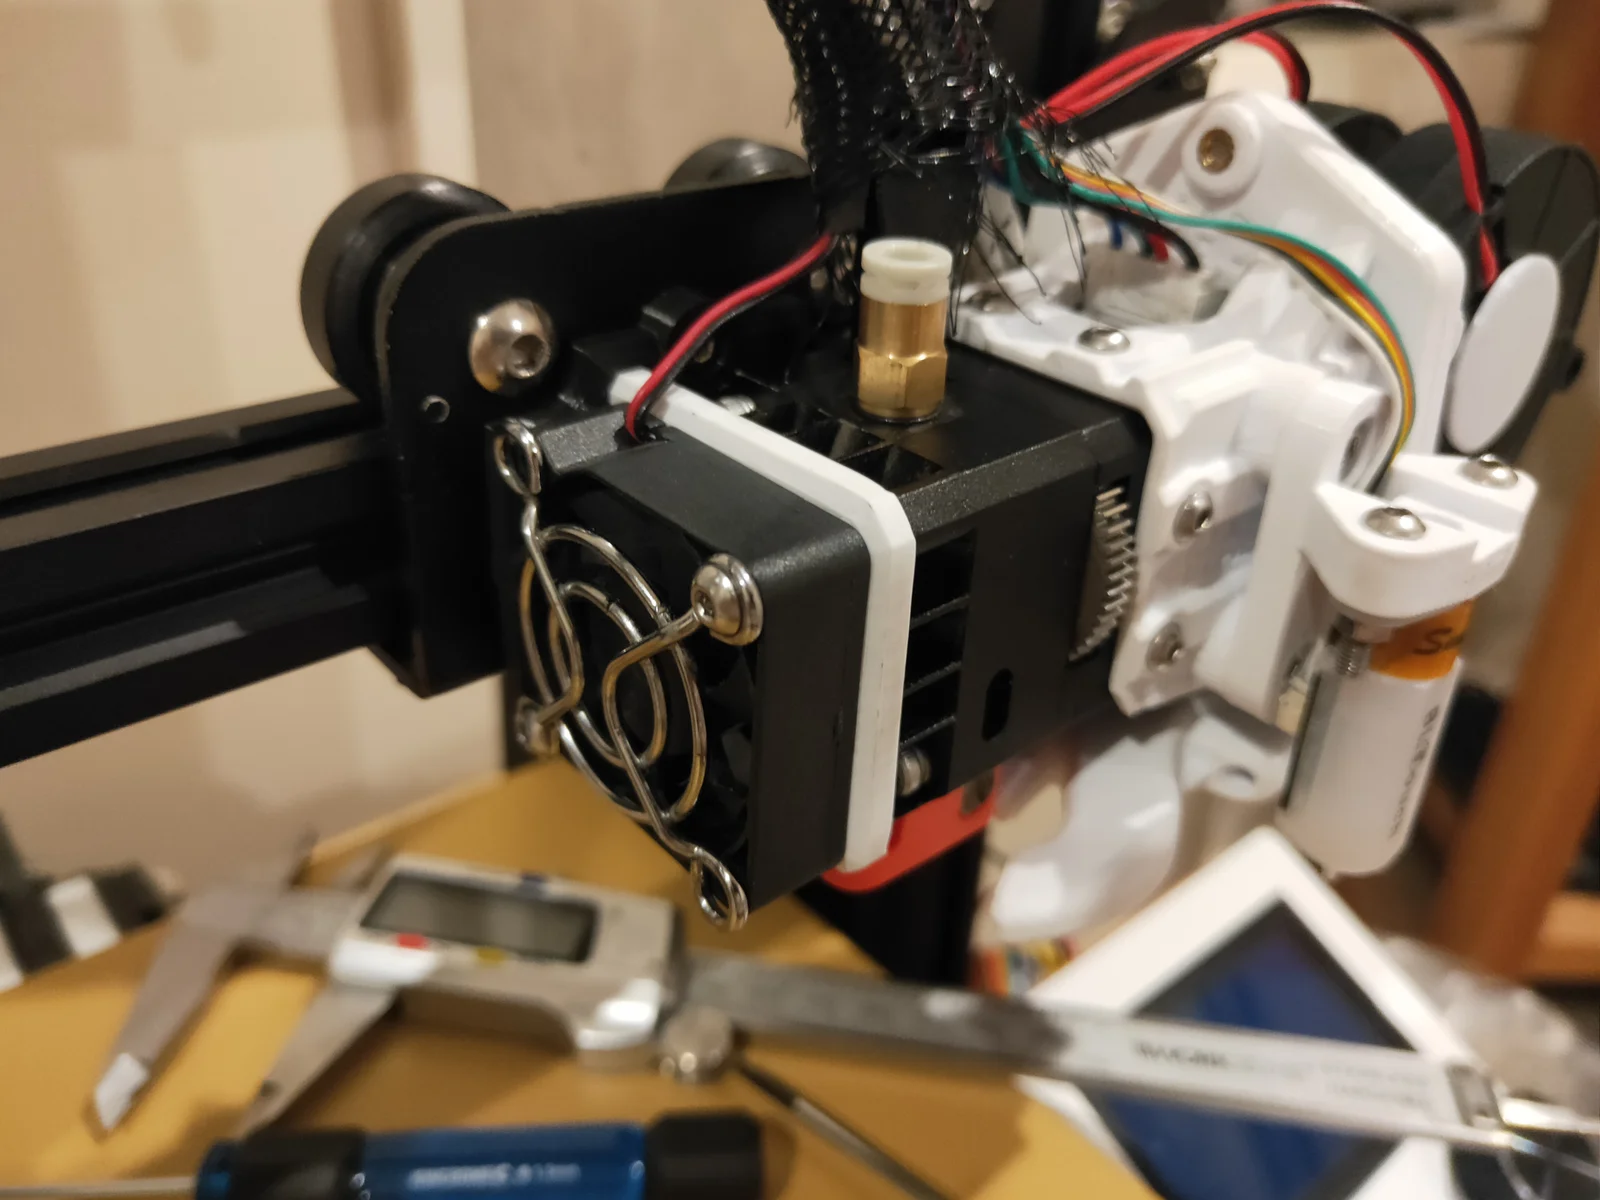
The removeable fan mount makes the already hard to service H2 just a little bit easier and allows you to have two colours to match your aesthetic.
This model is designed specifically to work with Predy's “MAD - Modular Air Duct for BIQU H2”
26/08/23 - Added versions without the notch where the fan mounts. Assembly will be easier since clearance is tight (you can then slide the fan mount in like a dovetail joint), but it may result in less rigid mounting.
24/02/23 - Added orthogonal drawing to easier visualise measurements.
The file "H2 MountPlate" makes use of sacrificial bridges to avoid support.
Using a screwdriver or similar, break through the sacrificial bridges on the rear of the mount.

Tightly fasten the mount plate to the H2 with the first two 6mm M3 screws. (Tuck the thermistor and heater wires behind the tab for cable management)

Place the assembly onto the Ender 3 backplate.

Tightly fasten the printed plate to the metal backplate with the other two 6mm M3 Screws.

Starting at an angle, insert the fan mount. (It may help to slide the mount into the plate a few times to loosen the joint first)

Tightly fasten the fan to the H2 with the two 20mm M3 screws.

As this plate is so thin, the MAD duct cannot clear the belt tensioner (at least on the ender 3 pro) which reduces build volume. Using a hot knife I cut a slot to let the duct assembly clear the tensioner mechanism. It ain't pretty but it works
Byds-printsLikes0Downloads353

 Byprusa-researchLikes0Downloads2.7K

 Bytinx_1344834Likes1.2KDownloads6K

 Bydet-manLikes0Downloads173

 Bynamida-verascheLikes0Downloads150

 BydarienLikes0Downloads1K

 ByBrokentooth_designsLikes17Downloads148

 BynozeLikes0Downloads134

 Byla-cave-au-chatLikes0Downloads969

 ByvertigomakesLikes0Downloads564

 By3DPrintDemonLikes0Downloads330

 Bypeter-van-der-waalLikes0Downloads258