



New
Pocket-Size Third Hand Mini Spring Loaded Vise
 ByrjunLikes0Downloads304
Remix of Vòng Chỉnh Nét Webcam Logitech C270 By Scatterthought
Build another version of this model.
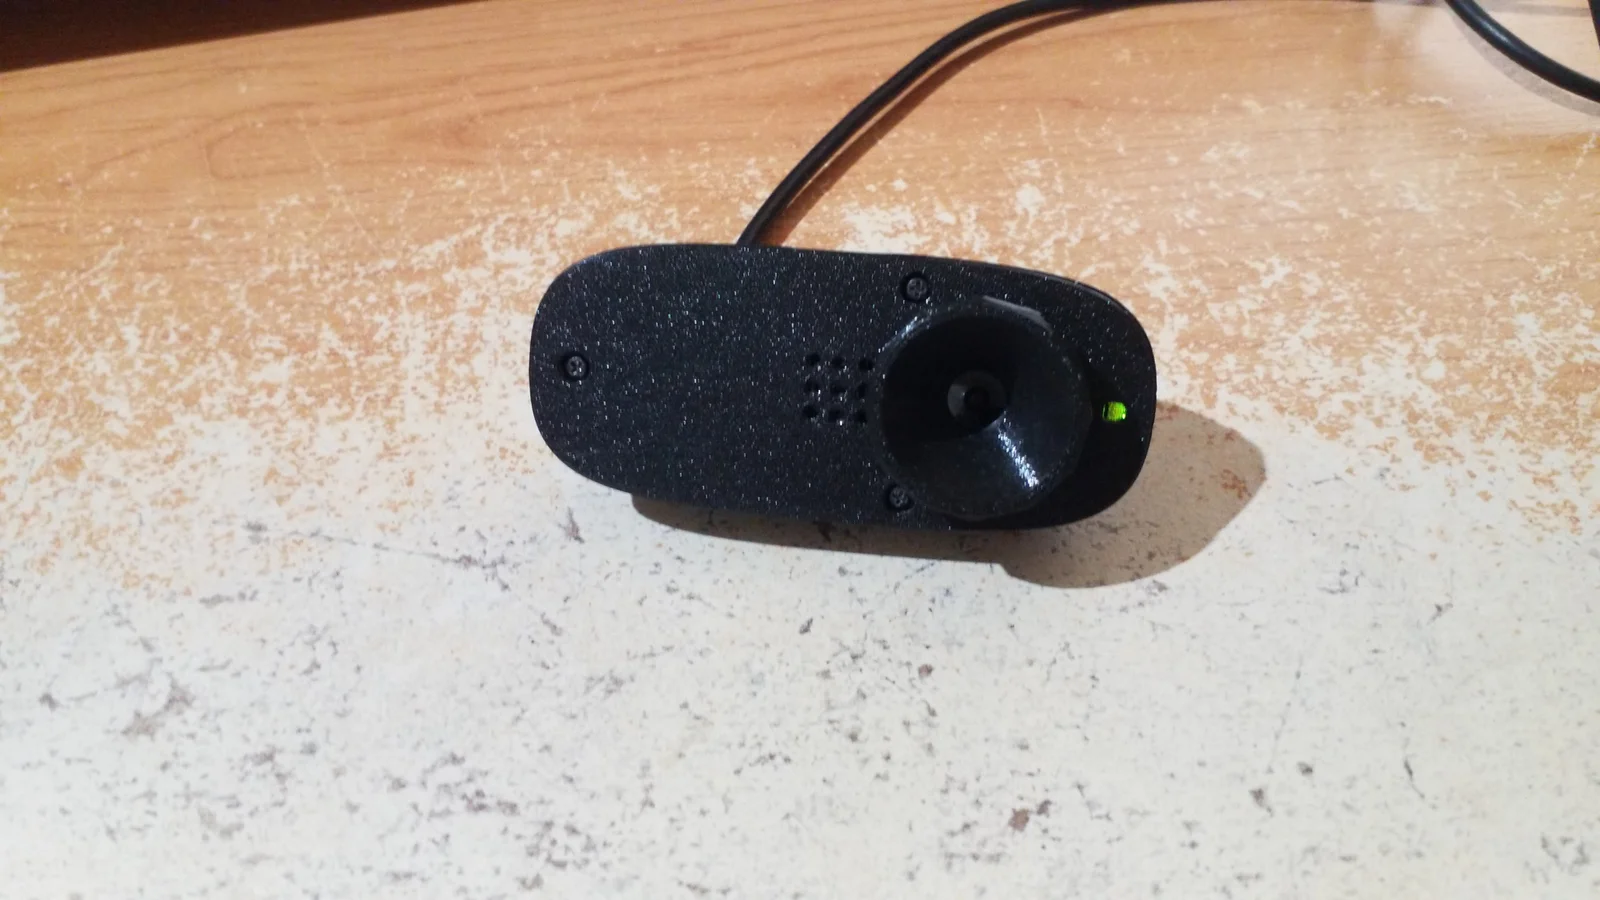
This is a remix of a remix (Scatterthought) of a good Logitech C270/C310 Focus Ring design. I just add my contribution ;)
-Tighter tolerances between ring and cover.
-Change the “gear” design to better grip the lens.
-Change ring internal angle and depth to rmove any gaps between the ring and the lens to avoid dust inside the cam and around the lens.
-Add holes for the microphone of the webcam
-Ad hole for the green led of the C270/C310 to be visible when running.
Version
Description
Date
A.1
Initial Release
20/09/2023
4. Materials for Assembly (BOM)
Have a nice print !
Last note! I've spent quite a lot of time designing, iterating and prototyping on all my models. Therefore, if you enjoy them, please don't forget to like+download and then rate them, so that I can earn so prusaments to continue ;)
ByrjunLikes0Downloads304

 ByleonicLikes0Downloads1.4K

 ByZED4EverLikes313Downloads5.2K

 ByVC_DesignLikes271Downloads756

 ByfifindrLikes500Downloads4K

 Bymrfixit_324954Likes65Downloads478

 Bylab-96Likes0Downloads106

 ByDan Schwartz SchwartzLikes744Downloads3.4K

 ByBrokentooth_designsLikes83Downloads453

 Byvc-designLikes0Downloads3.2K

 Bythorin-oakenshieldLikes0Downloads531

 Bytorii-creative-studioLikes0Downloads448