

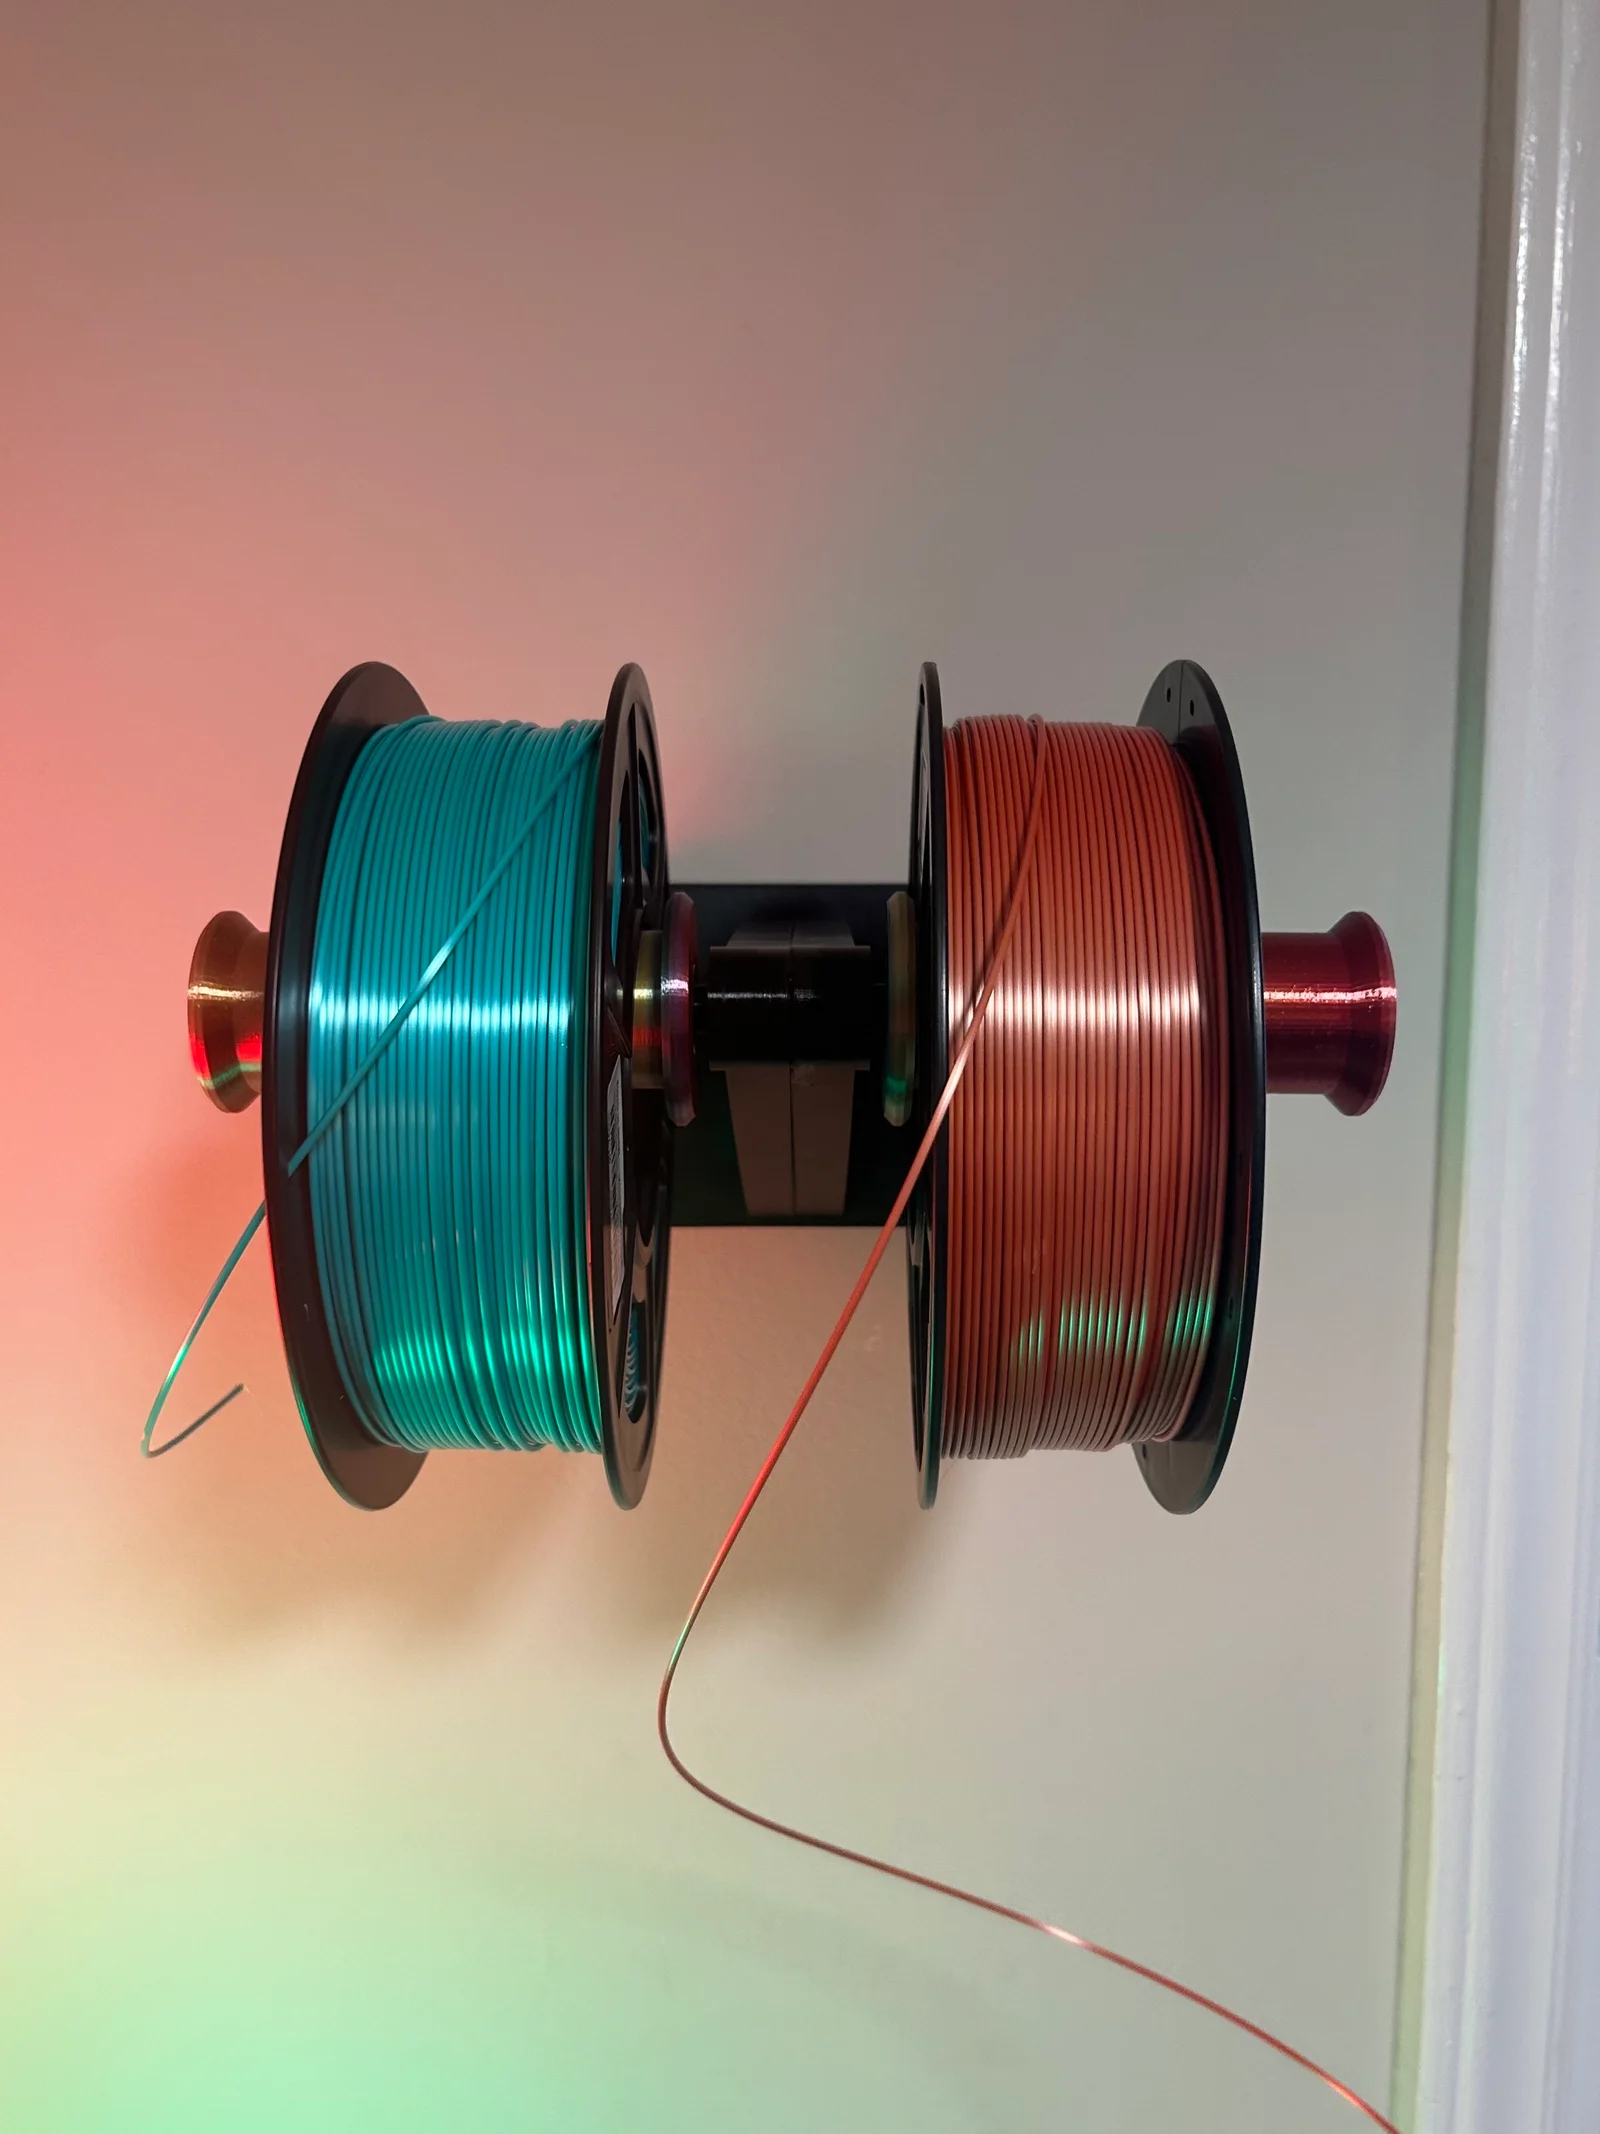
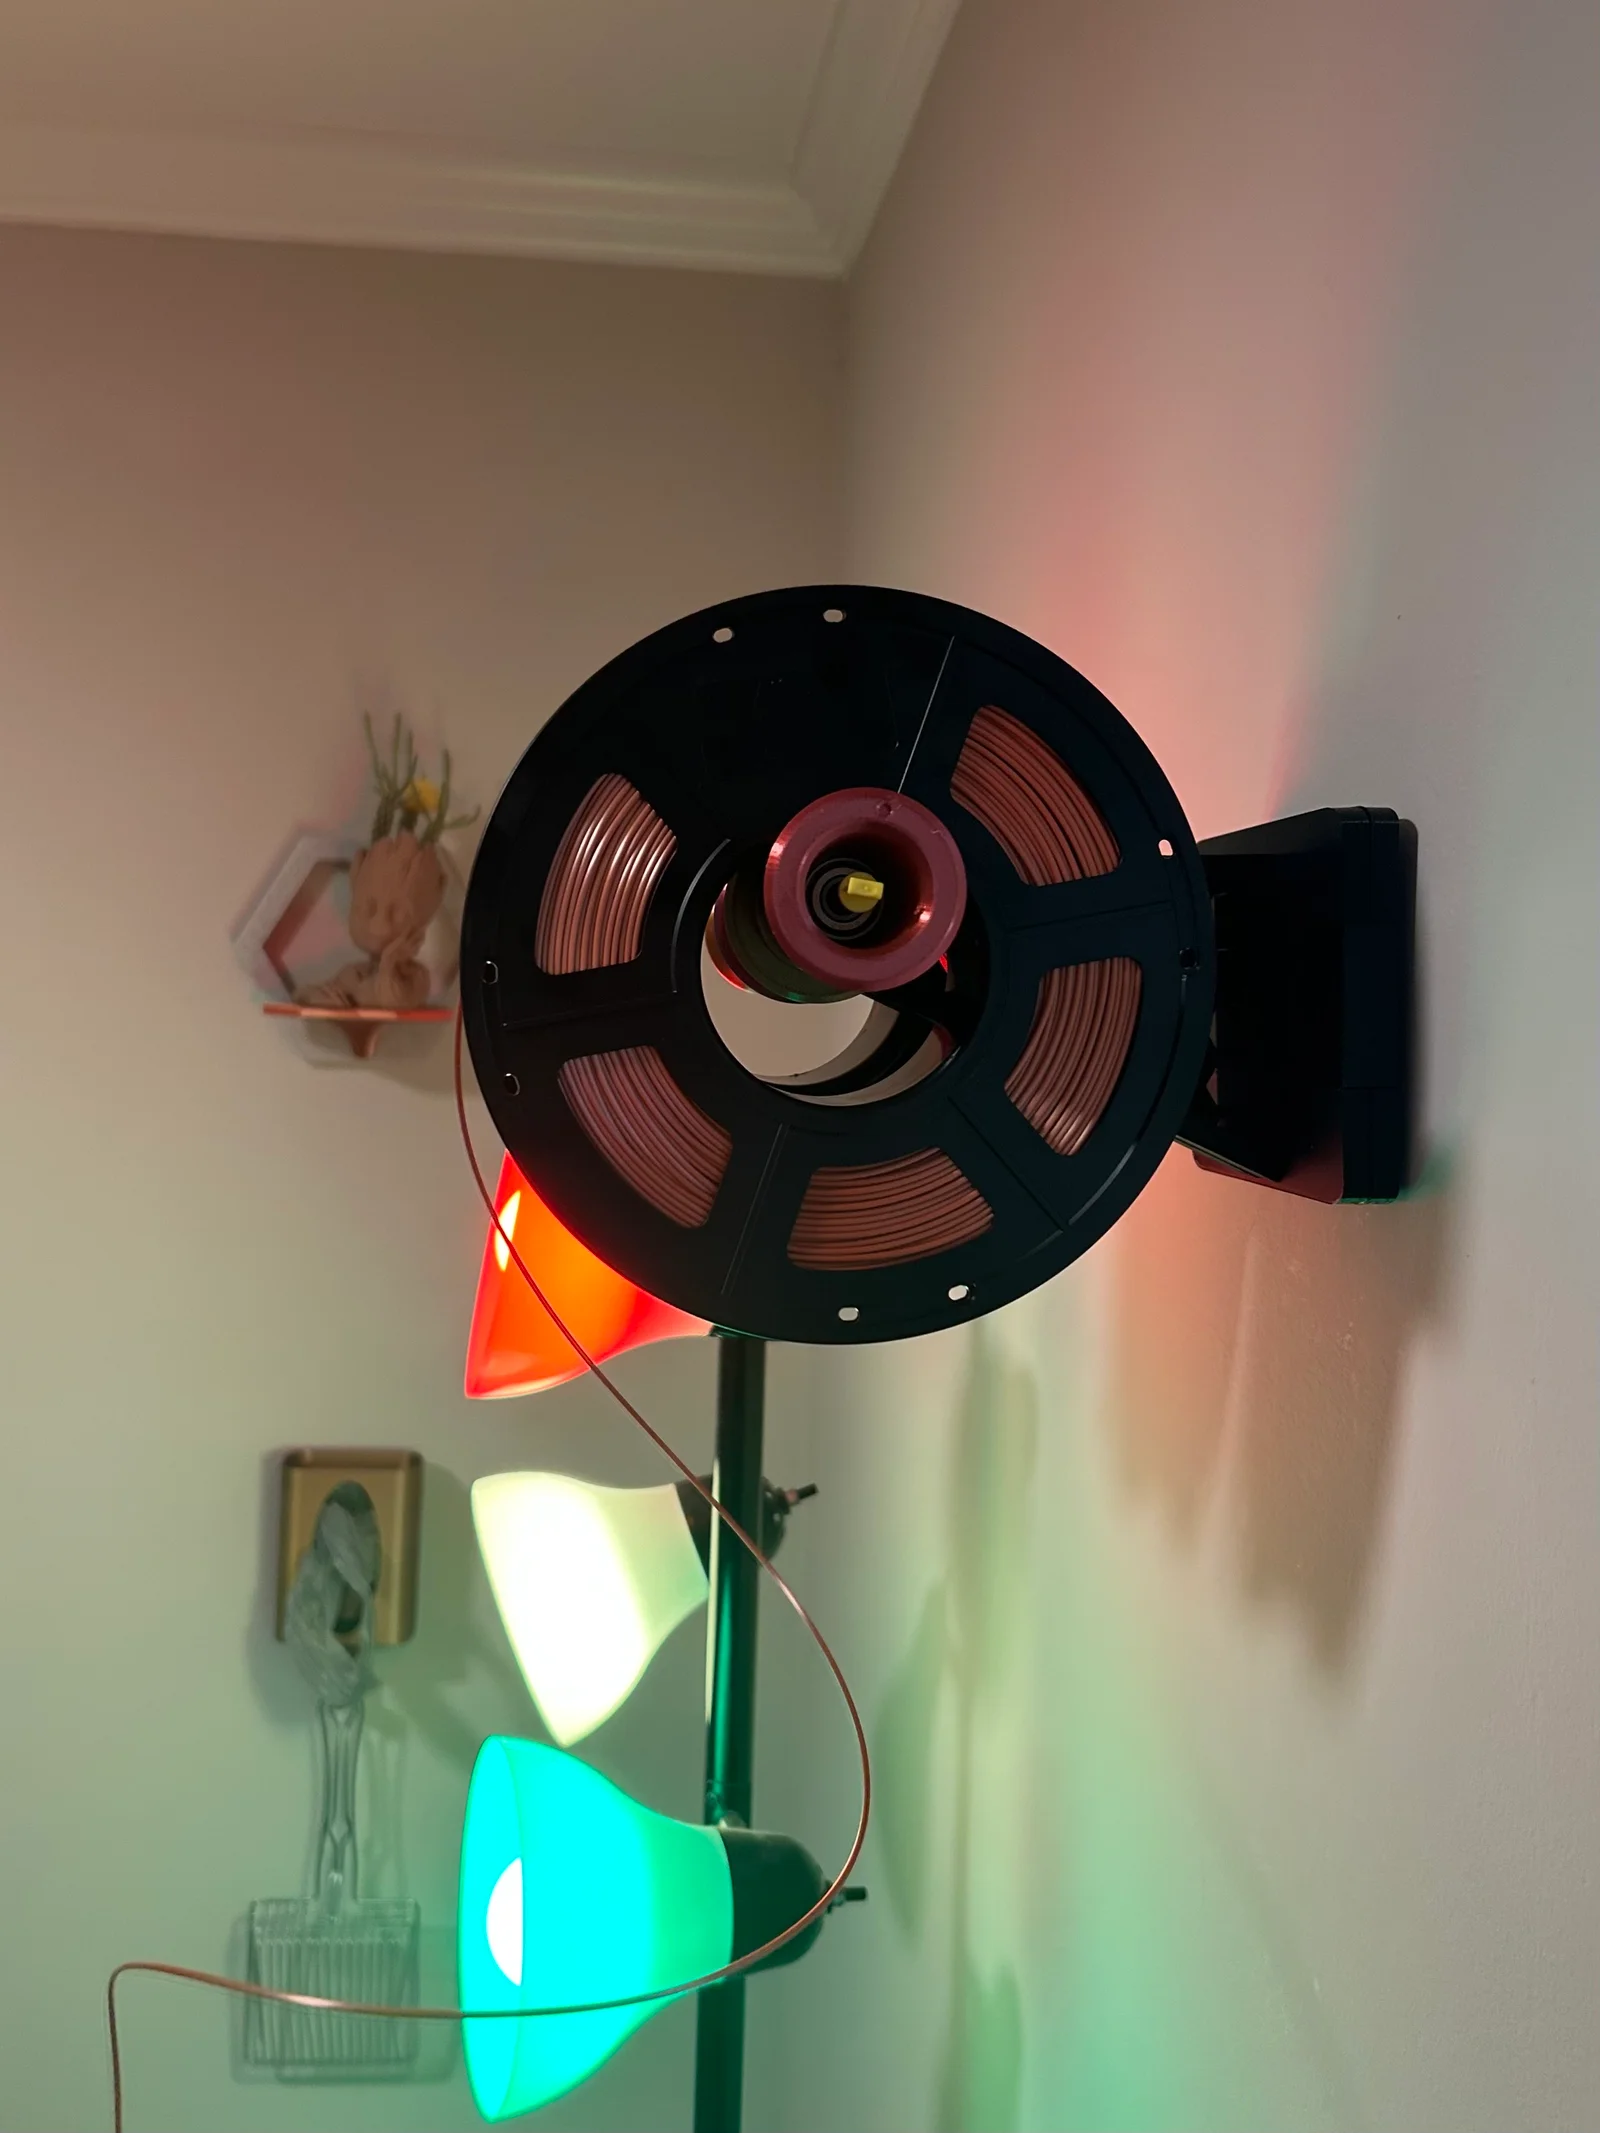


Kẹp giữ sợi Filament
 Bytinx_1344834Likes1.2KDownloads6K
Remix of Móc treo tường Command Strip lớn dễ in By ChippWalters
Build another version of this model.
Uh oh, your landlord doesn't allow you to put holes in the wall. How are you going to organize your active spools without taking up all your desk space? Things were great when you could utilize the magic of screws...
But wait! There is a solution...the Command Strip Spool Mount!
Hold on, though. How can a glorified piece of tape restrain the potential energy of plastic filament from crashing down onto your messy desk?
Well, it can with 4 XL pieces of the controversial sticky Velcro! Let's see how this works.
This object is the hybrid child of the following 2 models with a splash of gene editing: https://www.printables.com/model/423017-command-strip-hook https://www.thingiverse.com/thing:3070317
Printer Brand:
Prusa
Printer:
I3 MK3S
Rafts:
No
Supports:
No
Resolution:
0.2
Infill:
20%
Filament: Any PETG/PLA
Printing Notes:
Print 2 Clasps, 2 Rollers, & 1 of every other piece.
You may need supports for the 2 drafts on the Spool Mount. I used PETG for the arms & PLA for the remainder.
Command Strips
You will need 4 pairs of the XL Picture Hanging Command Strips such as these: https://a.co/d/0Xnm0n1
Velcro together the pairs & stick them to the Wall Mount - Male piece. Make sure the bevel is upright for mounting. Trim the flaps of the strips so that they are hidden behind the Spool Mount, but long enough to still be pulled for removal. Attach this to the wall of your choice & wait at least an hour to allow the adhesive to bond.
Assembly
Align the Spool Mount and Plate - Female so that the arms can slide down into the holes in the Spool Mount and the Plate can slide down onto the Wall Mount. Attach them together with the Clasps.
Align the 2 arms & mount them on the Spool Mount. They should fit snugly. I also recommend gluing the far ends together to close the slight gap between the 2.
Insert 2 ball bearings of type 608 (22x8x7) into each Roller. Attach them to the Arms with a M8 rod. I designed this version to use the 120mm M8 rods provided in the MMU upgrade, but you could also use 180mm M8 rods recommended by the original designer. If you have them, use the yellow stopper to keep the Rollers from sliding off. Each Roller should spin freely.
To finish, slide the assembled Spool Mount onto the Wall Mount & hang your spools. Have fun printing!
Category: 3D Printer Accessories
Bytinx_1344834Likes1.2KDownloads6K

 ByAlex_3996727Likes29Downloads68

 BywendigoLikes0Downloads122

 Byprusa-researchLikes0Downloads780

 BydalleLikes0Downloads147

 Byarhi_585078Likes64Downloads543

 ByHanzo3dLikes155Downloads415

 ByGeek5DLikes147Downloads489

 ByBrokentooth_designsLikes23Downloads410

 Bycrawler-3903250Likes0Downloads907

 Byartme-3dLikes0Downloads335

 By3DSourcererLikes48Downloads377