Argon One - USB 3.0 Hub
- Downloads
- 39
- Likes
- 1
- Views
- 649
- Remixes
- 0
- Comments
- 0
Files 1 455.4 KB
- Argon_One_-_USB_3.0_Hub_1765997693.stlSTL · 455.4 KB
Make a variant with AI
Build another version of this model.
Details
- Model ID
- #92340
- Category
- Dụng Cụ Tiện Ích
- Published
Description
Background
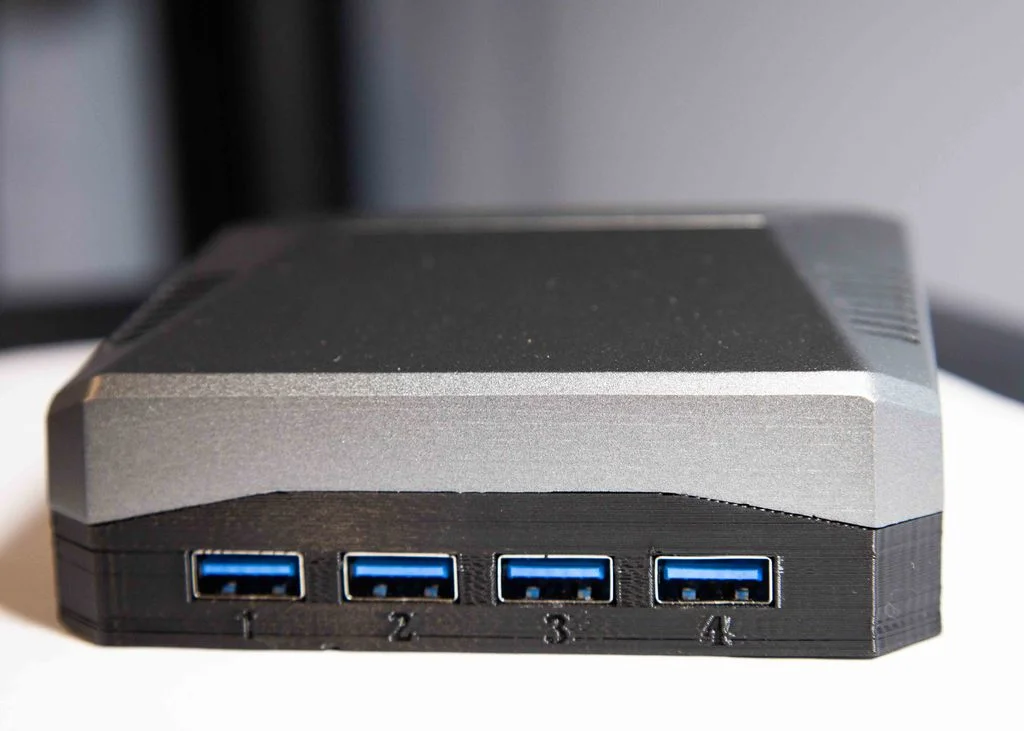
I needed front access to USB on the Argon One Raspberry Pi 4B case. (v1 and v2)
It didn't need to be USB 3, but I figured why limit it to 2.0!
I tried using the Anker 4 port hub but due to the cable on the side of the PCB, this wasn't possible inside the dimensions required.
I was able to find a hub with the cable exiting from the rear which was perfect.
To convert the male A of the hub's cable, I was able to find a right angle keystone jack that did the job.
Parts Needed
- 1x - ORICO 4-Port USB 3.0 Hub: here or here
- 1x - Poyiccot USB 3.0 Keystone Jack, 90 Degree
- 2x - M2x3mm screws
- 1x - USB 3.0 180° Connector Bridge Adapter (multiple sources)
- Comes with the Argon One M.2 Case
- eBay Item:194014551651
- Aliexpress
- 1x Argon One Raspberry Pi 4B Case (all versions are compatible)
- Version 1 (Link not available, but it has micro HDMI connections)
- Version 2
- Version 2 with M.2 Board (Can't use this with the M.2 board attached)
- Nanosound HiFi
- Electrical tape
Instructions
- Print the part
- Remove the USB Hub from its housing
- Remove the keystone jack from its housing
- Place they keystone jack's PCB into the slot on the rear, it should sort of snap into place.
- Place the USB hub PCB into the from of the printed part. There are two screw holes that should fit inside the PCB's mounting holes.
- Screw down the USB hub PCB using the two M2 screws.
- Plug the hub's cable into the inside port of the keystone jack, routing it in a loop.
- Secure the keystone jack (or don't) with some hot glue.
- Cover the keystone jack and USB ports with electrical tape because it's pretty snug and it could short out the pi.
- Unscrew the bottom of the Argon ONE case (keep the screws)
- Screw the assembled printed part onto the bottom of the Argon ONE with the screws that were already there.
- Connect the USB bridge adapter to the back of the printed part and Pi.
- Have a snack, you done good kid!
Print Settings
Printer Brand: FlashForge
Printer: Inventor
Rafts: No
Supports: Yes
Resolution: 0.200mm
Infill: 20%
Filament: Inland PLA Black
Print spec
- Formats
- stl
- Model files
- 1
- Total size
- 455.4 KB
- Largest file
- 455.4 KB