



Thằn lằn cử động linh hoạt - In tại chỗ (Không cần support)
 Bycream110_291842Likes924Downloads7.7K
Build another version of this model.
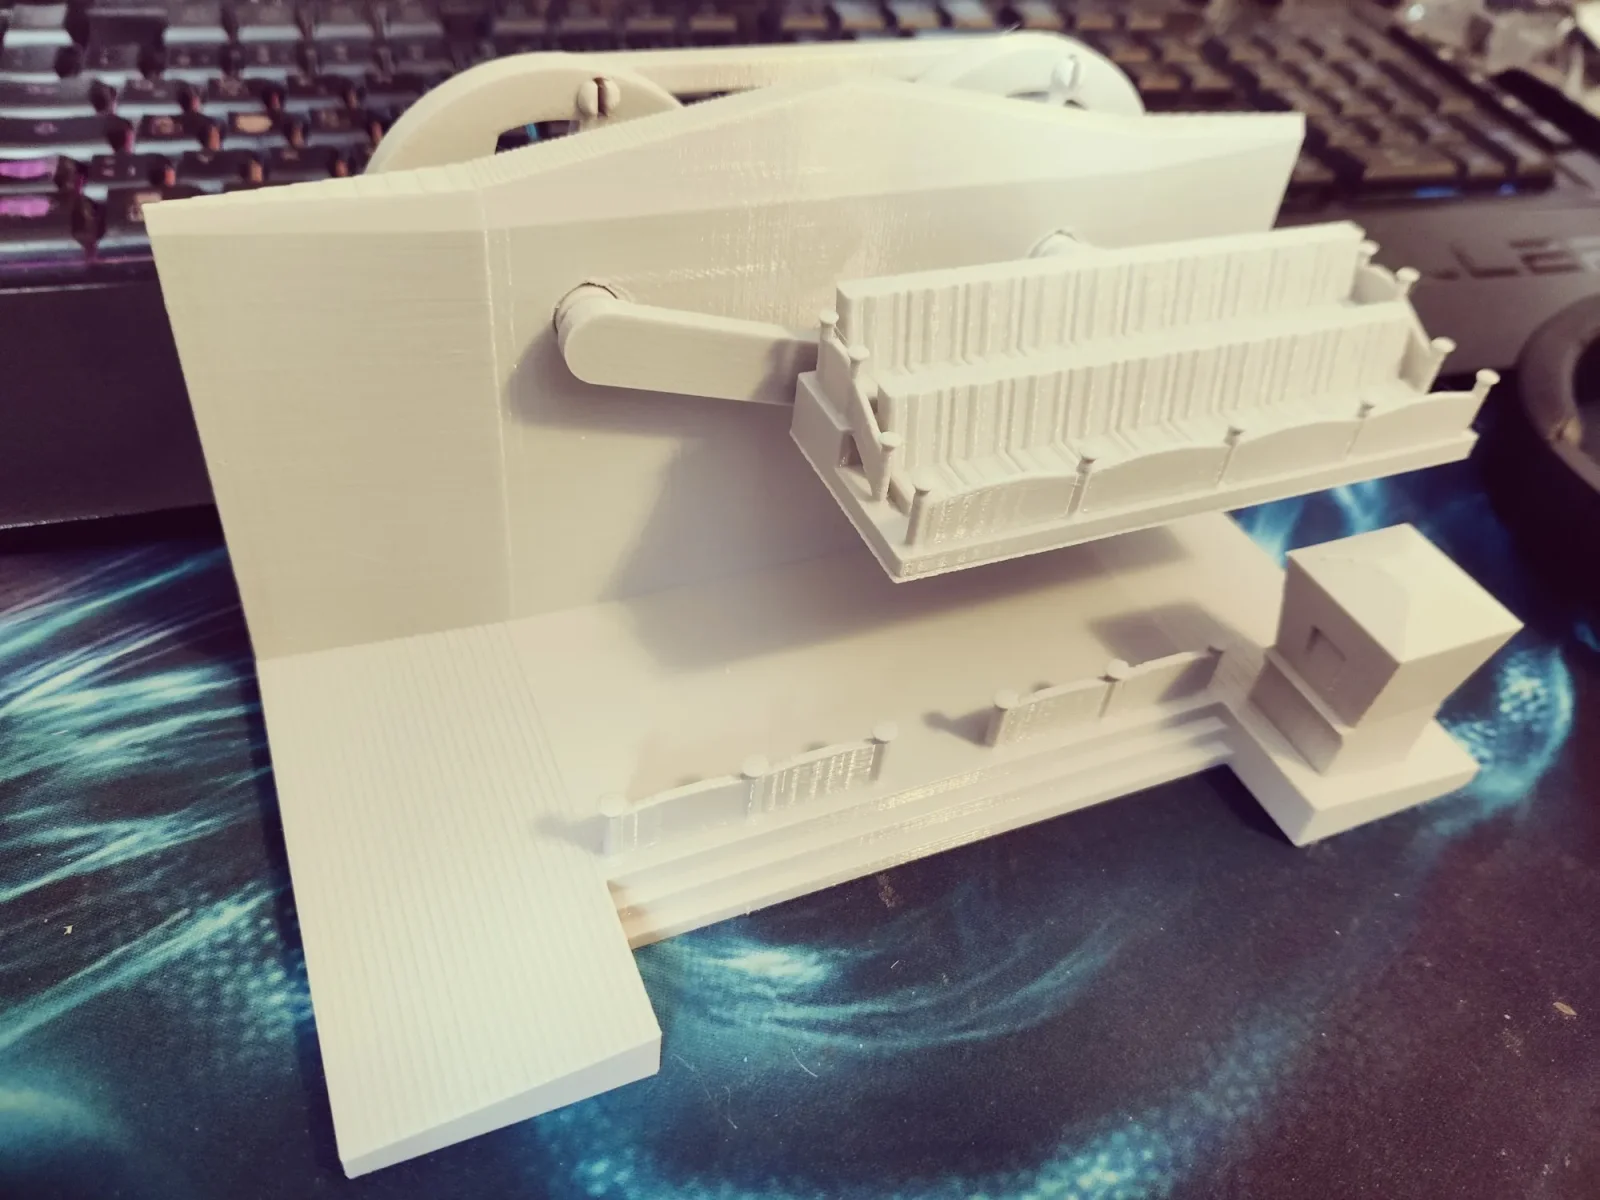
This Model is a free-form designed Fun Fair attraction that is known under a lot of names, like “Crazy Dance”.
It can be easily printed on most 3D printers (biggest part is <20cm wide) and has only one part that requires support.
Since I suck at painting, if you print it please publish a make with your paintings on it.
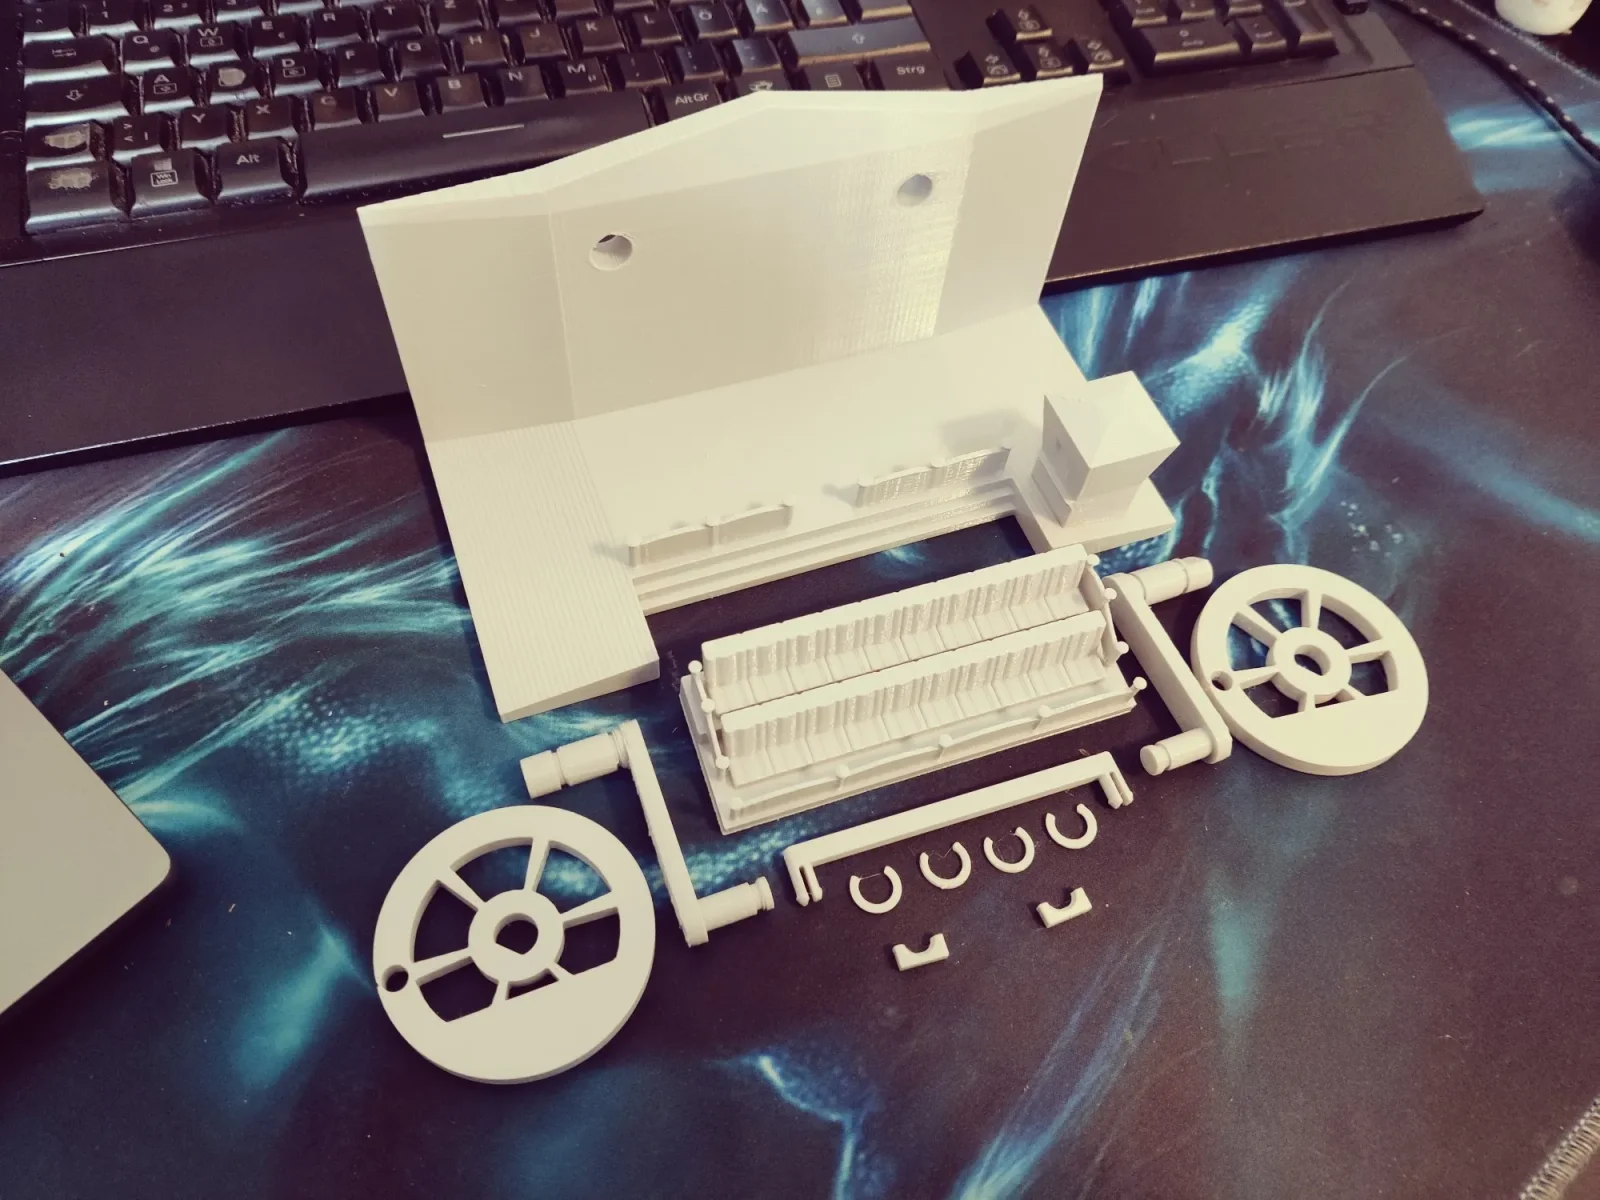
Part list:
Part
# of Prints
Remarks
Arretierung.stl
2
Locks that keep the arms from falling out of the carriage.
Bodenstation.stl
1
Scheibenwischer Wagon.stl
1
should print without support just fine.
Schwungrad-Arm.stl
2
Best to print with the thick end (the trimmed circle) on the plate. Only part that definitely needs support.
Schwungrad-Clip.stl
4
Tension Rings. Let them cool a bit after printing to prevent them from changing shape while still warm.
Schwungrad-Rad.stl
2
Schwungrad-Synchronstange.stl
1
Assembly:
First, stick the two arms through the base plate with the thicker, trimmed circles. Fixate both arms with 2 Tension rings each in the insets on both sides of the base station wall.
Next, push the arrestor locks part-way into the carriage (you might have to cut the top part a little to make it fit, it's extremely tight fit).
Attention: don't push them all the way in, they won't go out afterwards and if you push them in before mounting the arms you will not be able to mount them at all.
Now, you can mount the Carriage onto the arms and click the arrestor locks in place. The carriage should now no longer be able to slide off the arms.
It's now time to mount the wheels on the backside. It's important to mount the wheel such that the outside hole for the synchronizer bar is offset to the arm position by 90° If it's offset by 180° flip the wheel.
The last step is to install the synchronizer bar into the wheels by clipping it into both holes.
That's it!
Source files are included as always, this time I made part of it in FreeCAD and another Part of it in Blender.
Bycream110_291842Likes924Downloads7.7K

 ByOnemoredaveLikes861Downloads6.9K

 Byjs14581_2767550Likes118Downloads3.3K

 Byquibeck_3353173Likes351Downloads2.1K

 ByTheMakerStuffLikes315Downloads1.9K

 ByGoolow_295072Likes598Downloads1.6K

 ByMikWantecLikes264Downloads1.5K

 BySzvmkn_3779340Likes231Downloads1.3K

 ByHacker Man ManLikes248Downloads1.5K

 Bycentarico_3241219Likes257Downloads972

 Byfluffytails37Likes184Downloads766

 ByHkillebrewLikes65Downloads159