



Thùng rác in Vase Mode
 BybobmakesLikes2.5KDownloads17.5K
Remix of Eos - Vỏ chuột tối giản dựa trên Logitech G402 Hyperion Fury By Jansakas
Build another version of this model.
What is this?
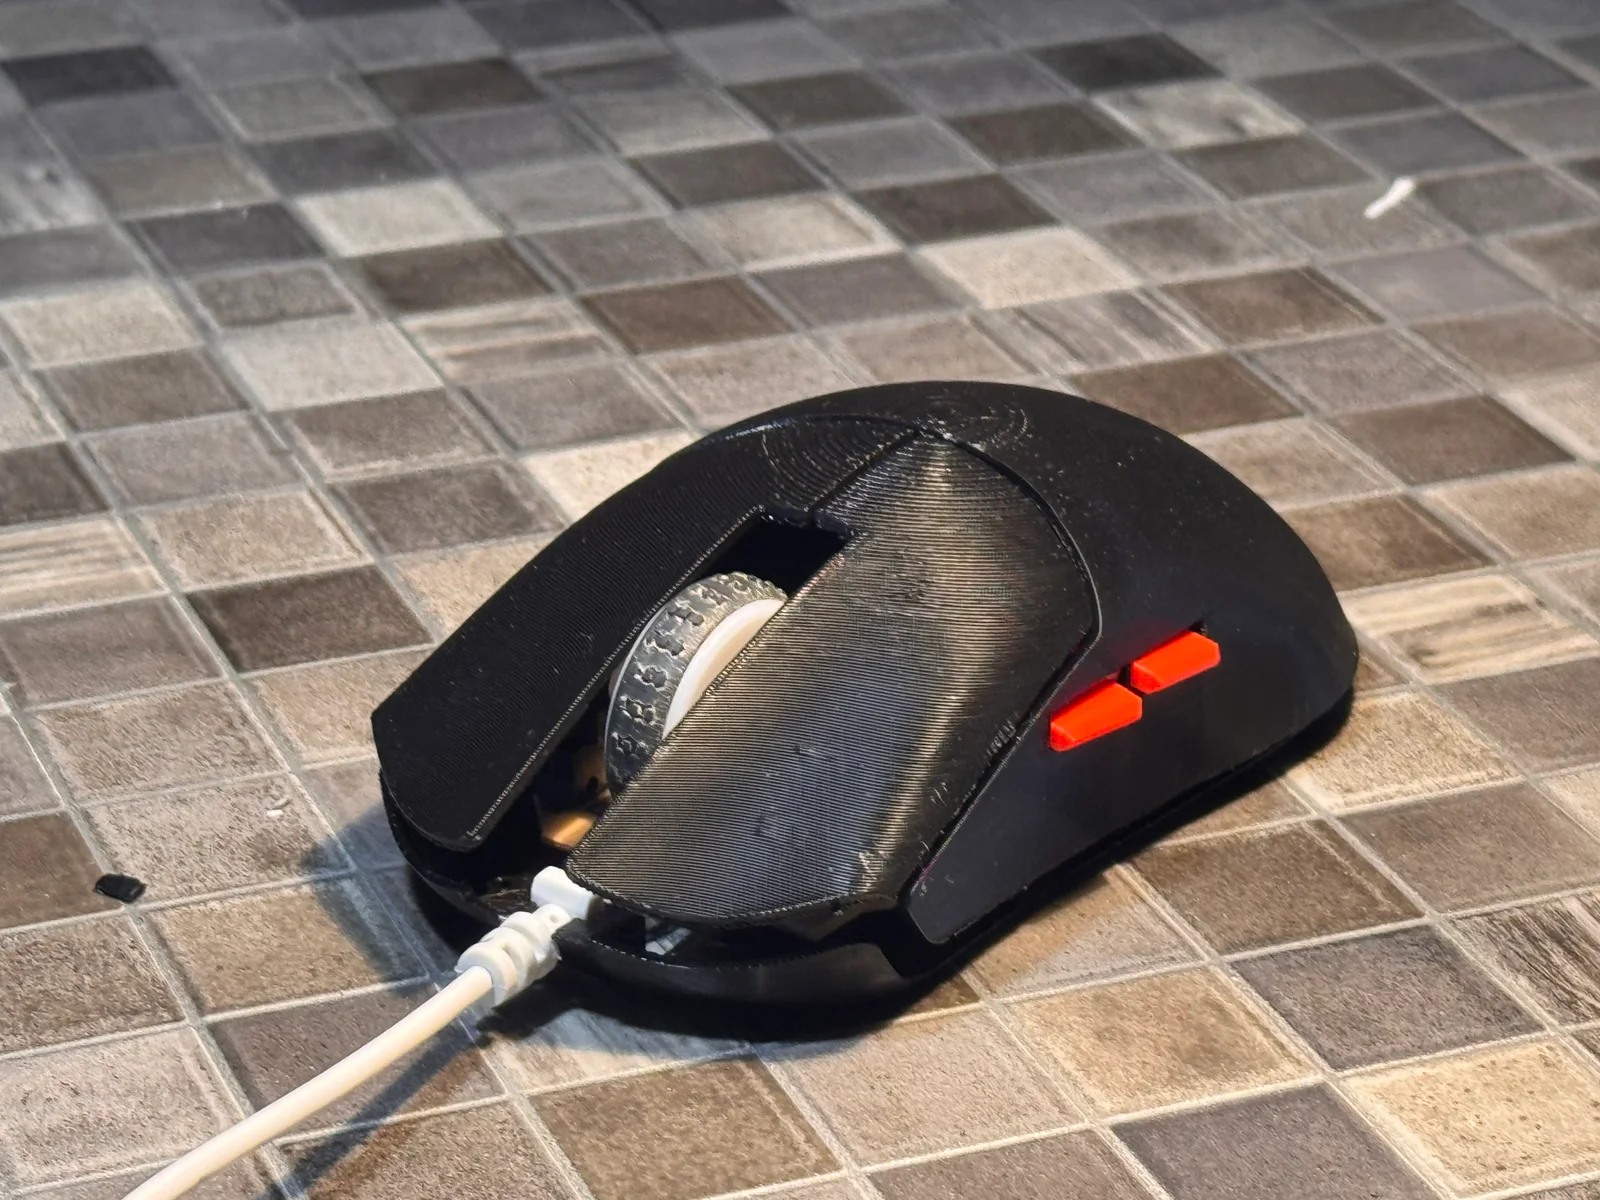
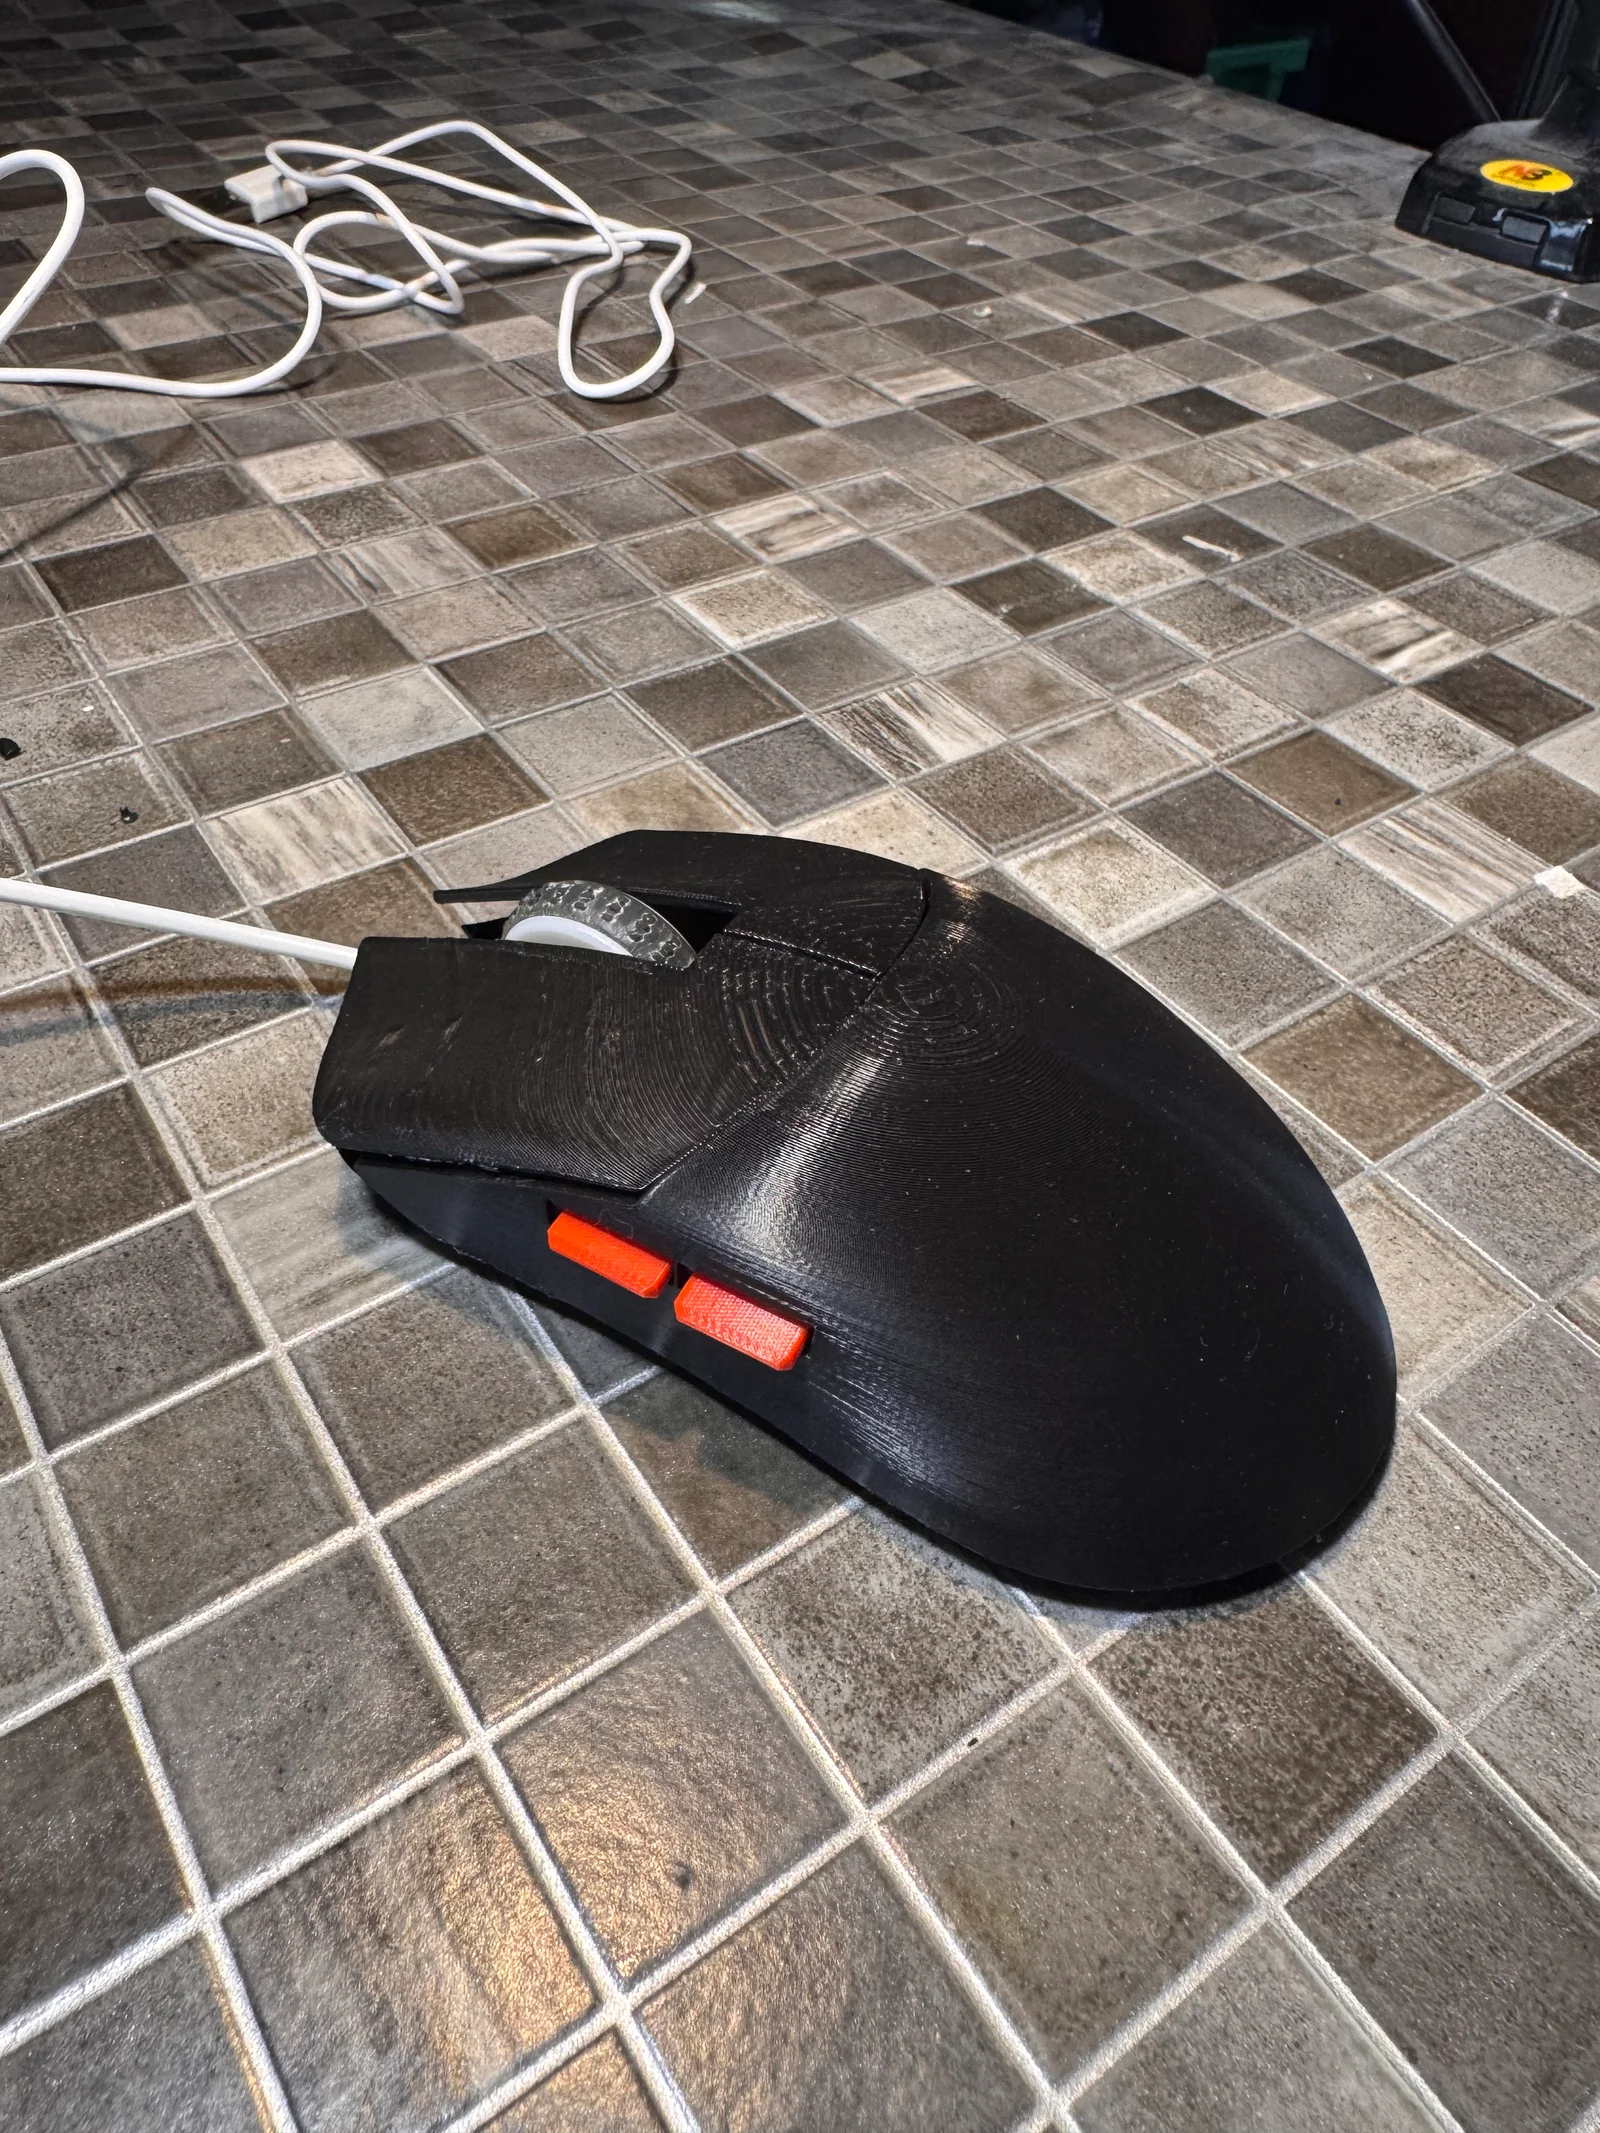
This is a modified mouse shell built to house the guts of a Razer DeathAdder Essential — PCB, switches, sensor, the whole nervous system — inside a different body.
The backstory: a friend of mine attempted a transplant of his DeathAdder Elite internals, it went sideways, and the project died. 💀 I inherited the leftover DeathAdder Essential electronics from that failed operation and decided to give them a new home. Think of it as an organ donor situation — the original patient didn't make it, but the parts live on.
This model is a remix of an existing design (original credit + link below). I reshaped it so the Essential's internals actually fit.
⚠ Original model credit: link. All credit for the base geometry goes to the original author; this remix just butchers it into a DeathAdder-shaped container.
🙏 The real reason I'm posting this
Let me be honest with you: this design is a war crime. ⚖
It works. It's a functioning mouse. But it's held together by stubbornness and questionable geometry, and there are a bunch of rough edges (literally and figuratively — see Known Issues).
I'm uploading this specifically so the community can fix it. Please:
Remix it 🔁
Improve the tolerances
Fix the button geometry
Straighten out the scroll wheel
Do literally anything to make it less of a crime
If you make a better version, I genuinely want to see it. Consider this less of a "finished model" and more of an open wound waiting for a surgeon. 🩹
🖨 Printing notes (read before you slice) ⚠
Fair warning: this model is a support apocalypse. 💀 It was not designed with printing in mind — I shaped it for fit first and worried about printability never. Expect a forest of supports, ugly overhangs, and some cleanup afterward.
If you're remixing, making this actually print-friendly is one of the biggest wins you could contribute. Split parts, add proper support-friendly geometry, reorient for the bed — go wild.
📦 Included files
STEP — for CAD editing in pretty much any parametric software
3DM (Rhino) — the native working file, if you want the SubD/NURBS source
STL — ready to slice and print
Also included: photos of the assembled mouse and a step-by-step photo guide for putting it back together. 📸
🛠 Bill of Materials (screws)
You'll need three types of screws — think of them as three layers of an onion, each holding a different part of the sandwich together:
Screws
Qty
Job
M3×5
3
Mount the PCB to the base plate
M2×4
4
Mount the 4 spring plastics that press the buttons onto the PCB
M2×8
4
Join the base plate to the top shell
🔩 Assembly — step by step
The first photo is a labeled parts-reference shot showing what every piece is — start there to get your bearings, then follow the steps below. Part names match the STL filenames 1:1.
Step 1 — Seat the sensor lens. Drop the clear plastic lens (the transparent little piece) into its slot in 01_BasePlate, where the mouse sensor sits. 🔍
Step 2 — Plug in the USB cable. Connect the USB cable to the PCB first — doing it now makes routing the cable way easier than fighting it later.
Step 3 — Anchor the cable end. Seat the cable's strain-relief end into 01_BasePlate so it doesn't dangle around while you work.
Step 4 — Drop in the PCB. Place the PCB into 01_BasePlate so the cable runs underneath the board — but make sure it isn't lifting the PCB up. The board needs to sit flat, not propped up on its own wire. 📏
Step 5 — Screw down the PCB. Drive the 3× M3×5 all the way into 01_BasePlate, locking the PCB in place.
Step 6 — Press-fit the scroll wheel. Push the scroll wheel onto its posts — it's a friction fit, just press it home. 🎡
Step 7 & 8 — Mount the main buttons. Fit 03_Button_Left and 04_Button_Right into 02_TopPlate and screw each one down → M2×4 each.
Step 9 (optional — only if you enjoy suffering 😅) — Mount the side buttons. Install the botched side buttons: 05_SideButton_A goes on the FRONT of the mouse, 06_SideButton_B at the REAR → M2×4 each. Skip this step if you'd rather not deal with them (see Known Issues).
Step 10 — Close it up. Screw 01_BasePlate to 02_TopPlate → 4× M2×8. ⚠ Take your time here — the holes need to line up cleanly or you'll cross-thread / fight the shell. Align first, screw second.
Done. It's ugly, it's a crime, but it clicks. 🎉
🐛 Known Issues (a.k.a. the crimes)
Full disclosure, because you deserve to know what you're getting into:
Scroll wheel isn't centered and sits at a slight angle. 📐 It's off just enough to notice and annoy a perfectionist.
Side buttons stick. They don't press cleanly and tend to jam. 🫠
Scroll click doesn't work at all — the cheap Chinese clone encoder I ended up with simply doesn't have a middle-click switch. So there's nothing to press. lol.
Main click is mushy / unreliable — it sometimes feels like a single press registers as multiple clicks. Not ideal for anything competitive. 🖱💢
No cable grommet / blank — I forgot to model a proper cover for the cable exit, so the cable isn't locked down and can pop out over time. 🔌 Easy remix target.
None of these are unfixable. They're invitations. 😇
❤ Go forth and improve it
Print it, break it, redesign it, post your remix. The whole point of putting this up is to turn my mess into someone else's clean build. Tag me in your version — I want to see this design redeemed.
Happy printing! 🚀
BybobmakesLikes2.5KDownloads17.5K

 Byquibeck_3353173Likes1.5KDownloads11.5K

 ByVinors3DLabLikes393Downloads997

 ByHydratedMini_1690513Likes173Downloads719

 ByWaffleDude_496342Likes54Downloads139

 ByTommy3DLab_2023125Likes636Downloads2.5K

 Bymoleculecrtr_1215658Likes544Downloads2K

 ByTheMerchant_560996Likes104Downloads271

 Byextrablind_178817Likes40Downloads225

 Bygleb_sexy_1069616Likes42Downloads234

 By178222178222_2484344Likes449Downloads1.7K

 ByEldordLikes499Downloads1.4K