



Kẹp Kính Mát Gắn Xe Hơi
 ByVC_DesignLikes721Downloads2.9K
Build another version of this model.
Use a router, jig, and dovetail hangers to make your own pegboard tool hangers out of plywood or sheet goods that can be easily rearranged. See photo.
Pegboard with 1/4 in. holes spaced 1 in. on center
1/2 in. diameter, 14° dovetail router bit
1 in. router guide bushing
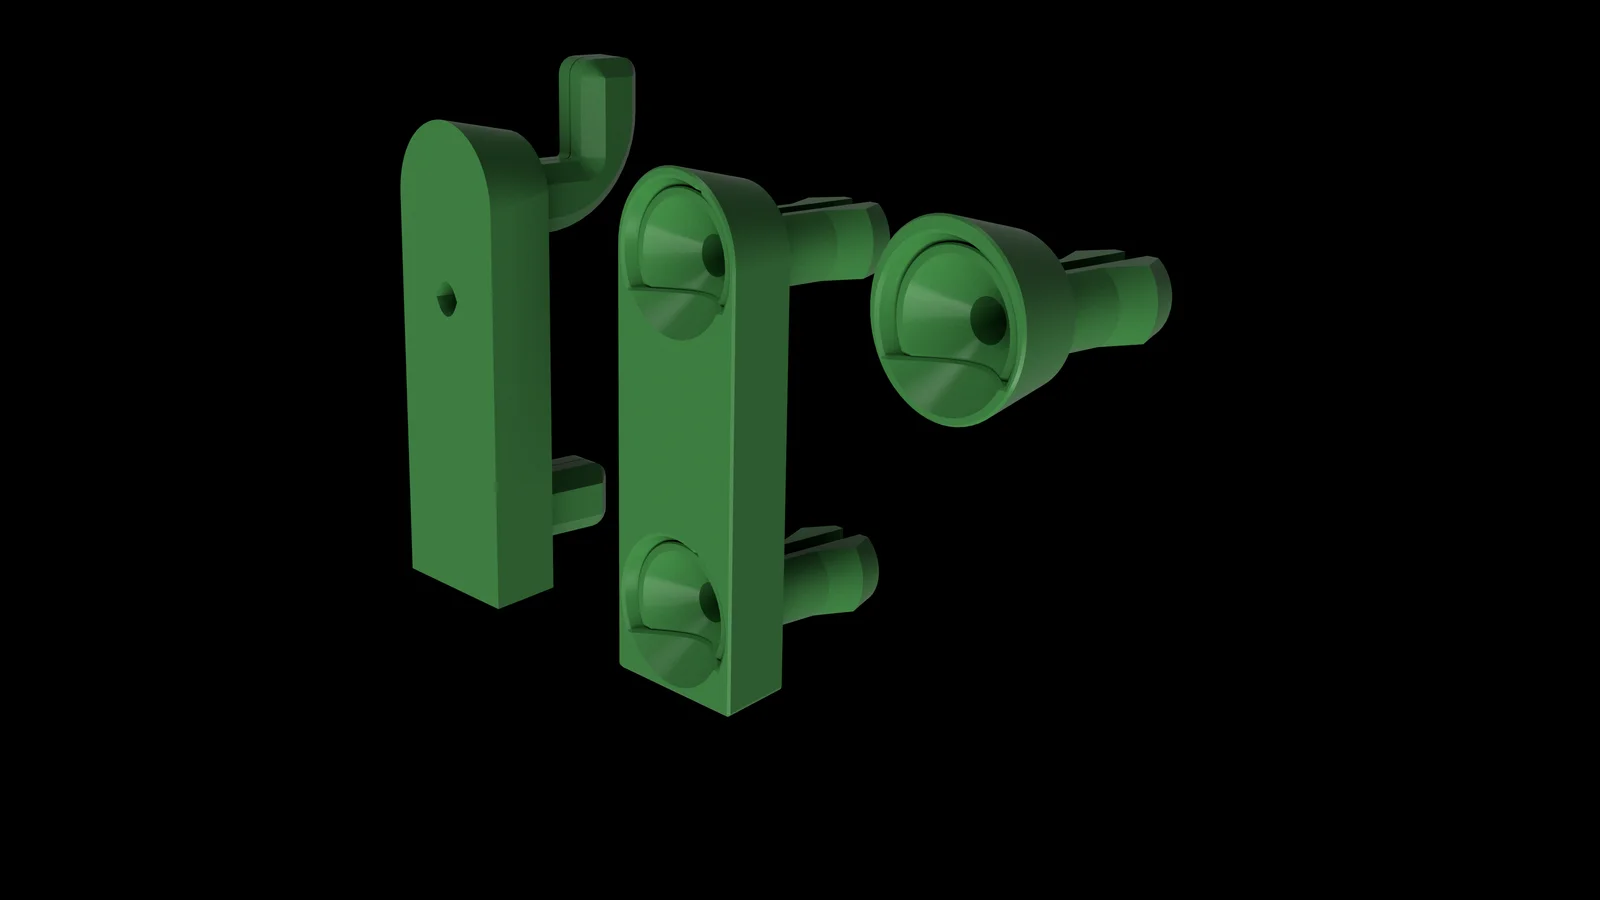
Dovetail Hook - A removable hook that fits the routed dovetail slot. The hook can be locked in place with a screw to prevent accidental removal.
Dovetail Screw-On Mount - Uses (2) anchor inserts and screws to attach hanger to pegboard. I added a small recess on the inside to paint in the seam.
Circular Screw-On Mount - Uses (1) anchor insert to attach hanger to pegboard
Anchor Inserts - Uses screws & screw on mounts to attach to pegboard
It is not complicated to use, I'm just not great at explaining it.
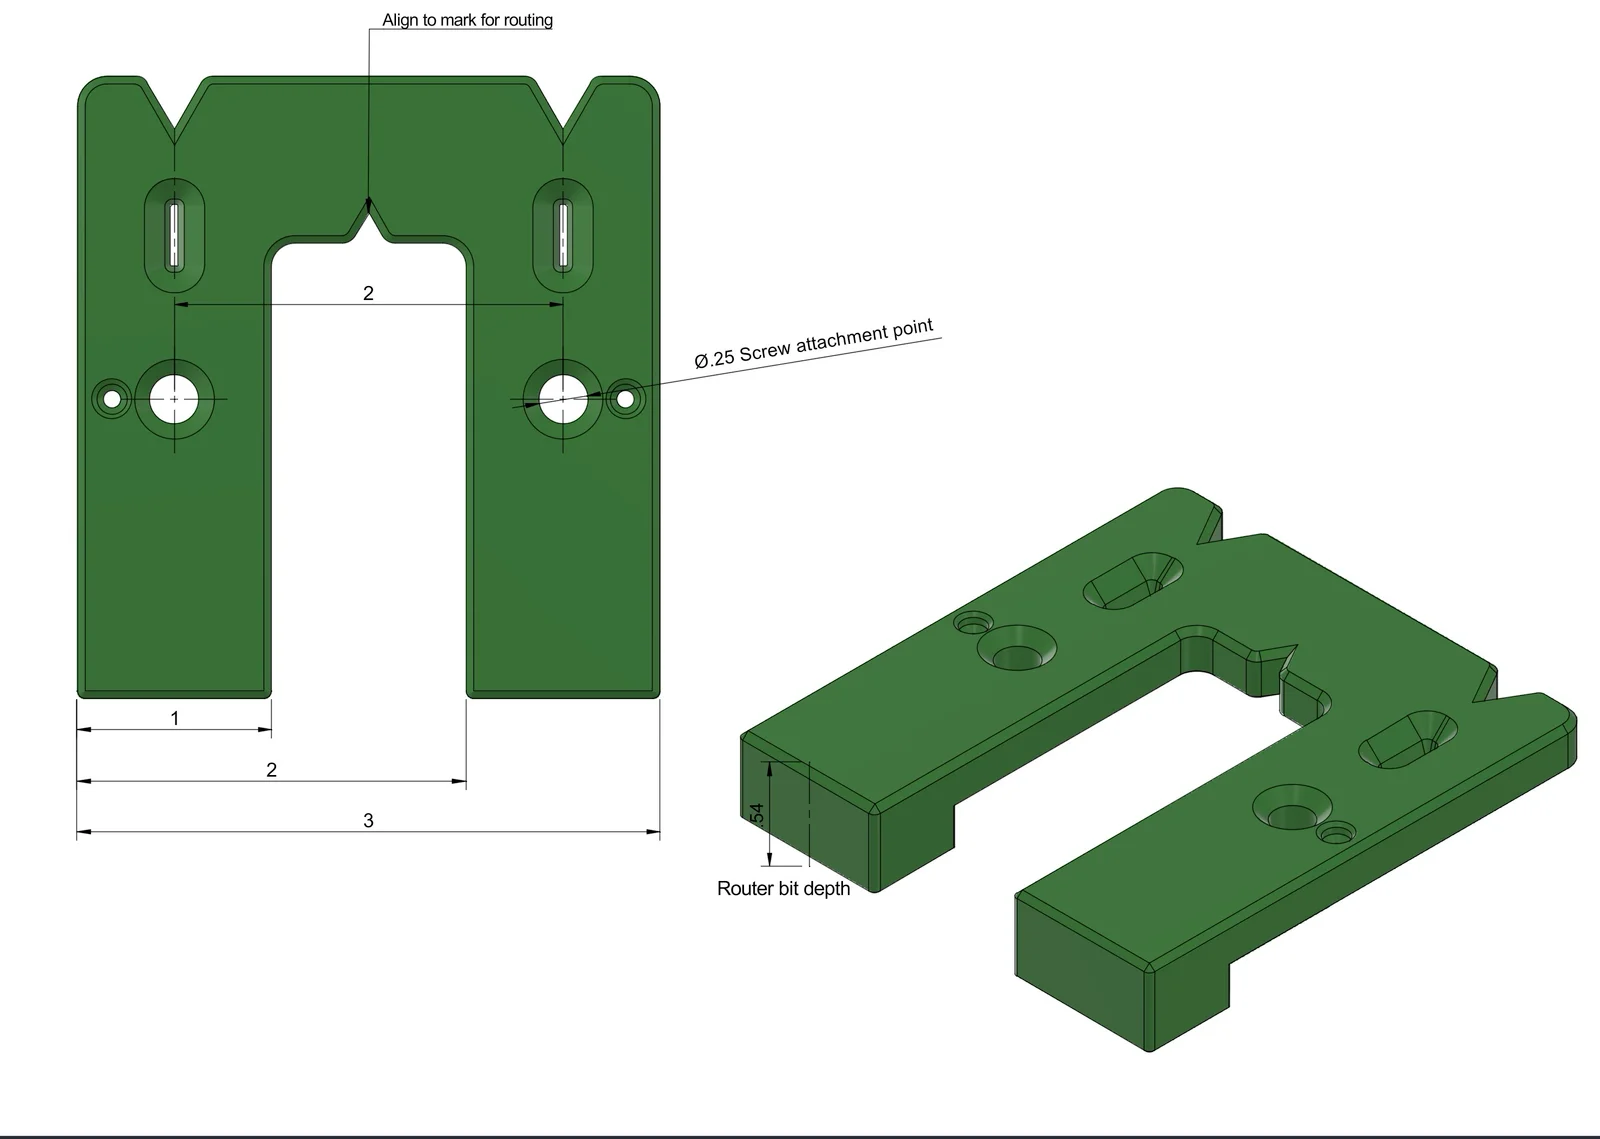
This jig is designed around a 1-inch increments that match standard pegboard spacing of 1 inch on center (O.C.). Examples below of how to use the jig. You could also just use a ruler and mark at whatever 1 inch increments you want and align it to the v-groove on the inside of the jig for routing the slot.
Mark the center of the board.
Align the inside center V-groove on the jig with the centerline.
Use the layout slots in the jig to mark 2-inch on-center locations or the outside of the jig to mark 3-inch on center.
Slide the jig so the center V-groove aligns with the layout marks, secure in place, & route the slots.
You can achieve the same 2-inch on center result by aligning the left and right V-groove at the top of the jig with the centerline.
Secure the jig to your workpiece.
Draw a pencil line along the outside edge of the template.
Route the dovetail slot.
For the next slot, align the pencil line with the appropriate side of the jig to create 1-inch, 2-inch, or 3-inch on-center spacing. See photo attached to model.
If you prefer to secure the jig with screws instead of double-sided tape, you can easily create 2-inch on-center spacing by sliding the jig left or right and reusing one of the screw holes from the previous dovetail location.
A hinge pin drill bit works well for drilling accurately centered attachment holes.
The alignment face that references the plywood also serves as the guide for router bit depth. Always make a test cut on scrap material and adjust the depth as needed before routing your final workpiece.
You can use a screw going from the front of the tool holder into the hole of the dovetail hook to prevent it from lifting off the hook. To do this, slide the dovetail hook into the router slot, mark the hole location, and drill through to the front of the tool holder. The countersink the hole on the front of the tool holder, attach to dovetail hook on pegboard, and use a screw to lock it in place.
ByVC_DesignLikes721Downloads2.9K

 ByUpcrid3D_1585693Likes808Downloads2.1K

 ByWilko_SLOLikes935Downloads2K

 ByshoheiyLikes0Downloads429

 ByRobertoGalloc_356815Likes549Downloads1.8K

 ByTater_364200Likes486Downloads1.6K

 ByfifindrLikes709Downloads1.7K

 Bywhilex_1739192Likes644Downloads1.1K

 ByGi_TLikes801Downloads1.3K

 ByzeroflowLikes186Downloads1.2K

 ByMatthew_GhostLikes350Downloads942

 ByleonicLikes0Downloads1.4K