



Dino Snack Clip - Kẹp miệng túi hình khủng long siêu đáng yêu
 ByTommy3DLab_2023125Likes636Downloads2.5K
Build another version of this model.
I have an older KitchenAid, lever type, from the early 1980s. It's an absolute beast, but after so many decades, there's some play.
The ice cream maker for KitchenAid is friction-fit and pawl-driven. It's a clever design, because if and when the ice cream becomes too stiff to stir, it flexes slightly and falls apart, instead of damaging the attachment or the mixer.
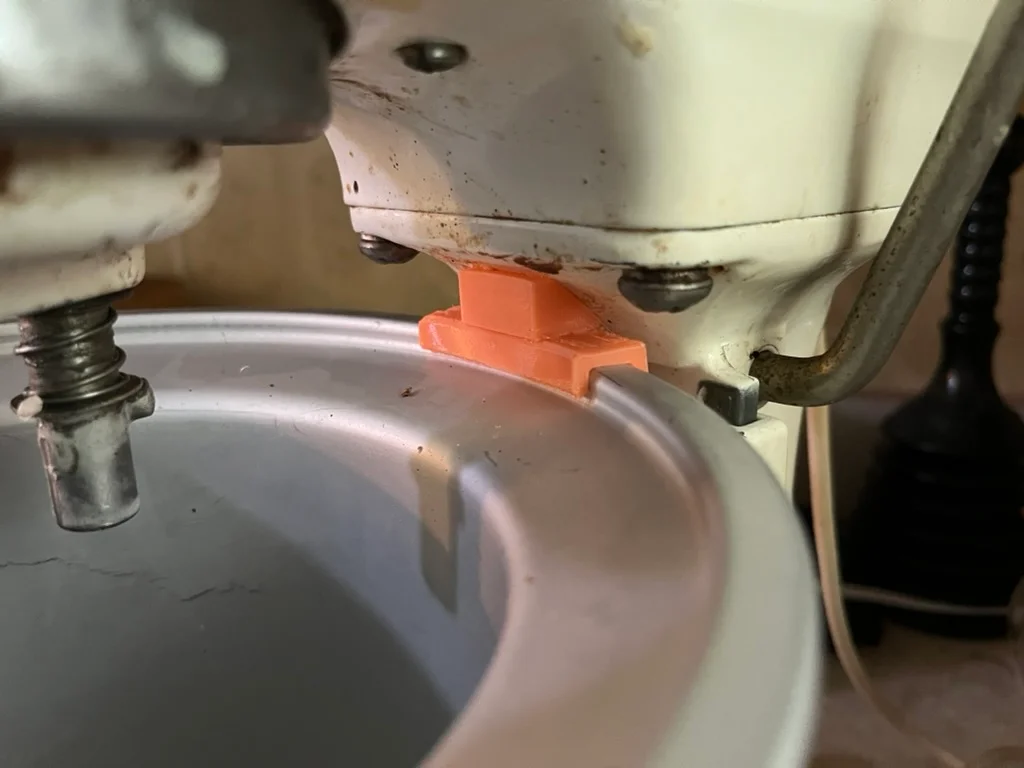
However, given the someone loose conformation of my elderly mixer, this makes things a little bit... delicate. Exciting even. I've greatly increased reliability by cutting some squares of kitchen glove latex out, and using them between the pivot and the mixer, and the pivot and blades, but it's not quite enough: as the ice cream chills, the bowl starts rocking back and forth, and eventually this will lead to sudden collapse if I don't babysit the speed very carefully.
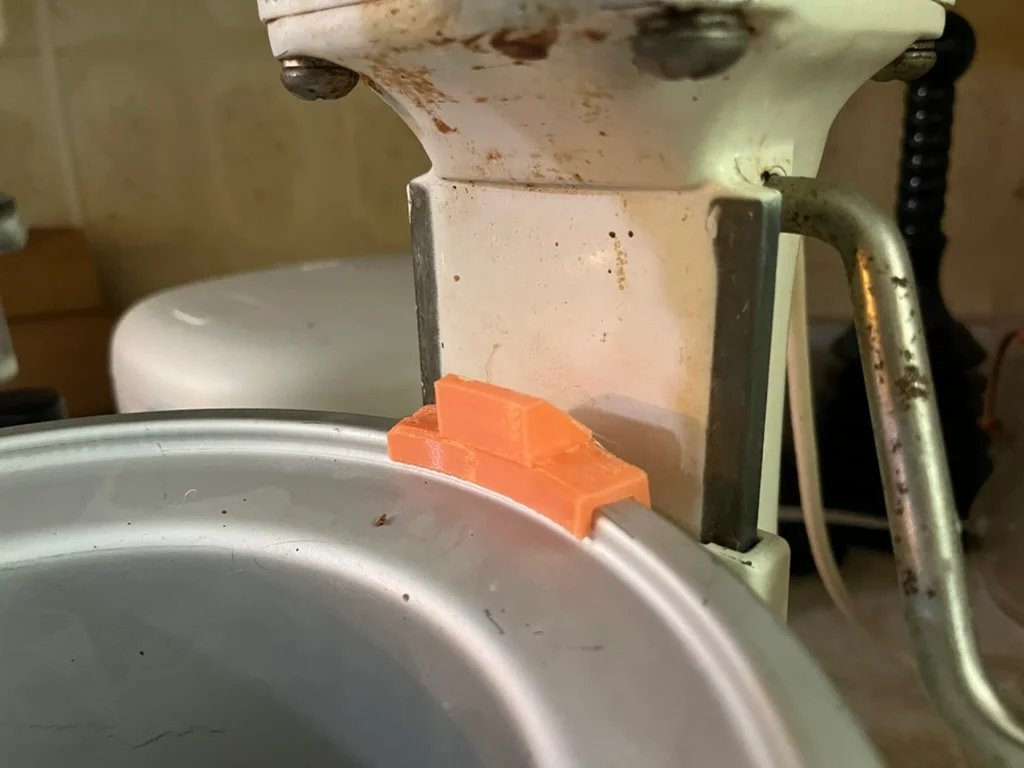
So I whipped up a little part in OpenSCAD. It fits over the rim, in the back (as illustrated), and takes up the slack, giving a much smoother ride.
NOTE: this is for a lever-arm KitchenAid, not a swing-head KitchenAid. I include the script so you may be able to adapt it to the the latter.
You'll want to use TPU for this: it's designed to be a couple mm oversized and compress into place. A stiff plastic like PLA or even PETG could damage the ratchet on the lever, so don't do that!
I used a high-durometer TPU: Justmaker TPU 64-D, in "shy pink". Best results on a 0.4 nozzle were 2 walls, including top and bottom, and concentric infill.
The part is designed to be printed without supports, ramp-side down, using the version of the model with "ears". Cut the ears off after with plastic snips, and if you have a bit of roughness on the outside edge (I did, but not so bad), you can clean that up with the snips as well.
The no-ears version of the part is also included, if you have a printer which can do support material, you'll probably want that one instead.
ByTommy3DLab_2023125Likes636Downloads2.5K

 BybobmakesLikes2.5KDownloads17.5K

 BydalleLikes0Downloads178

 Bydimmel-designLikes0Downloads151

 ByTony Bullard BullardLikes465Downloads687

 ByDeltaprintsLikes56Downloads169

 BygentledesignLikes0Downloads134

 Bym-collectableLikes0Downloads3.9K

 Byquibeck_3353173Likes545Downloads3K

 ByJackLikes145Downloads768

 Byeli_667847Likes171Downloads371

 Bylayer-forgeLikes0Downloads598