



Mẫu tranh treo tường nghệ thuật phong cảnh thiên nhiên Nature Decor
 ByCodyMeyer_2545340Likes163Downloads730
Build another version of this model.
Description:
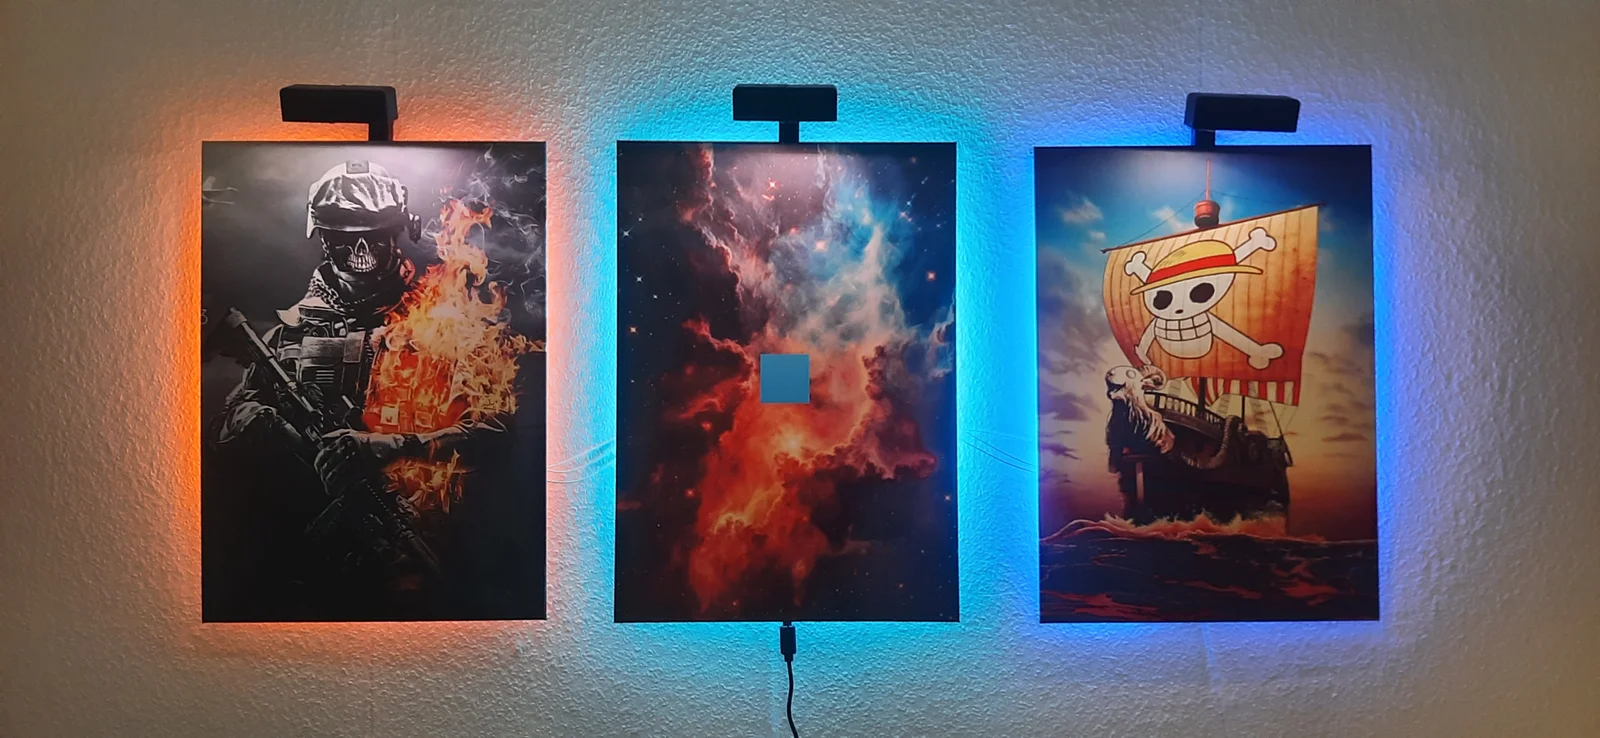
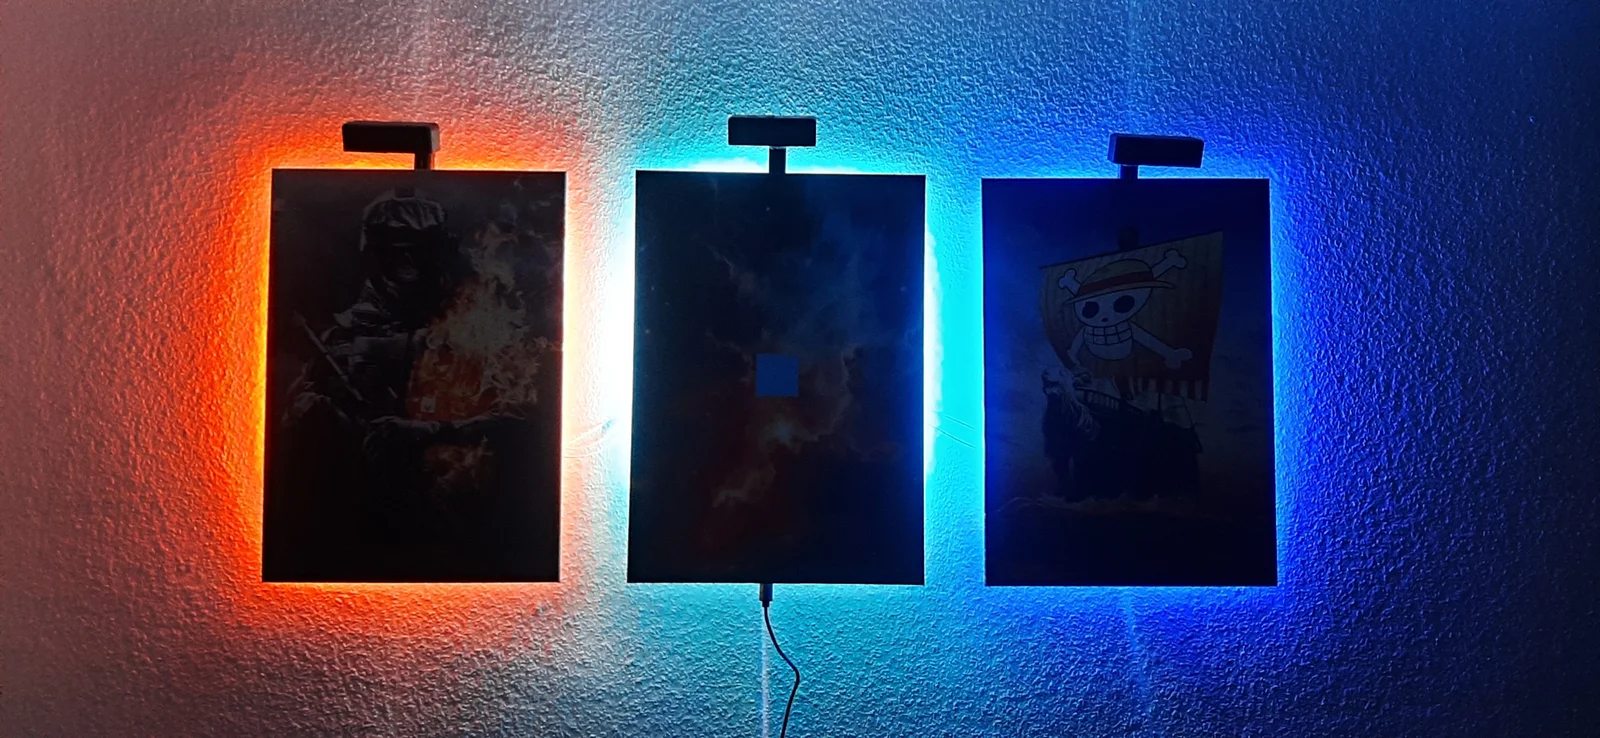
This 3D-printable project adds a fully customizable LED backlight to your medium-sized Displates, powered by an ESP32 running WLED. The design is modular, easy to assemble, and ideal for setups using a gallery rail or nail mounting.
Overview
The system prints in two parts that simply snap together.
The result is a clean, backlight that highlights your Displate with adjustable effects via WLED.
Materials Needed
5V RGB LED Strip: TODO:: [Link]
5V Power Supply: TODO:: [Link]
ESP32 Board: Runs WLED
⚠ Original builds used an ESP8266, but it is now considered deprecated for new WLED projects.
Recommended: ESP32 for full compatibility and performance.
M3 Screws: For mounting the ESP32
Three colored wires (e.g., red, black, yellow): Power, ground, data
Per Displate: 1 upper and 1 lower Frame part.
Optional:
3D-printed spotlight module (for front illumination)
1x 3-strand white cable for daisy-chaining multiple panels to one ESP32
Perfboard & silver wire for clean internal wiring (recommended)
Tools Required:
Soldering iron, sandpaper, glue, voltmeter, wire cutter/stripper, and a device with USB for flashing the ESP32.
Variant: Create a 3D “Popout” Effect
Two versions of the model are included, each with a different height profile:
The center unit is slightly taller, pushing it a bit further off the wall.
The left and right units are shallower, creating a subtle 3D depth effect that makes the center Displate visually “pop” forward.
This layered effect, emphasizing the piece in multi-panel setups.
If you’re only mounting a single Displate, the thinner model works perfectly on its own.
("Please Remind me to Add the Models")
Mounting Options
Using a Gallery Rail:
Mount the hook facing the Displate. This balances the panel nicely against the wall. Gallery Mounting is a great Option if you want to avoid drilling holes or rearrange artwork often.
The spotlight chassis also includes a filament cutout path for clean cable routing, so it Hangs Straigt.
Using a Nail or Wall Hook:
Mount the hook facing the wall for traditional nail-based hanging.
Assembly
Snap the Two Pieces Together
Choose the correct orientation:
Hook toward the wall for nail mounting
Hook toward the Displate for gallery rail mounting
Attach the Magnet
Glue the Displate magnet to the front of the center piece.
Install the ESP32
Use the dedicated holder at the bottom of the center piece and secure the board with M3 screws.
Wire the LED Strips
Follow the standard multi-strip wiring guide.
In my setup:
The center unit contains the ESP32.
The left and right units connect to it via thin white wires, which are barely visible once mounted.
(Optional) Add Spot Lights
Just cut the LED Strips running around the Frame, at the Location of the Spot Light Location, and Extend it via Cables, so a Piece of LED Strip can be mounted Inside the Spot Light.
Be aware of the Direction of the LED Strip.
Flash and Configure WLED
Install WLED on your ESP32.
The software provides full RGB control, animation presets, and segment configuration.
Optional: Add Front Display Lights
You can also mount front-facing spotlights for accent illumination.
In my prototype:
I cut the LED strip and ran wires through the hollow spotlight chassis, adding four LEDs to light the artwork directly.
They tend to focus most of the light toward the top of the image, so I recommend:
Doubling the number of LEDs for stronger output
Adding aluminum foil inside for reflection
Using a diffuser for softer, more uniform lighting
Files & References
WLED Firmware: https://kno.wled.ge/
Please Ignore the Shity Wiring on the Pic, was one of my First Electronics Projects ever. It science has been Improved.
I got Inspired by this Idea:
Completly remodeled the 3D Model from Scratch.
It additonally Features:
- Mounting Point for Microcontroller
- Already Split in Half in the Model for beeing better Printable
- Has Optional Spot Lights
- Has a DC Jack Mount Holder
- Has Holes to Extend with Multiple Displates to the Side
- Has a Wall Hook
ByCodyMeyer_2545340Likes163Downloads730

 ByshoheiyLikes0Downloads212

 Bykallekubinsk_3569049Likes37Downloads189

 ByMrCoolGaming_2947996Likes47Downloads177

 ByCederbLikes32Downloads188

 ByTomYumLikes33Downloads161

 ByAllenM_581301Likes40Downloads142

 ByJous42Likes35Downloads117

 ByMichael Phillips PhillipsLikes26Downloads115

 Byst0rmyLikes0Downloads464

 ByTomvHLikes44Downloads137

 ByStreamMovieY_3470525Likes30Downloads124