

Prusa Core One – INDX Spoolholder Caps
 Bypeter-van-der-waalLikes0Downloads260
Build another version of this model.
Note: This is not the final version, as I don't have an INDX yet. As soon as I get my Founders Edition, I plan to add mounts for PTFE tubes or INDX filament sensors. My goal is to do this with little to no modification to the existing parts.
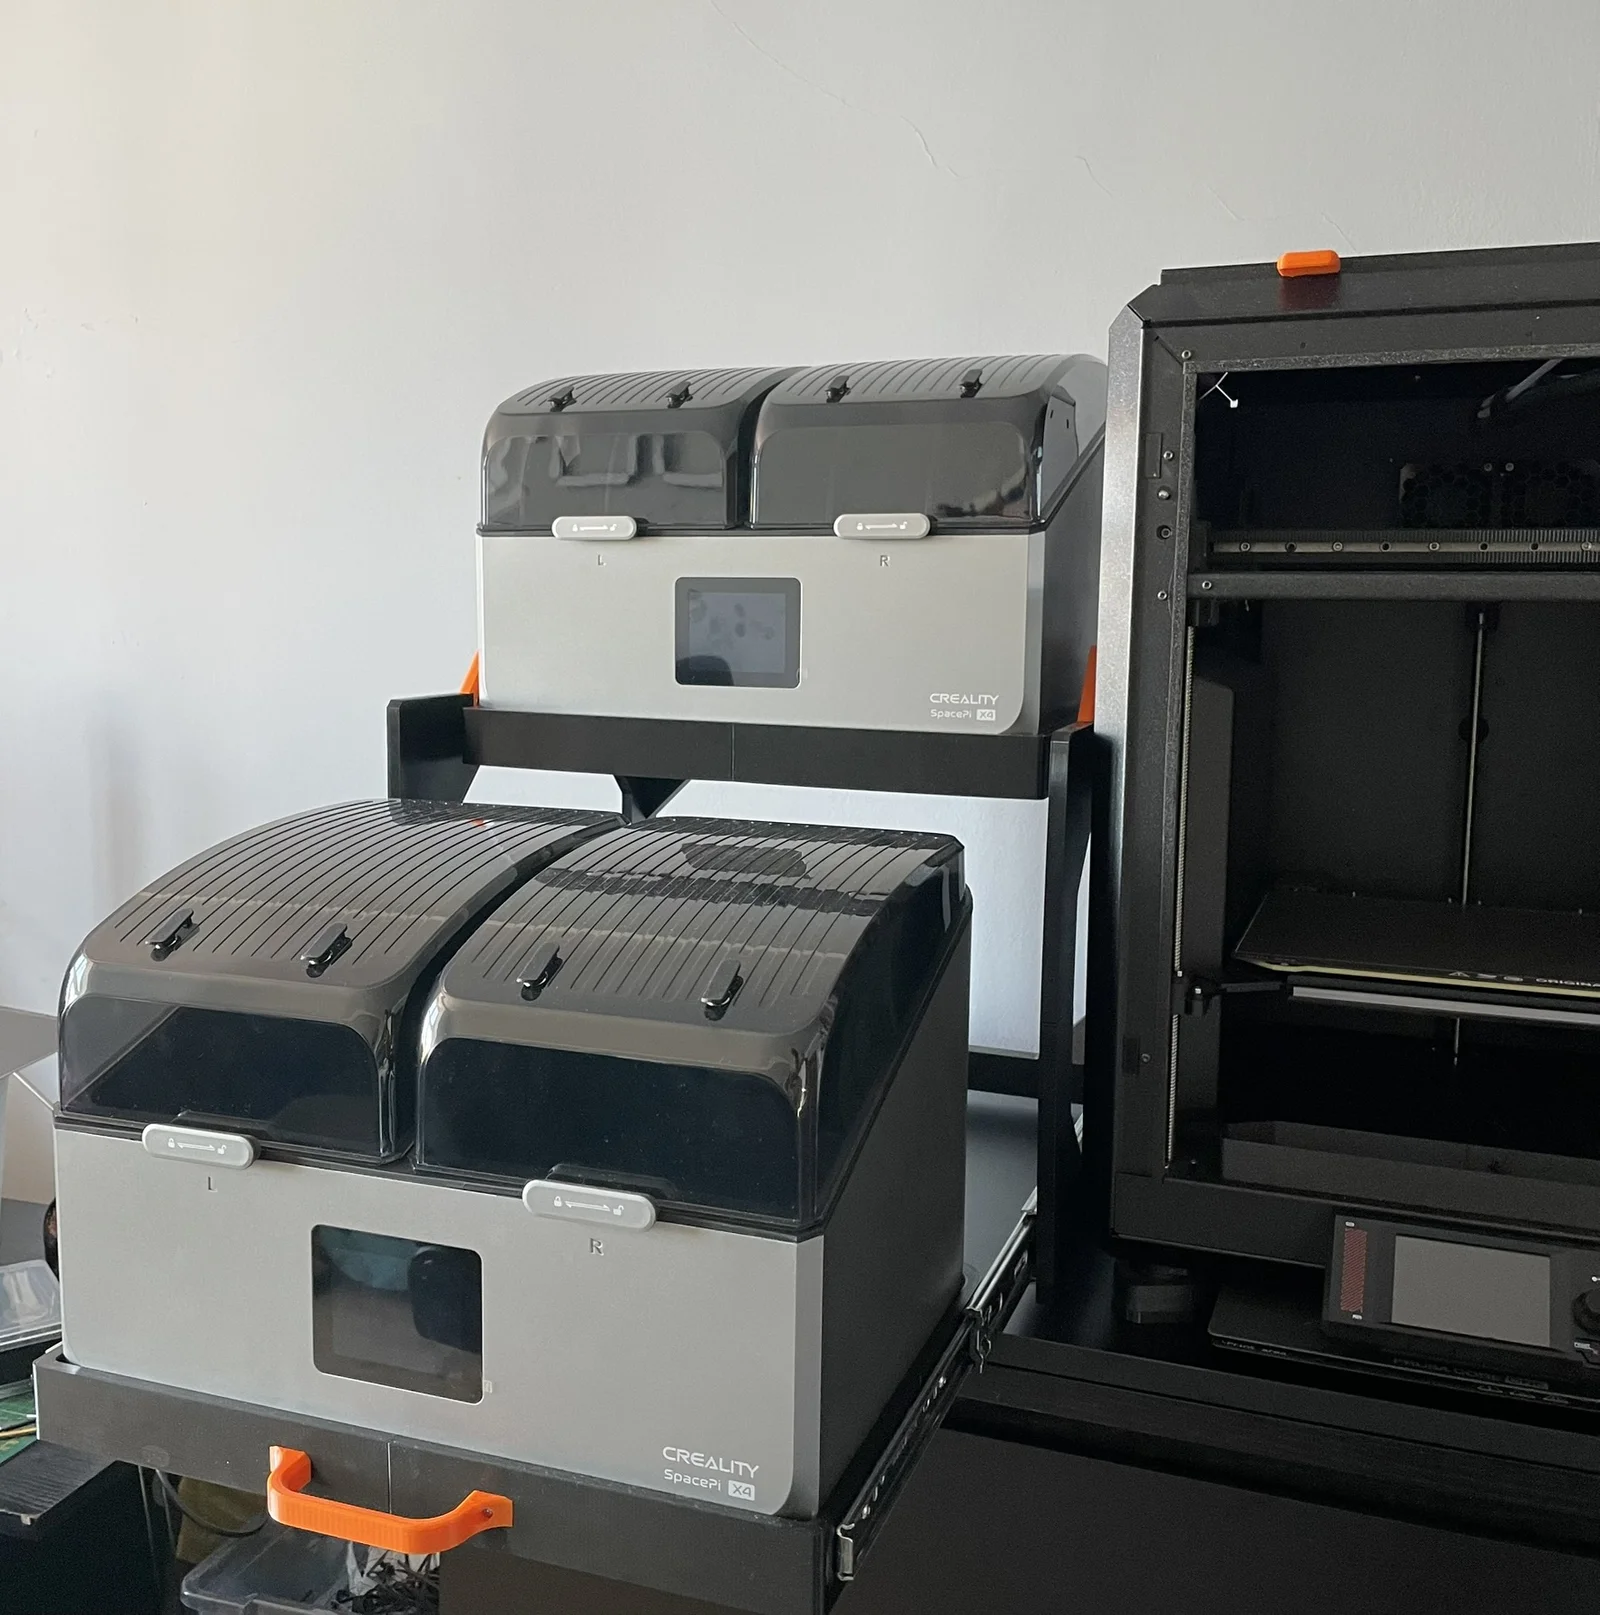
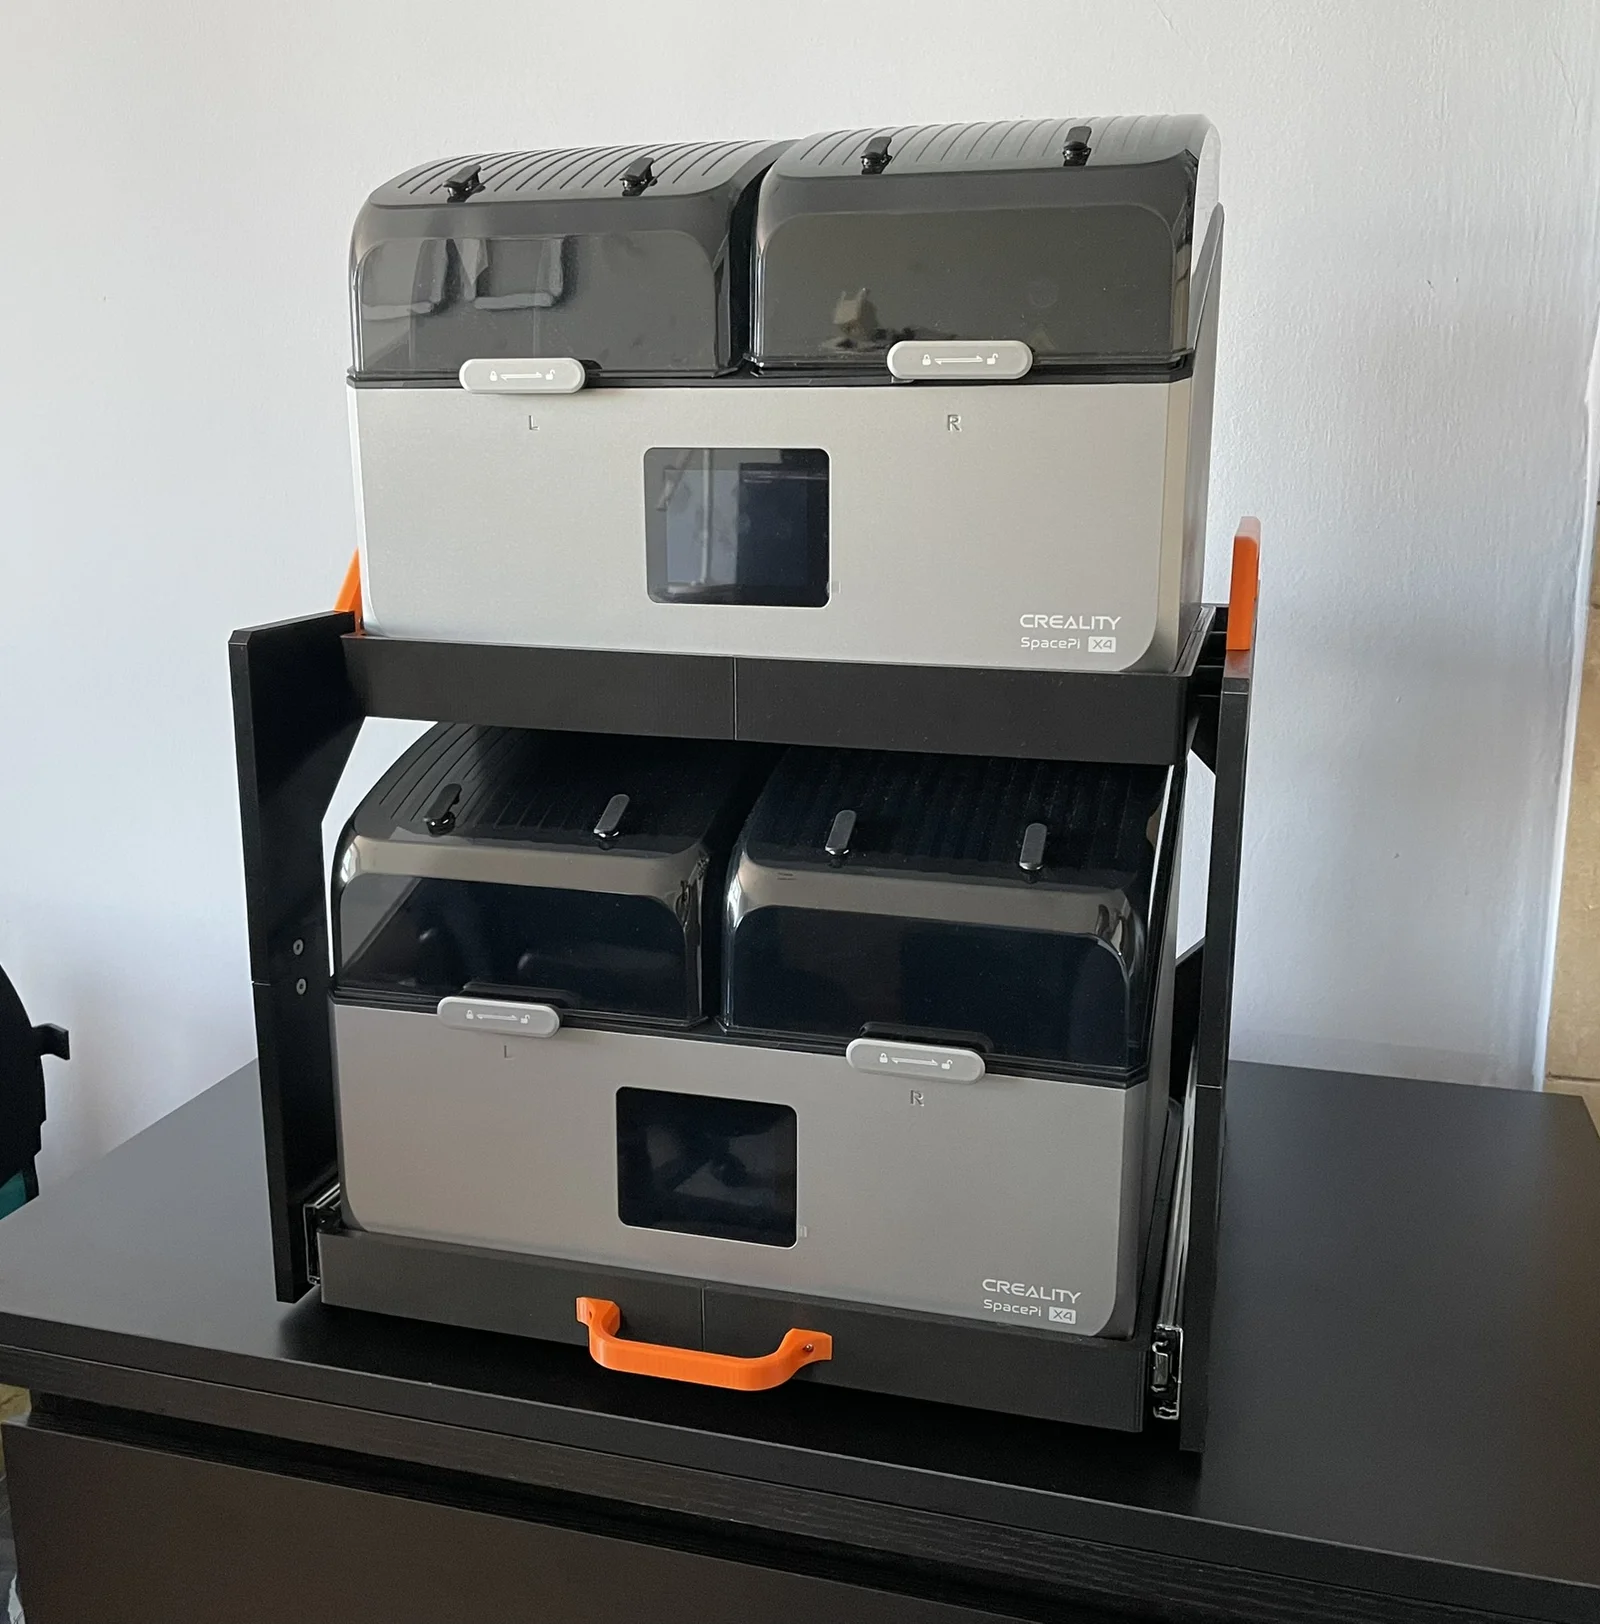
While waiting for the INDX, I am preparing a printer setup for 8 spools. For this purpose, I purchased 2 Creality SpacePi X4 dryers and created this rack which holds both of them. The lower drawer uses of the shelf GTV H45 VERSALITE PLUS+ 350mm drawer slides available on amazon, while the upper one is mounted permanently. I'm also including models for the upper side walls, where a drawer can also be installed on the top level, just keep in mind that I haven't tested this.
Hardware required:
Heat Set Insert
M4x4
26
Button head screw
M4x6
6
Button head screw
M4x8
4
Button head screw
M4x25
4
Countersunk screw
M4x8
56
Nut
M4
44
Button head screw
M3x8
2
Nut
M3
2
Drawer slide
350mm
2
Heat Set Insert
M3x5,7
8
Button head screw
M3x8
8
Assembly Instructions
Insert 26× M4×4 heat inserts into the 8 parts that will form the two side walls. Optionally, press in 8× M3×5.6 inserts into bottom parts of the wall to serve as feet.
Take the four parts of one side wall and connect them using connectors. In two of the connectors, thread in M4×8 screws, attach the handle and tighten with M4×8 screws. Repeat for second wall
Take the drawer slides and detach the part that mounts to the drawer. Attach the wall-side part using 3× M4×6 button head screws. Repeat for the second side wall.
Take the 8 parts that will form the lower drawer and upper shelf. Insert M4 nuts into the bottom, and 4× M4 nuts (one per part) into the sides of the lower drawer.
Assemble the drawer and shelf parts using connectors and M4×8 countersunk screws. On the front of the drawer, insert 2× M3 nuts and attach the handle using M3×8 screws.
Note that the drawer has slots for nuts on each side, while the upper shelf has screw holes.
Install the previously disassembled drawer slides into the bottom drawer using 4x M4x8 button head screw
Take bracing rails connect them together using bracing rail connectors. Attach a triangular corner bracket to each end of every bracing rail. Use these assembled supports to connect the two side walls by inserting them into the slots and pushing downward.
Slide the drawer into place.
Using M4×25 screws, attach the shelf to the side walls by inserting bushings between the shelf and the wall (the screw must pass through the bushing).
Anti-Tip System:
I didn't want to mess around with sand or other weights to balance the rack and stop it from tipping over when the drawer is extended. Instead, I created a system that screws into the back of the tabletop where the rack sits, allowing for quick and easy removal.
I created an parametric .f3d file for the connector (it’s not perfect, but it works😅). Just measure the distance to the edge of the table as shown in the attached picture, and change the length parameter in the file. Remember to print the screw horizontally to make it much stronger.
Bypeter-van-der-waalLikes0Downloads260

 Bytinx_1344834Likes1.2KDownloads6K

 Byprusa-researchLikes0Downloads2.7K

 BykingnothingLikes0Downloads185

 Byp3rr1ff3ryLikes0Downloads154

 ByPengLordLikes32Downloads115


 Byla-cave-au-chatLikes0Downloads971

 By3DSourcererLikes48Downloads381

 Bydominik-chuchlikLikes0Downloads126

 Bydet-manLikes0Downloads176

 Bygummiegecko8477Likes0Downloads168