



Snapmaker U1 Poop Deflector
 BydarienLikes0Downloads1K
Build another version of this model.
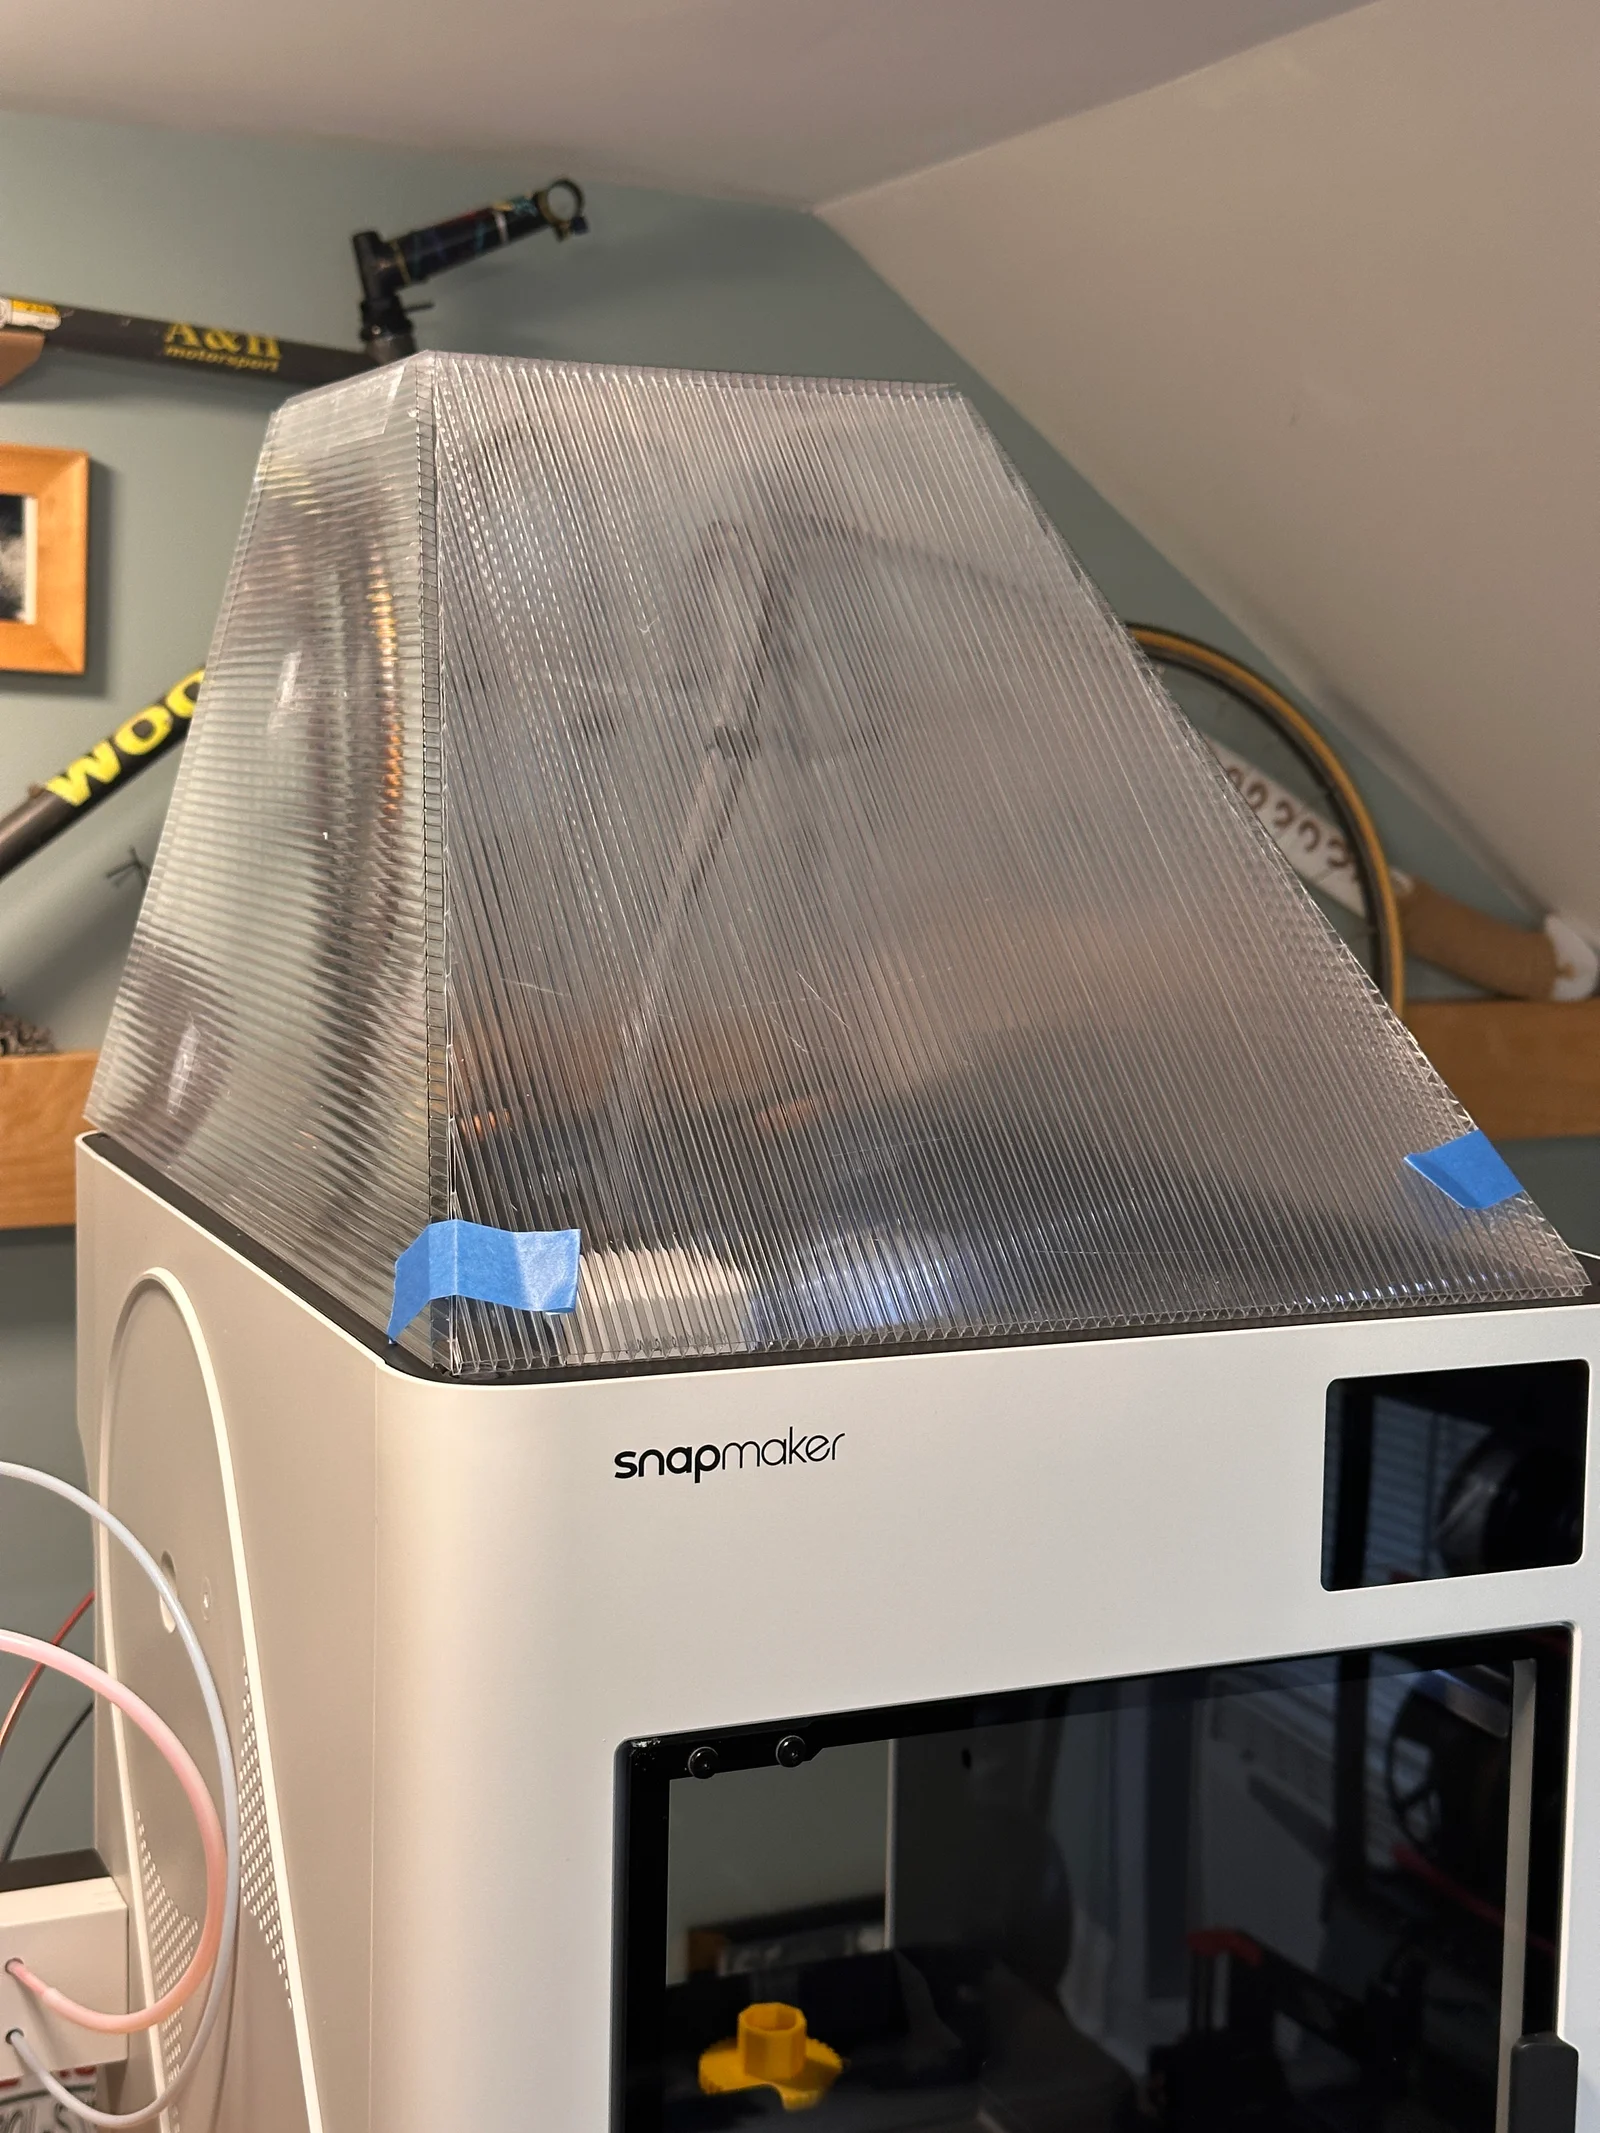
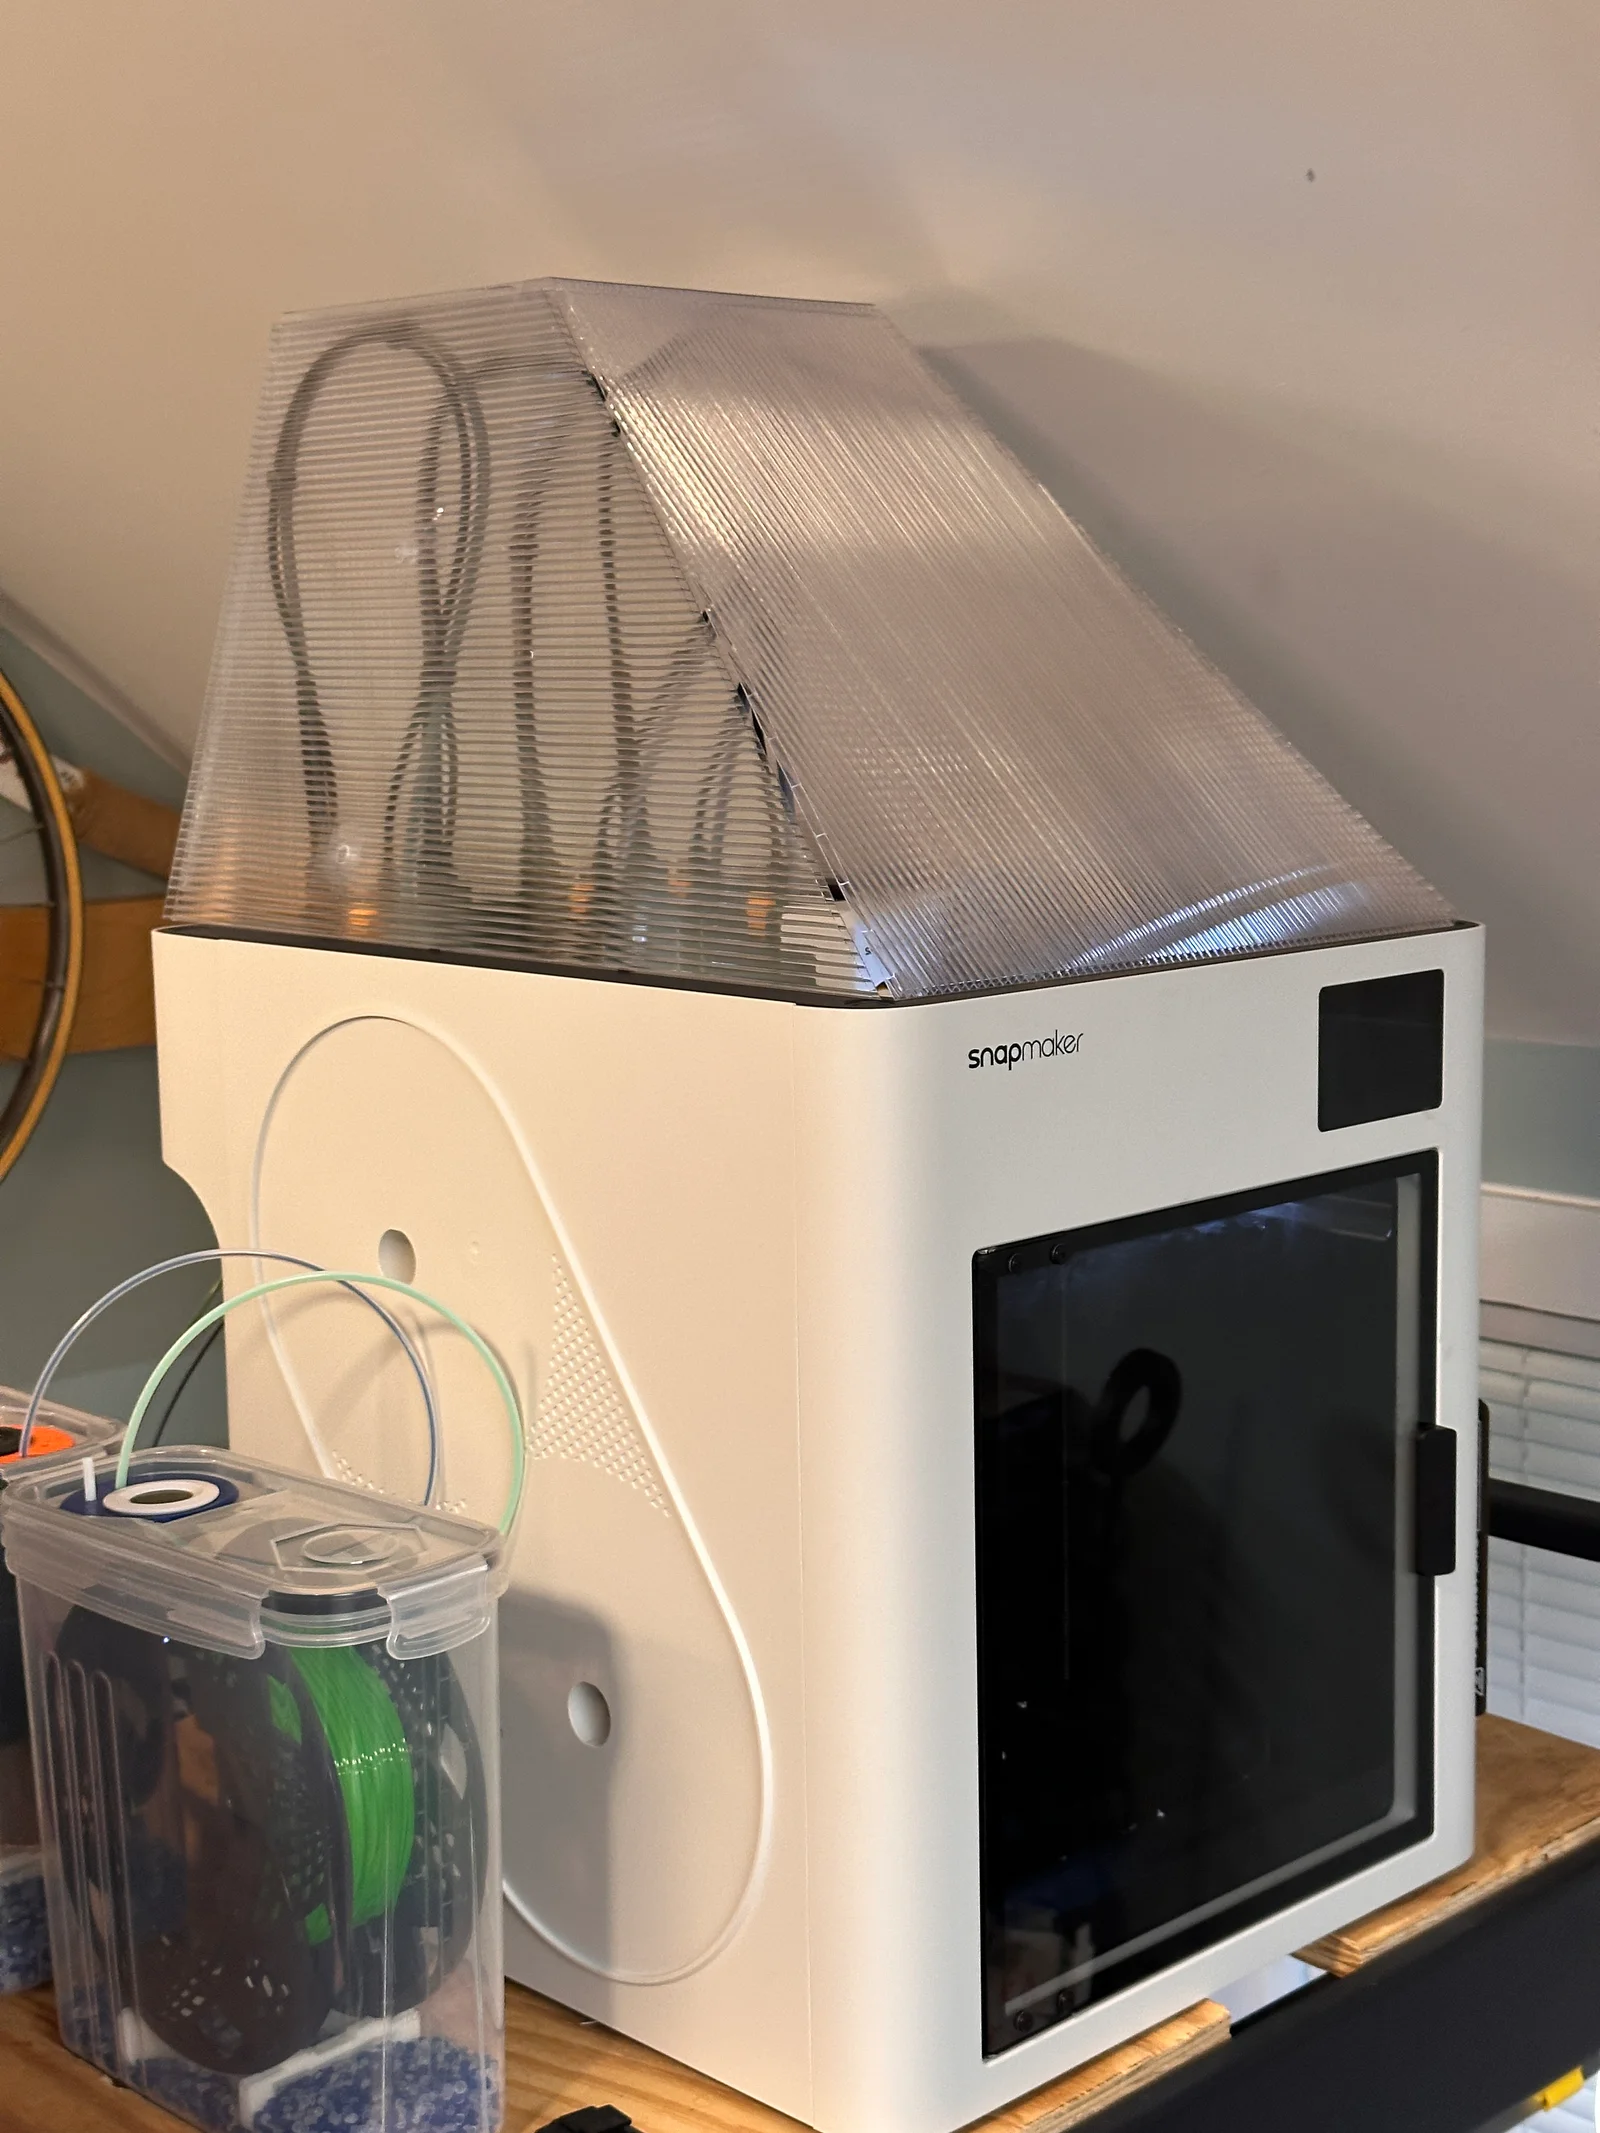
Ultra simple, quick to create top cover for the Snapmaker U1. Cut manually, assemble with tape. No printing required.
I've got a Snapmaker U1 and wanted to enclose the top. Snapmaker has their top kit but it's $150. Granted it adds filtration and such, but that's a steep jump. There are a bunch of printable designs, including one that uses an Ikea storage bin, but that still requires quite a bit of printing. There are some really professional looking ones which require even more printing and cut panels.
All of those are very cool, and kudos to everyone who designed them. I, however, like quick and simple solutions, and looked at the pile of coroplast I've got on hand and thought "I can probably work with that".
So, I took measurements, roughed it out, and cut it out of the coroplast, and wound up with a surprisingly effective top cover that doesn't look completely horrible and does a really good job of keeping things mostly sealed up.
There is no printing required! The STL attached is just for reference. If you've got a printer with a REALLY big print volume that can do good overhangs, you could conceivably print it upside-down in vase mode, but you would need a printer with at least a 500mm maximum build dimension.
That said, if anyone with a 500mm printer wants to try this as a vase mode, I would love to see it! The front panel is a 45 degree angle so it should be possble!
Instead, look at the two diagrams which show the size of the five parts. Lay those sizes out on your material of choice, cut them to size, and then assemble with tape. You could get fancier but you've already committed to "quick and dirty but functional" so there you go.
Only tape the front panel at the top, and then you'll have a swing up access door. If I really need to keep things sealed up, I'll hold that to the side panels with some painter's tape, but honestly in my testing it has worked well as-is.
I did it as five separate pieces but if you're using cardboard and have a big enough sheet, you might be able to do it in one piece. If you do cardboard and want to see what's inside, it's not hard to find 8x10 sheets of plexiglass online or in craft stores, so you could cut out a rectangle
It's a decent but not perfect fit. There is a little bit of a gap at the back.
It might not like to stay in place. I've addressed that with two small pieces of tape on the sides, but in cases where I forgot to do that, the prints have completed with no problem.
This is designed to be minimal volume, and as such, your tool 1 and 4 wiring/filament tubing may contact the inside of the enclosure. Arrange the clips so it hits there and it shouldn't be a problem.
With the front panel only taped at the top to create a hinge, the side panels may spread a little bit. With mine made out of 1/4" coroplast, this hasn't been an issue. A flimsier material like a thin cardboard might be a problem.
Yeah, it looks a bit jank, but it's effective and super quick to make.
BydarienLikes0Downloads1K

 Bytinx_1344834Likes1.2KDownloads6K

 By3DSourcererLikes48Downloads377

 Byprusa-researchLikes0Downloads2.7K

 Byarhi_585078Likes64Downloads540

 Bynamida-verascheLikes0Downloads148

 ByHanzo3dLikes155Downloads413

 ByGeek5DLikes147Downloads484

 ByBrokentooth_designsLikes23Downloads407

 ByvertigomakesLikes0Downloads560

 Byartme-3dLikes0Downloads333

 ByWyomingWolf_261196Likes52Downloads428