


Kẹp Kính Mát Gắn Xe Hơi
 ByVC_DesignLikes721Downloads2.9K
Build another version of this model.
Deutsch (for English see further below)
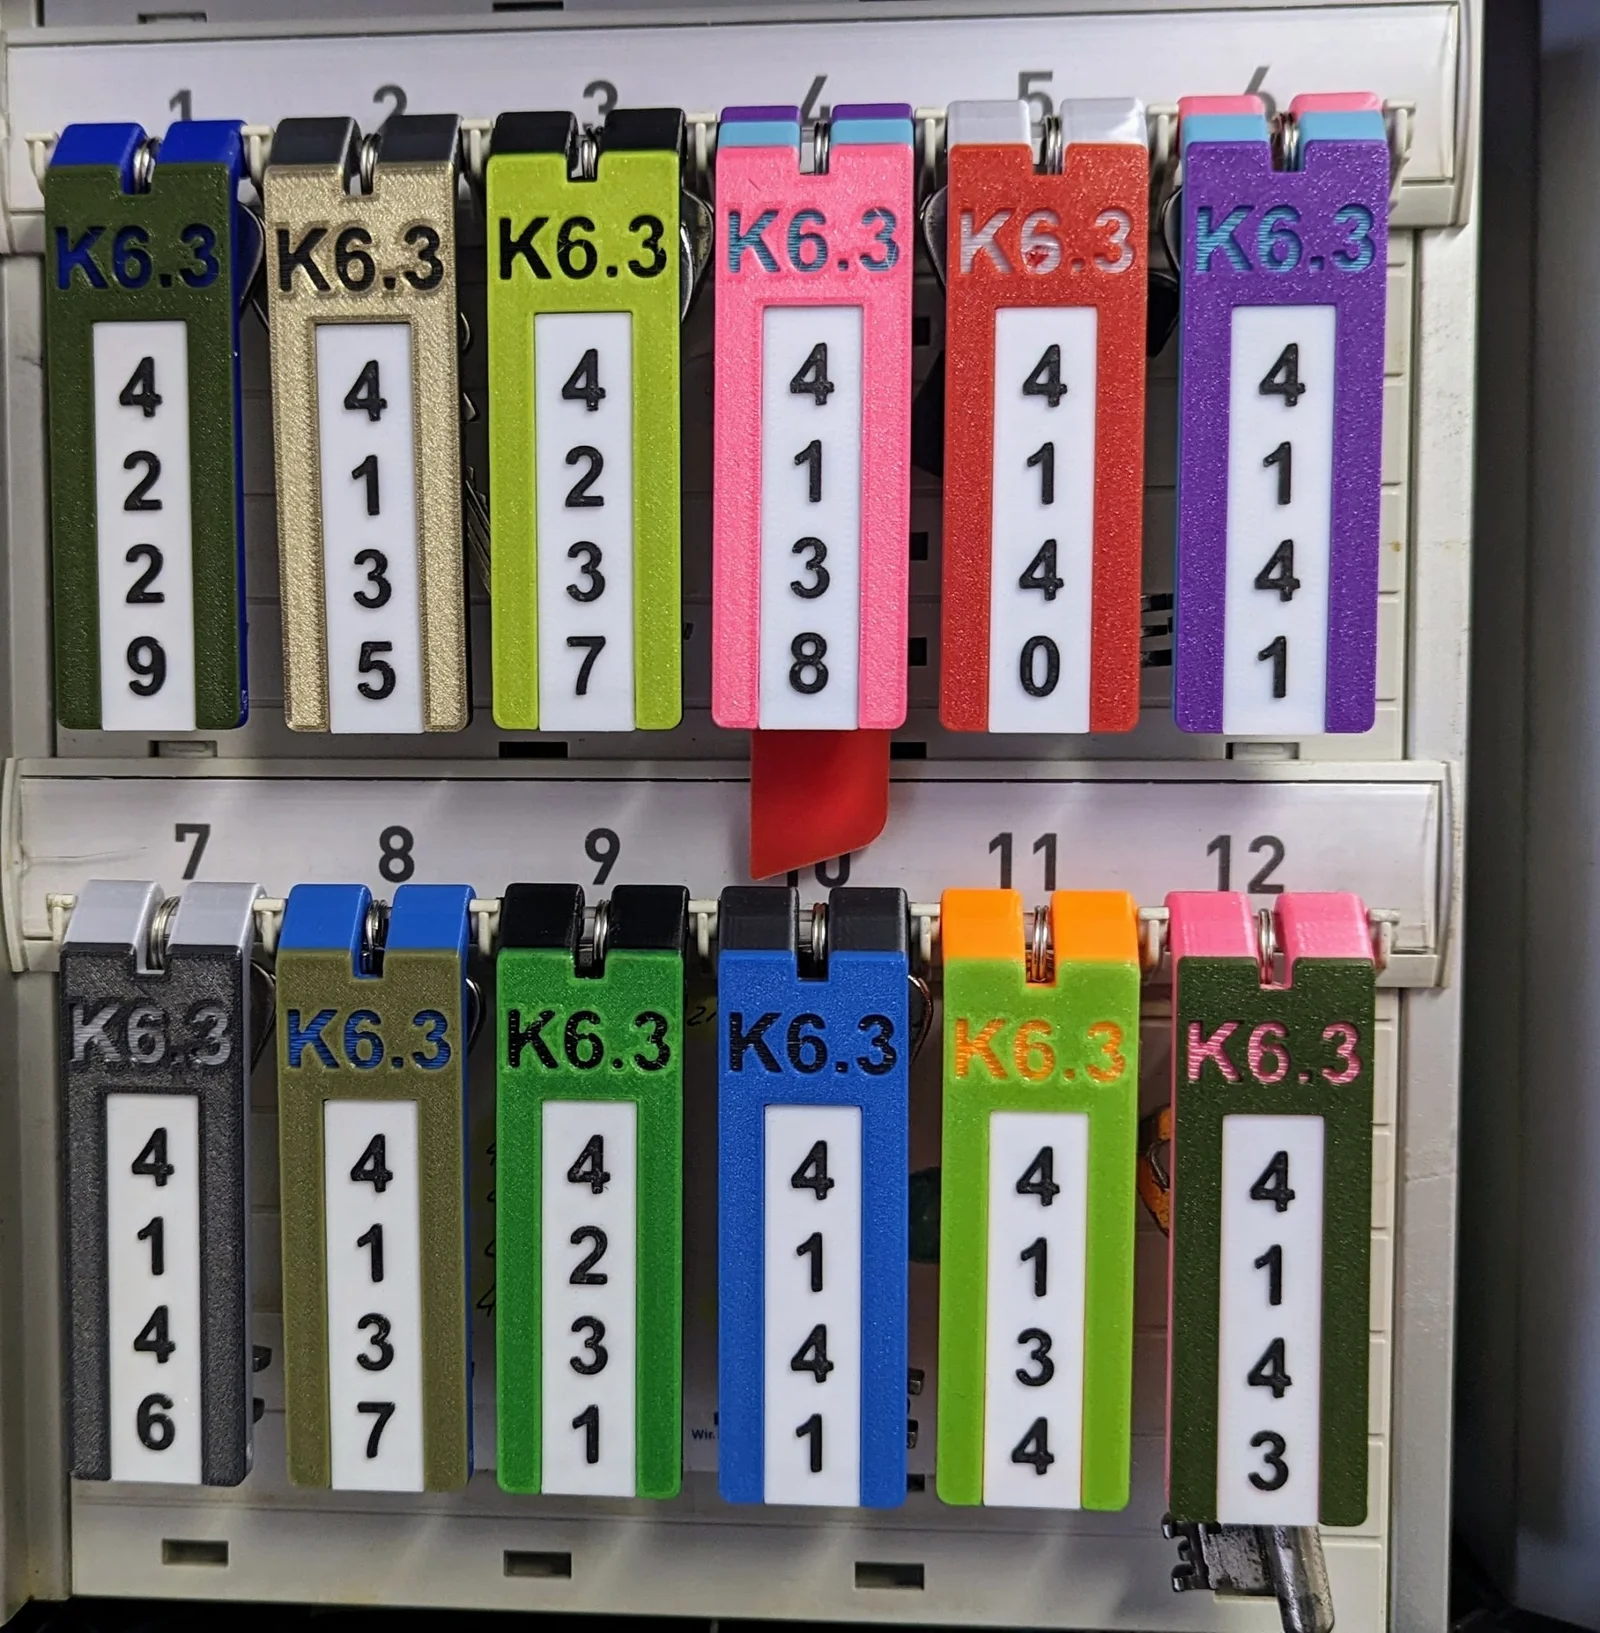
Dieses 3D-Modell ist ein Ersatz-Schlüsselanhänger für die Schlüsselschränke von “Durable”.
Mir haben die Originale nicht gefallen, außerdem waren sie mir viel zu teuer.
Features
Tipps zum Gestalten
Ein Fusion 360 Modell steht zur Verfügung. Dort kann man die vorhandenen Texte ändern (Siehe Skizzen “Organisation” und “ Room/Raum”).
Versionen
Es gibt 2 Versionen, die sich nur durch die unterschiedlich stark abgeknickte Aufhängung unterscheiden. Die Raumnummern-Einschübe sind bei beiden Varianten identisch.
Die Träger kann man in allen möglichen Farben und Materialien drucken. Ein Materialwechsel sollte bei 1 mm Höhe gemacht werden, sodass die Schrift der Organisation gut zu lesen ist.
Der Einschub sollte zweifarbig mit möglichst in hohem Kontrast gedruckt werden. Die Zahlen sind erhaben; ein Farbwechsel ist daher nach 4,4 mm angebracht. Ich empfehle schwarz für die Zahlen und weiß als Hintergrund.
Ich habe alles mit 0.4 mm Düse gedruckt, das sollte gut funktionieren.
Es wird kein Stützmaterial benötigt.
Zusammenbau
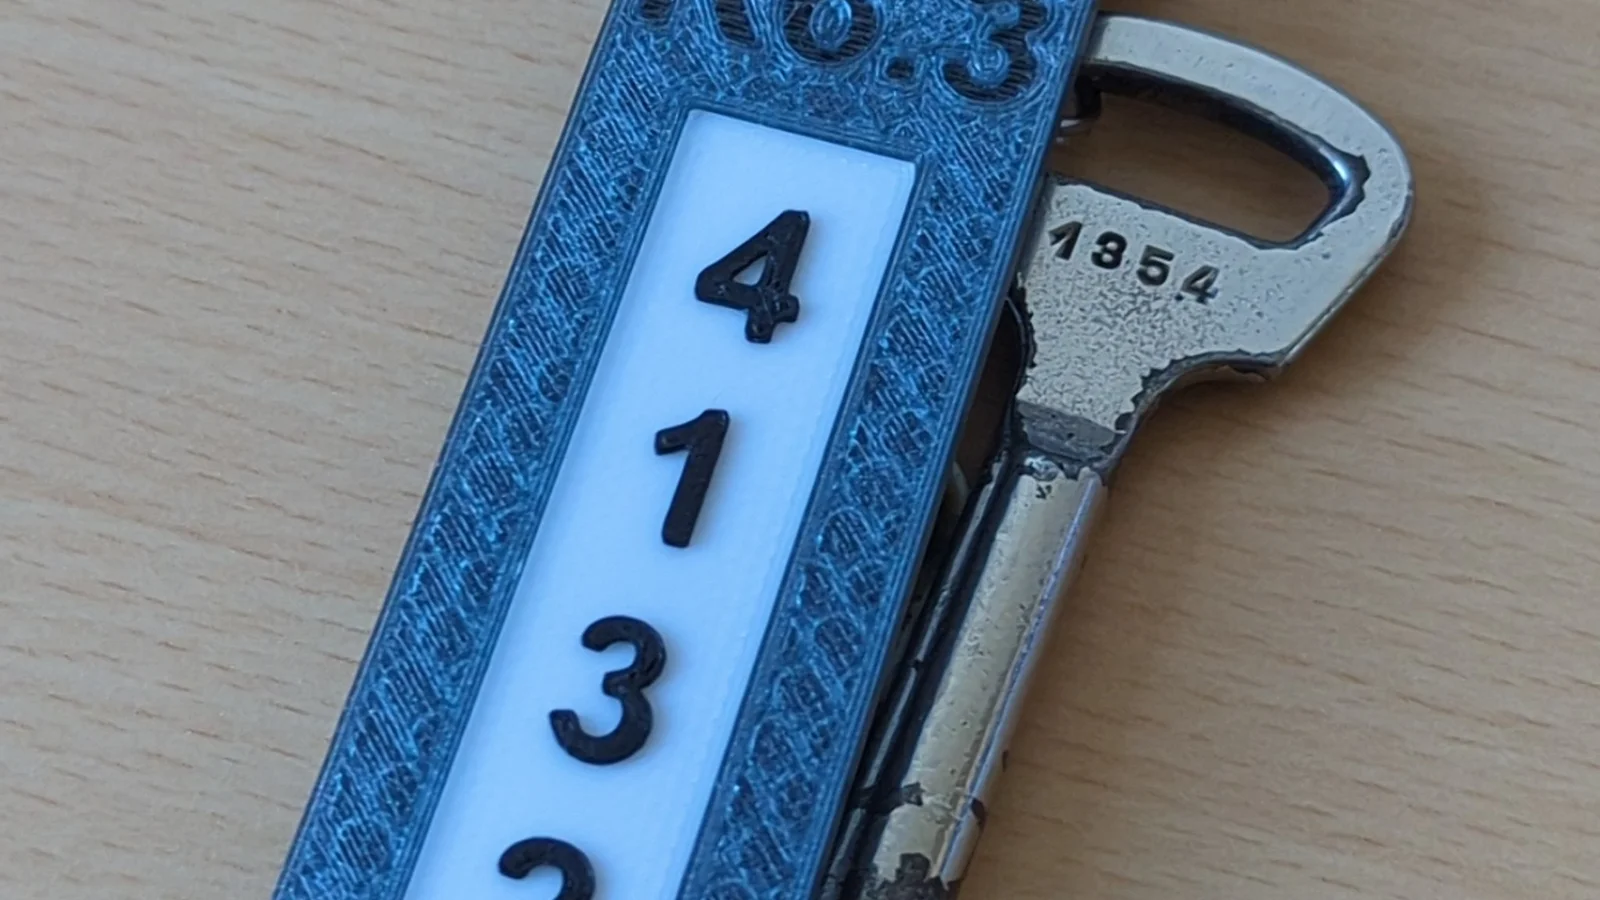
Der Einschub wird in den Träger geschoben. Der Einschub wird mit einem kleinen Stück Filament im Träger verankert (am besten nimmt man genau das Material, aus dem der Träger gedruckt ist).
Danach wird ein kleiner Schlüsselring oder idealerweise ein kleiner Wirbel oben am Träger durch ein weiteres Stück Filament befestigt.
Sollten die Bohrungen nicht groß genug sein, kann man sie von beiden Seiten mit einem 1,8 mm Bohrer leicht von Hand aufweiten.
Fertig ist der Schlüsselanhänger.
-----
English
This 3D model is a replacement keychain for the "Durable" Key Box.
I did not like the originals, and they were too expensive for me.
Features
Tips for designing
A Fusion 360 model is available for download. There you can change the existing texts (see sketches "Organisation" and "Room/Raum").
Versions
There are two versions, which differ only in the different degrees of top part. The room number insets are identical for both variants.
The carrier can be printed in all kinds of colors and materials. A material change should be made at a height of 1 mm so that the text for the organization is easy to read.
The inset should be printed with two different colors in high contrast. The numbers are embossed; a color change should be added at 4.4 mm. I suggest to use black for the numbers and white for the background.
I printed everything with 0.4mm nozzle, which should work fine.
No support material is needed.
Assembly
The inset has to be pushed into the carrier, all the way up. It is then connected to the carrier with a small piece of filament (it is best to use exactly the material from which the carrier is printed).
After that, a small key ring, or ideally a small swivel, is attached to the top of the carrier by another piece of filament.
If the holes are not large enough, slightly widen the hole from both sides with a 1.8 mm drill bit by hand.
ByVC_DesignLikes721Downloads2.9K

 ByfifindrLikes500Downloads4K

 ByUpcrid3D_1585693Likes808Downloads2.1K

 ByWilko_SLOLikes935Downloads2K

 ByRobertoGalloc_356815Likes549Downloads1.8K

 ByTater_364200Likes486Downloads1.6K

 Bywhilex_1739192Likes644Downloads1.1K

 ByGi_TLikes801Downloads1.3K

 ByzeroflowLikes186Downloads1.2K

 ByMatthew_GhostLikes350Downloads939

 ByZED4EverLikes313Downloads5.2K

 Bydona3d_Likes456Downloads679