



Thùng rác in Vase Mode
 BybobmakesLikes2.5KDownloads17.5K
Build another version of this model.
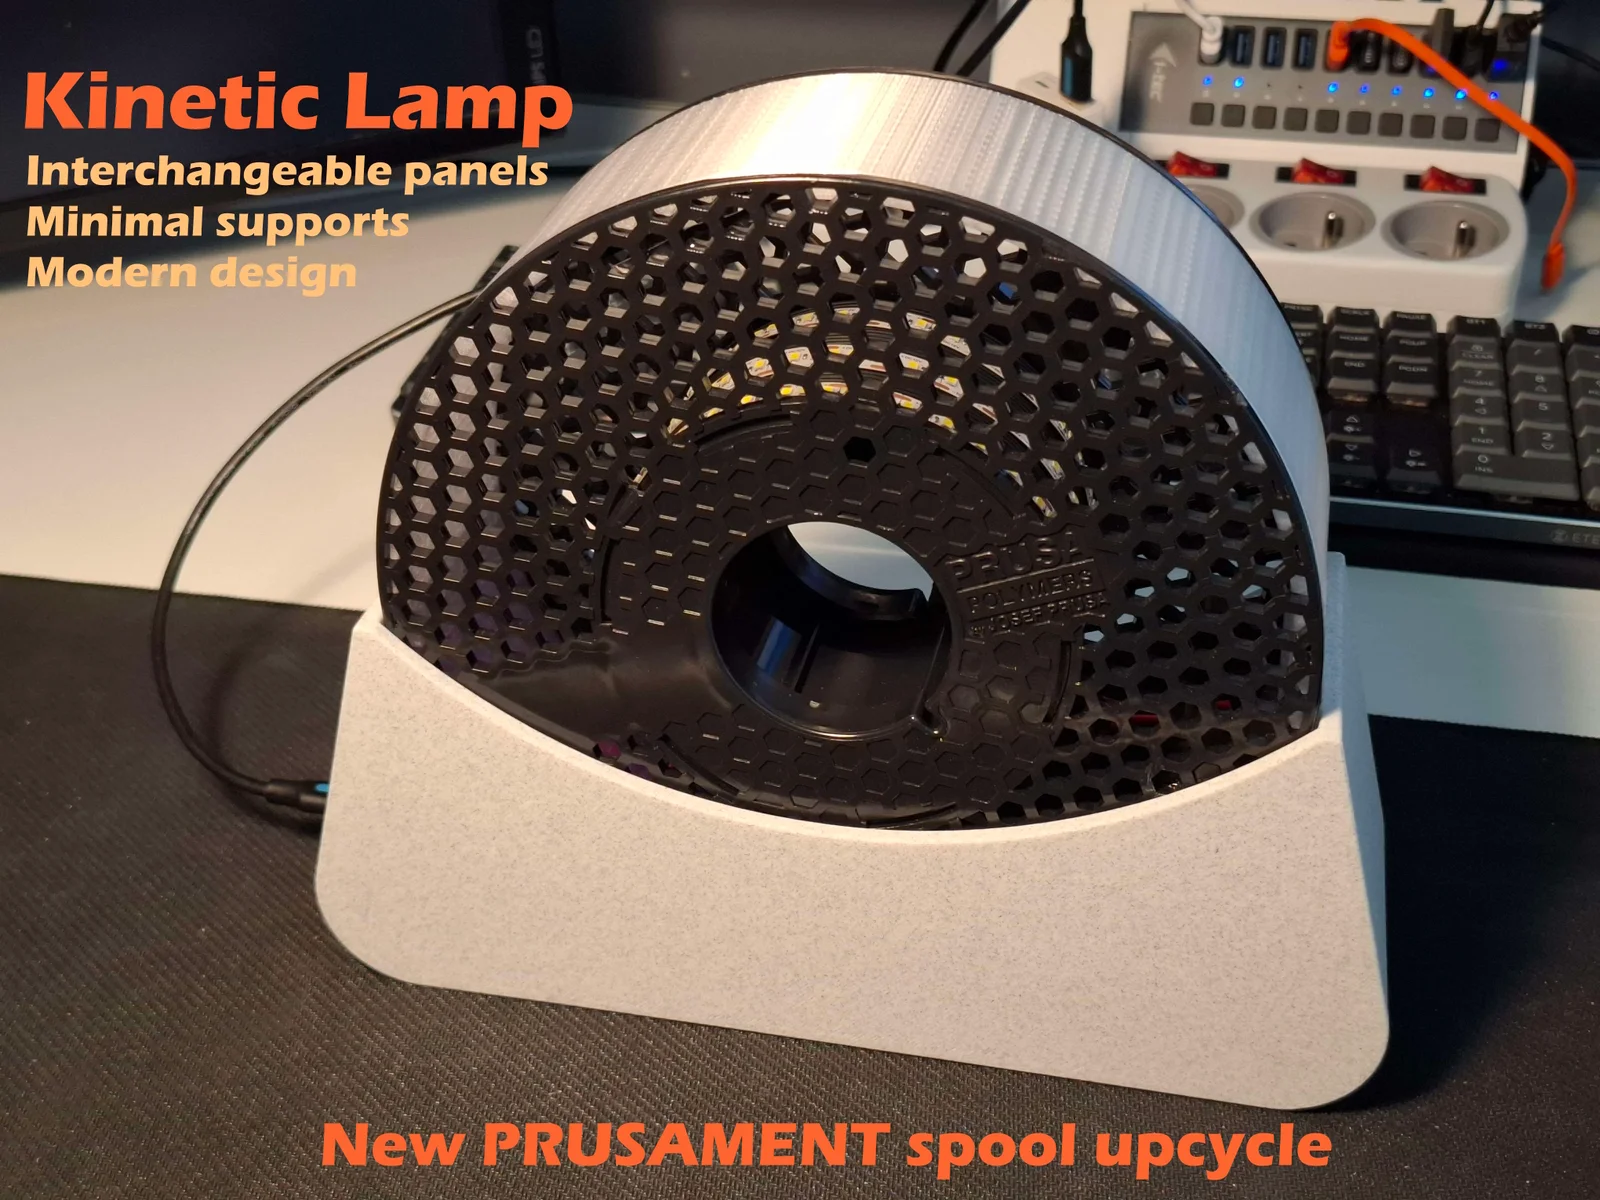
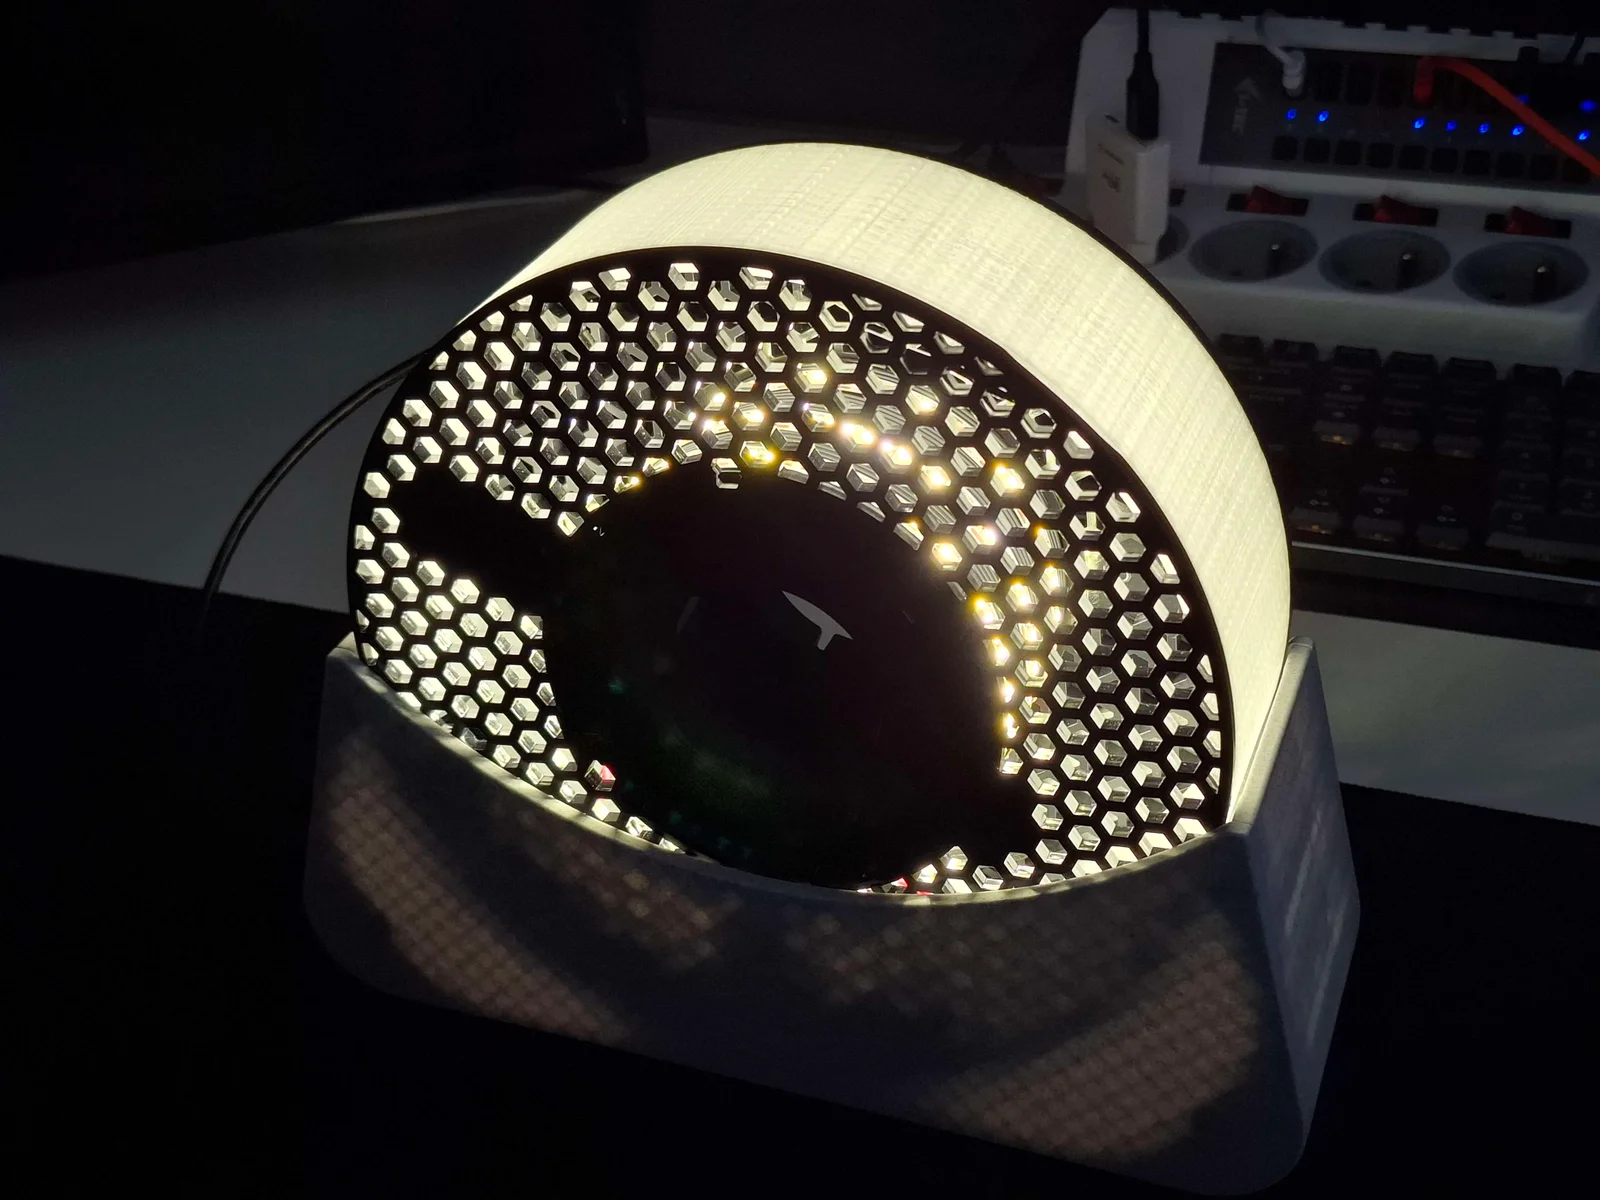
This model is a kinetically actuated lamp that upcycles the new Prusament spools into a modern and sleek design. The lamp turns on with a simple rolling motion of the spool and lights up from inside. It's great for bed-side table and night-time reading and can easily use RGB LEDs for complete color control. The model also features interchangeable side panels, which can be out of any material to match any space or aesthetic.
1x PRUSA Sliding mechanism with limit witch mounting
1x PRUSA Sliding mechanism 2
1x PRUSA Light diffuser (transparent or semi-transparent filament recommended, pretty infill pattern recommended)
2x PRUSA Bearing mount
1x PRUSA Floor
2x PRUSA Side panel
2x Magnet cover
2x 2.5mm self-tapping screw
4x M3x8mm button head screw
4x M38xmm flathead screw
8x M3x6mm threaded insert
6x Skateboard ball bearings (8mm ID, 22mm OD)
4x rubber feet
16x 5x3mm round neodymium magnet
2x 3x4x20mm rectangular neodymium magnet
1x Limit switch with lever (I used ZIPPY SM-05H-03P0-Z)
1m LED strip (I used this)
1x DC-DC Step-up module (optional depending on the type of LED strip; I used this)
1x USB-C port break-out board
Superglue, Soldering iron, Spare wire
You'll need: PRUSA Sliding mechanism with limit switch mounting, PRUSA sliding mechanism 2, limit switch, 2x 2.5mm screws, 2x 3x4x20mm rectangular neodymium magnet, 2x PRUSA Magnet cover
Prepare the rails by simply pushing/gluing the magnets inside the prepared holes and cover their other ens using the 3D printed covers. Screw the limit switch using two small screws directly into the plastic.
2. Preparing the bearing mounts
You'll need: 2x PRUSA Bearing mount, 6x Bearings, 4x M3 threaded inserts
Prepare the bearing mounts by gluing bearings on each of the prepared posts. Then press the threaded inserts into the bottom using a soldering iron.
3. Spool side one
You'll need: New empty PRUSAMENT spool, PRUSA Light difuser
Split the spool up into two parts and take one with the middle post still in. Align the Light diffuser posts with the holes on the spool and press it in (some of the holes might need to be widened a bit using an exacto knife). The top of the light diffuser should sit right by one of the filament channels on the spool. Then align the limit switch rail symmetrically with the bottom opening and glue it in place.
4. Electronics
You'll need: LED Light strip, DC-DC step-up module, wire
Coil and glue the light strip on the middle post of the spool. The light diffuser can be removed for this step and put back on after. Make sure you keep the leads of the strip close to the limit switch. Connect (solder) the positive lead of the LED strip to the limit switch. The other terminal of the limit switch is connected to the step-up module positive output. Lastly, the negative output of the module is connected to the negative lead of the LED strip.
NOTE: Make sure you're connecting the strip to the normally-closed pin of the switch, so that it only turns on when pressed. Also make sure to set the output voltage on the step-up module using the trimmer before you connect it to the LED strip to prevent accidental over-voltage.
5. Spool side two
You'll need: Other half of the spool, PRUSA Sliding mechanism 2
Put the diffuser back in if you removed it and reassemble the spool - a fairly large amount of force is necessary to latch the two halves together and the spin the halves until they click together. Then take the other rail and glue it opposite the first. Make sure the rails are concentric otherwise the mechanism won't spin!
You'll need: PRUSA Floor, 8x 5x3mm round magnet, 4x M3 threaded insert, 4x buttonhead screw, USB-C connector, 4x rubber feet, wire
Take the 3D printed floor of the cover and attach the rubber anti-slip feet. Then press-fit (or glue) the round magnets inside the prepared holes on the sides. Make sure that the magnets are all in the same orientation on both sides, so that the side panels are interchangeable. Glue the USB-C port at the back of the case and solder the wires connecting it to the input of the step-up module. Lastly heat-set the threaded inserts into the prepared posts at the bottom and screw the step-up into them.
You'll need: 2x PRUSA Side panel, 8x 5x3mm round magnets, prepared bearing mounts, 4x M3 flathead screws
Prepare two side panels by press-fitting or gluing magnets into them. Make sure the magnets attract to the ones on the cover so that the sides stay in place.
Then take the prepared bearing mounts, slide them onto the rails inside the spool and screw the whole assembly down to the base using four flathead screws from the bottom.
Voilà! Your lamp is now finished and should turn on the moment you roll the spool. You can easily 3D print more side panels in different materials and with different designs - clear to see the insides, plain to keep it sleek or with your own personal logo. Nothing is stopping you from making the side panels from other materials too - you could definitely use plexiglass, wood or metal for your own lamp ;)
Simply pop the magnetic side panels on and off to change your design completely!
BybobmakesLikes2.5KDownloads17.5K

 Byquibeck_3353173Likes1.5KDownloads11.5K

 ByTommy3DLab_2023125Likes636Downloads2.5K

 ByMiceciCZE_336250Likes15Downloads287

 Bymoleculecrtr_1215658Likes544Downloads2K

 ByPiotrRagoLikes161Downloads448

 By178222178222_2484344Likes449Downloads1.7K

 ByEldordLikes499Downloads1.4K

 ByVaclav_ZahradkaLikes181Downloads1.2K

 ByowlartLikes527Downloads1.3K

 BydmtinkdevLikes74Downloads292

 Bytjfenwick_306961Likes385Downloads1K