



Steam Machine Companion Cube / Vỏ đựng Weighted Storage Cube
 ByJaronLikes310Downloads1K
Build another version of this model.
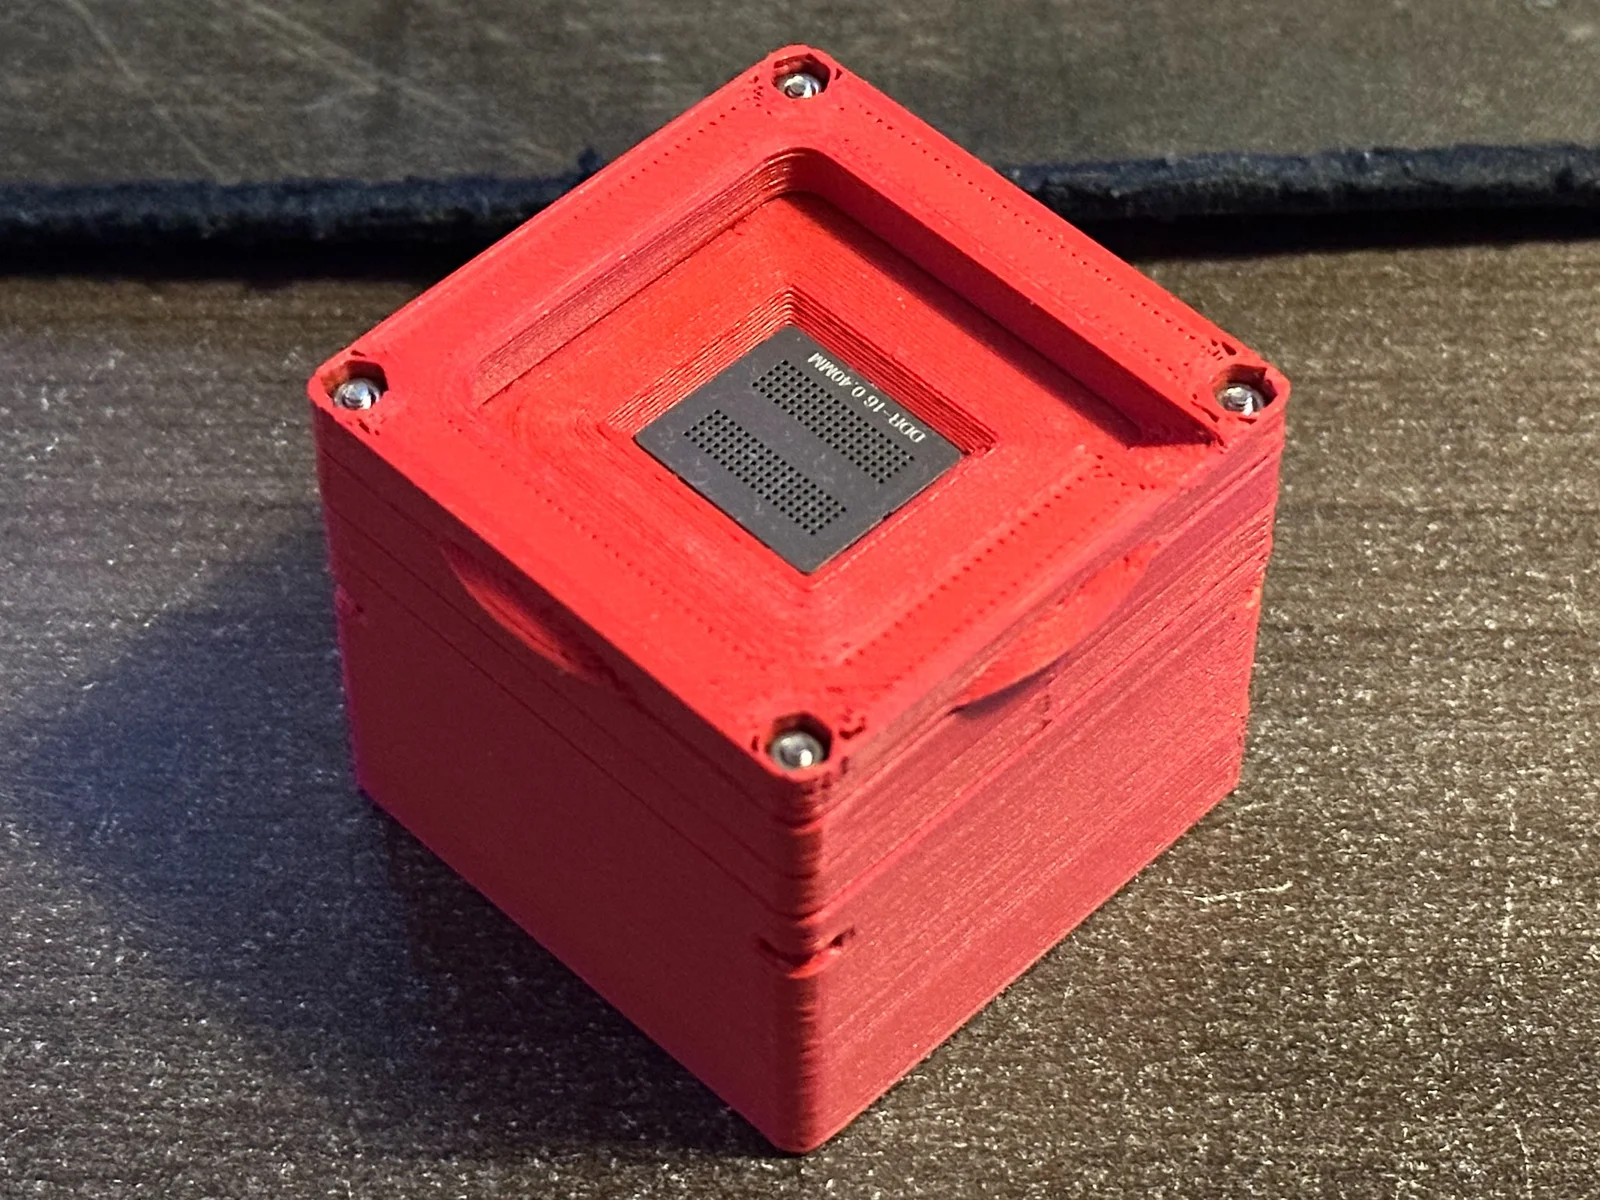
A DIY BGA reballing jig for GDDR6X chips.
Stencil size: 0.7" x 0.62"/17.82mm x 15.84mm
----------------------------
Screws & nuts: [Link]
Magnet:
----------------------------
Print in original orientations, with support.
----------------------------
----------------------------
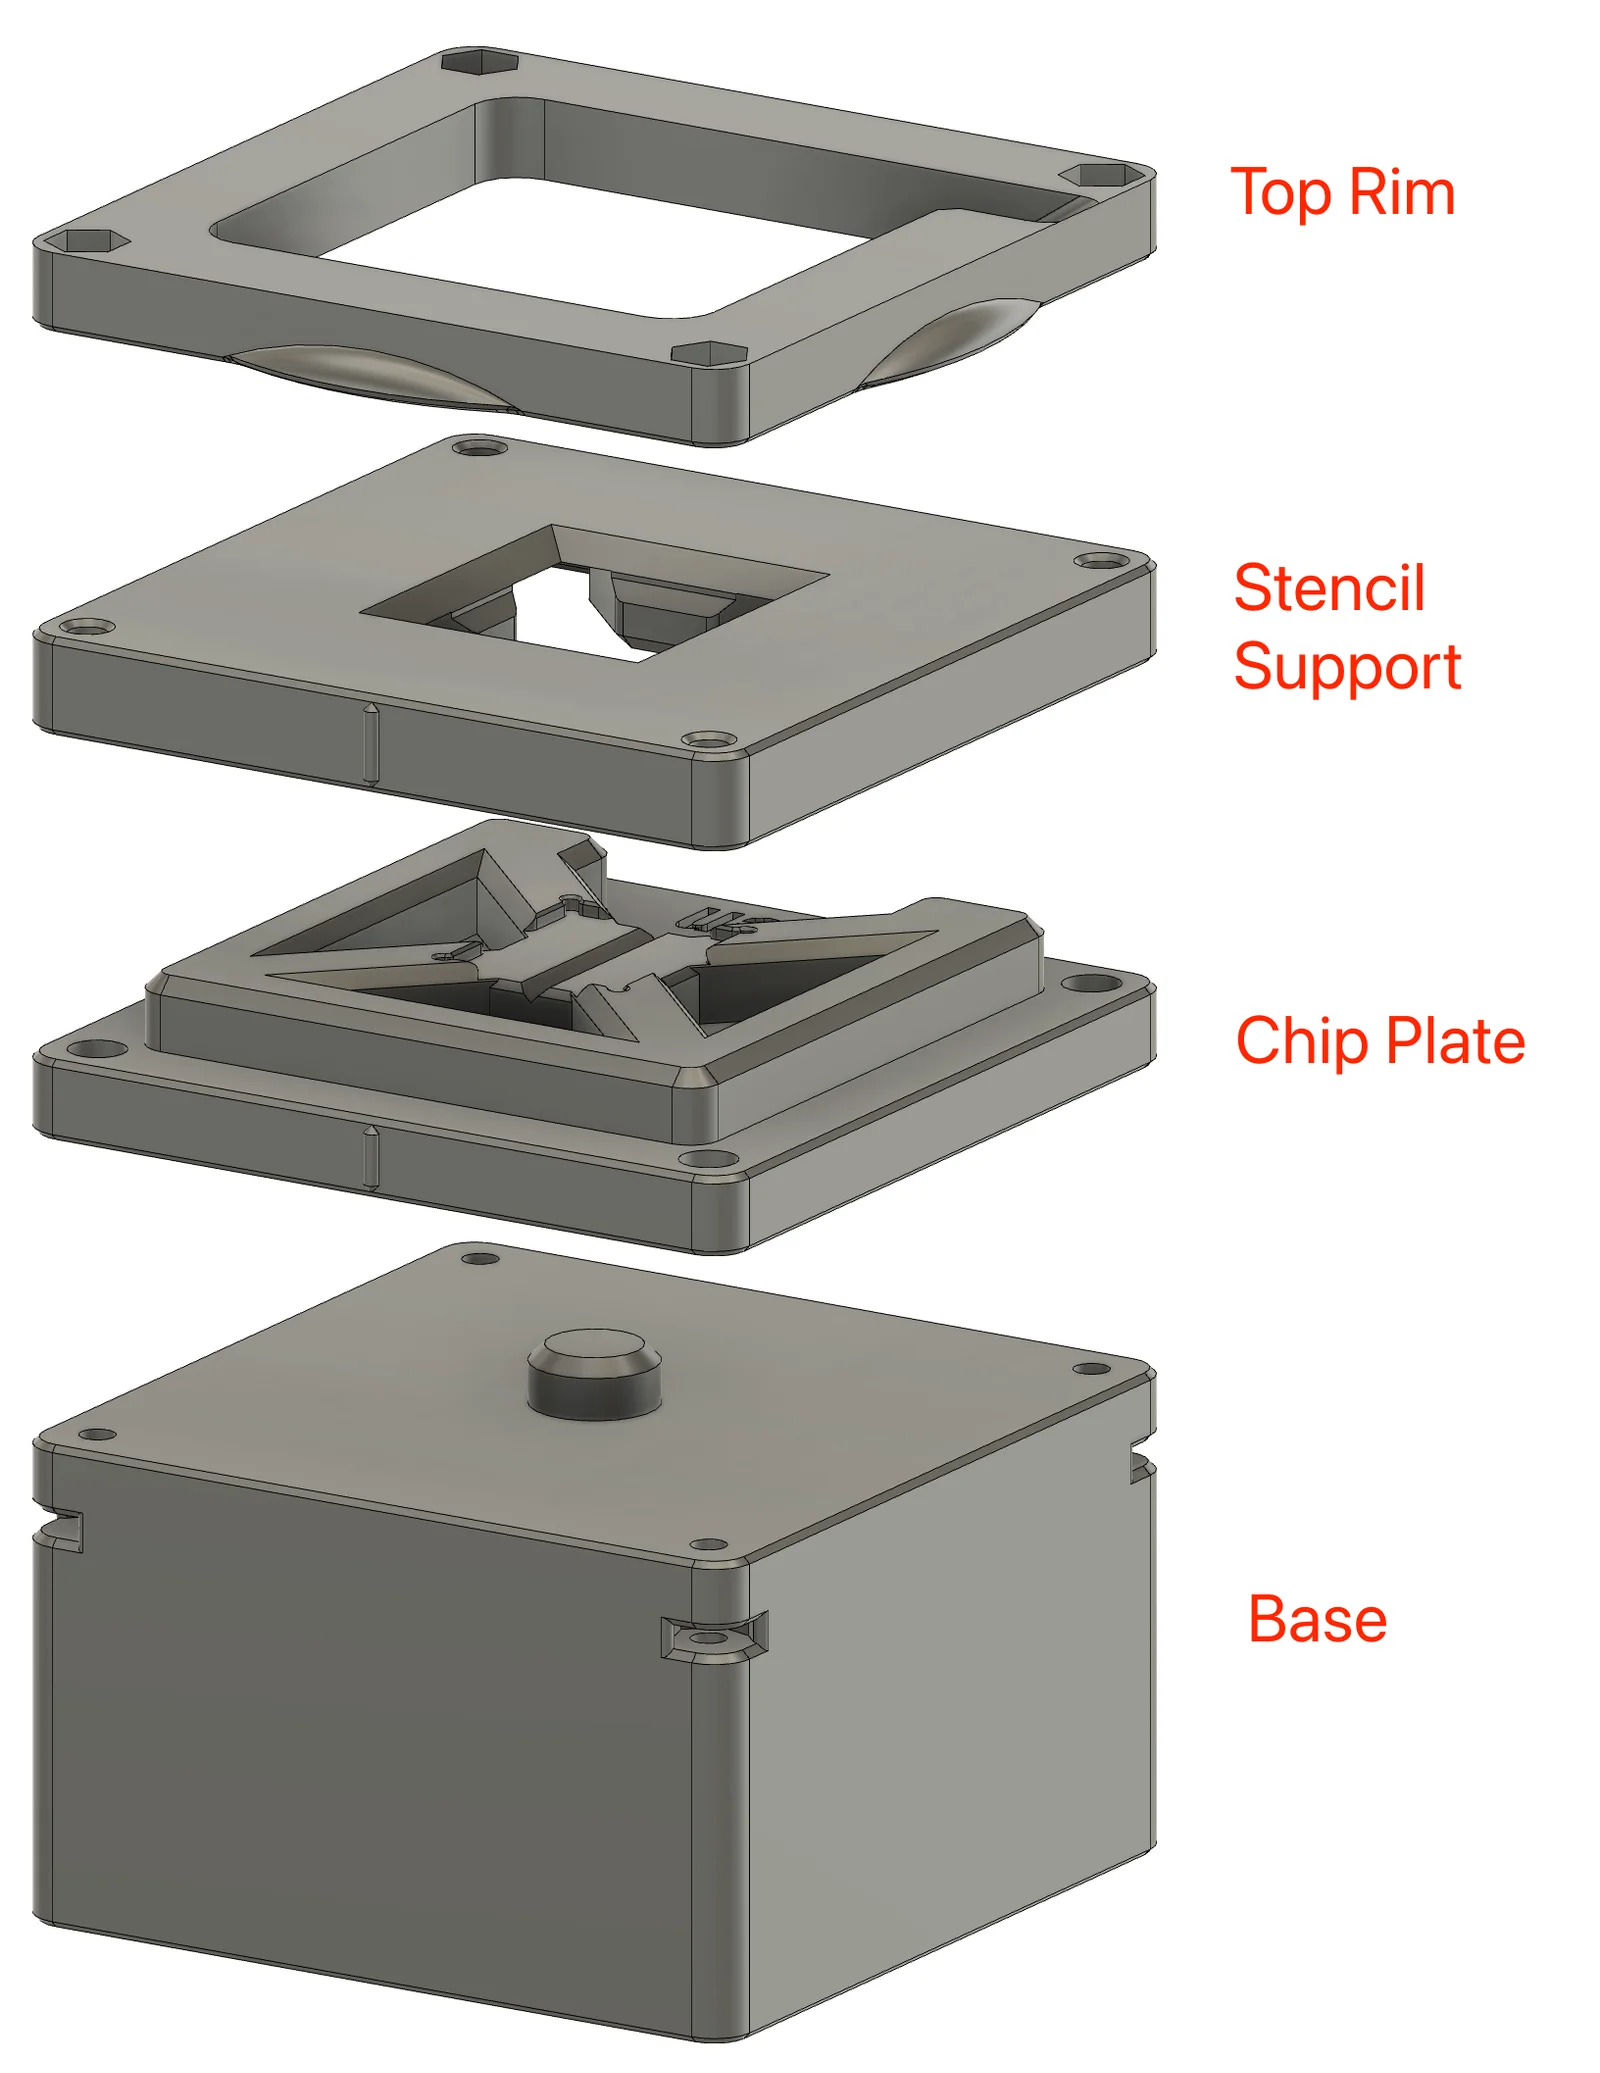
Clean out the support from the magnet hole on the bottom of the chip plate and insert a magnet no bigger than D8mm x 3mm.
Use [4x] M2x6mm screws to attach the top rim to the stencil support.
Use [4x] M2x8mm screws to attach the chip plate to the base AFTER inserting the magnet into the chip plate piece.
The base has an opening for a few coins to weigh the whole jig down for better stability.
ByJaronLikes310Downloads1K

 Byw3rN42Likes127Downloads935

 ByTomDDLikes89Downloads574

 ByJwidessLikes34Downloads375

 ByBroBuilds3D_4455044Likes32Downloads454

 ByckthLikes148Downloads2.4K

 Bynexgen-3d-printingLikes0Downloads392

 ByVikingptty_1943738Likes50Downloads233

 ByBrokentooth_designsLikes30Downloads225

 Byslava-kuzminLikes0Downloads282

 ByJKMCZLikes11Downloads176

 Byjodinskylab_3390035Likes144Downloads166