



Steam Machine Companion Cube / Vỏ đựng Weighted Storage Cube
 ByJaronLikes310Downloads1K
Build another version of this model.
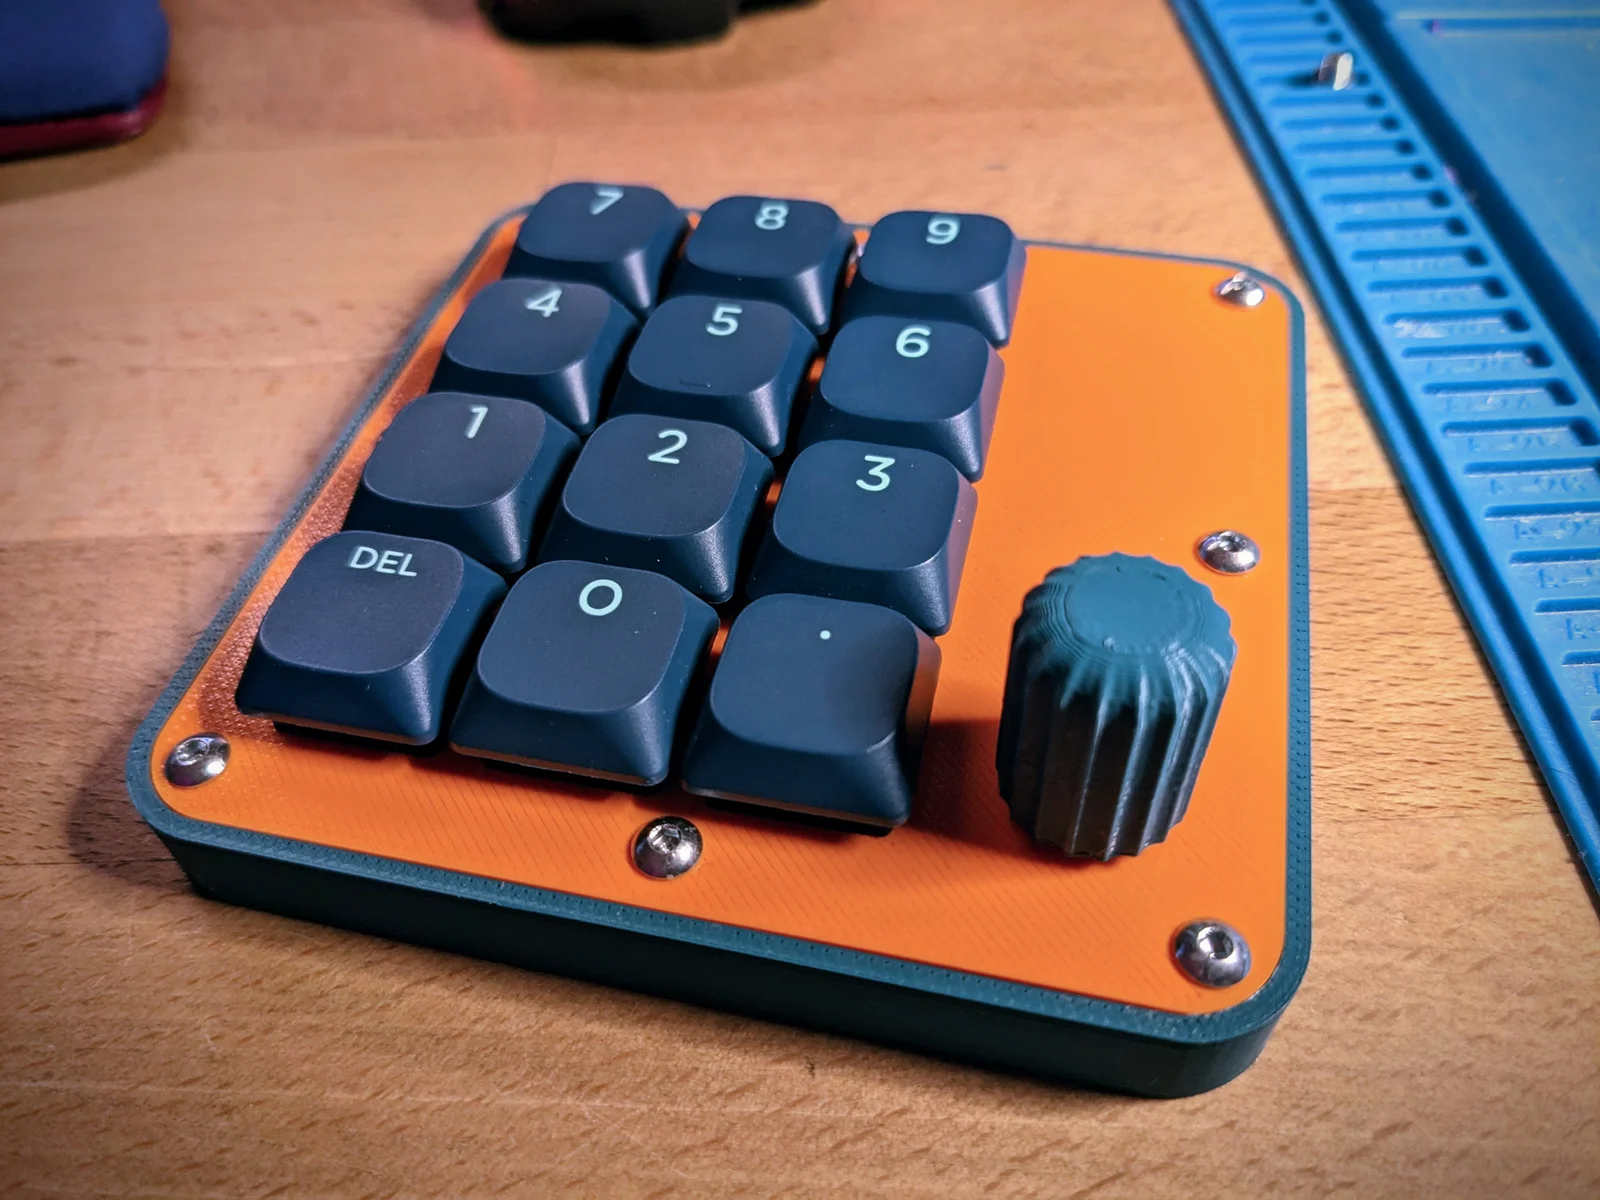
Low profile macropad with mechanical keys.
Amount
Part
Notes
Sources
13
1N 4148 Diode
DO-35 Diode Formfactor works best
Jellybean item: Amazon, Ebay etc
12
Cherry MX Low Profile Switch
Cherry MX Low Profile Switch | Lower body part of the switch sitting below the top plate should not go deeper than 7mm
Seems to be a bit difficult to source at the moment. I am using Reddragons from Aliexpress https://de.aliexpress.com/item/1005004299855522.html
1
Rotary Encoder Alps EC11E Type
Lower body part of the switch sitting below the top plate should not go deeper than 7mm
Jellybean item: Amazon, eBay etc. https://www.amazon.de/dp/B08728PS6N in my build
2
10k Resistor
M3x4 raised countersunk head screws
Jellybean item: Amazon, eBay etc
10
M3x4 raised countersunk head screws
Do not use hex-nut keyed screws as their heads will be too tall
Jellybean item: Amazon, eBay etc
8
M3 heated inserts
Optional. There are a lot of variants out there. Part is designed for ruthex (4mm hole)
Jellybean item: Amazon, eBay etc. https://www.amazon.de/dp/B08BCRZZS3 in my build
1
Pro Micro Arduino (ATMEGA32U4) USB-C Variant
There are a lot of clones out there. Dimension and part population might differ. You might need to remix the shell printed component if your dimensions are too far off.
https://www.amazon.de/dp/B0B5F3GT42 in my build. https://de.aliexpress.com/item/1005003643595104.html should work as well
12
Key Caps
DSA profile should work. In my build they would bottom out against the plate but still trigger. A printable low profile design is also included in the print files.
https://de.aliexpress.com/item/1005004840360158.html in my build.
1
6x6x6 Micro Switch
Snip off two legs, solder from the top.
Get an assortment of 6x6 Switches of eBay or Amazon. They have different shaft lengths, pick one which protrudes out of the shell.
Two variants of the body are included. One for heated inserts and one for self tapping. Recommended parameters:
If you are using printed keycaps, you might have to work the shaft hole a bit. What worked for me is to use a stem of an disassembled full size mx switch and a pair of pliers to ram it into the cap. This will debur the shaft cross and allow for easier mounting onto the final switches.
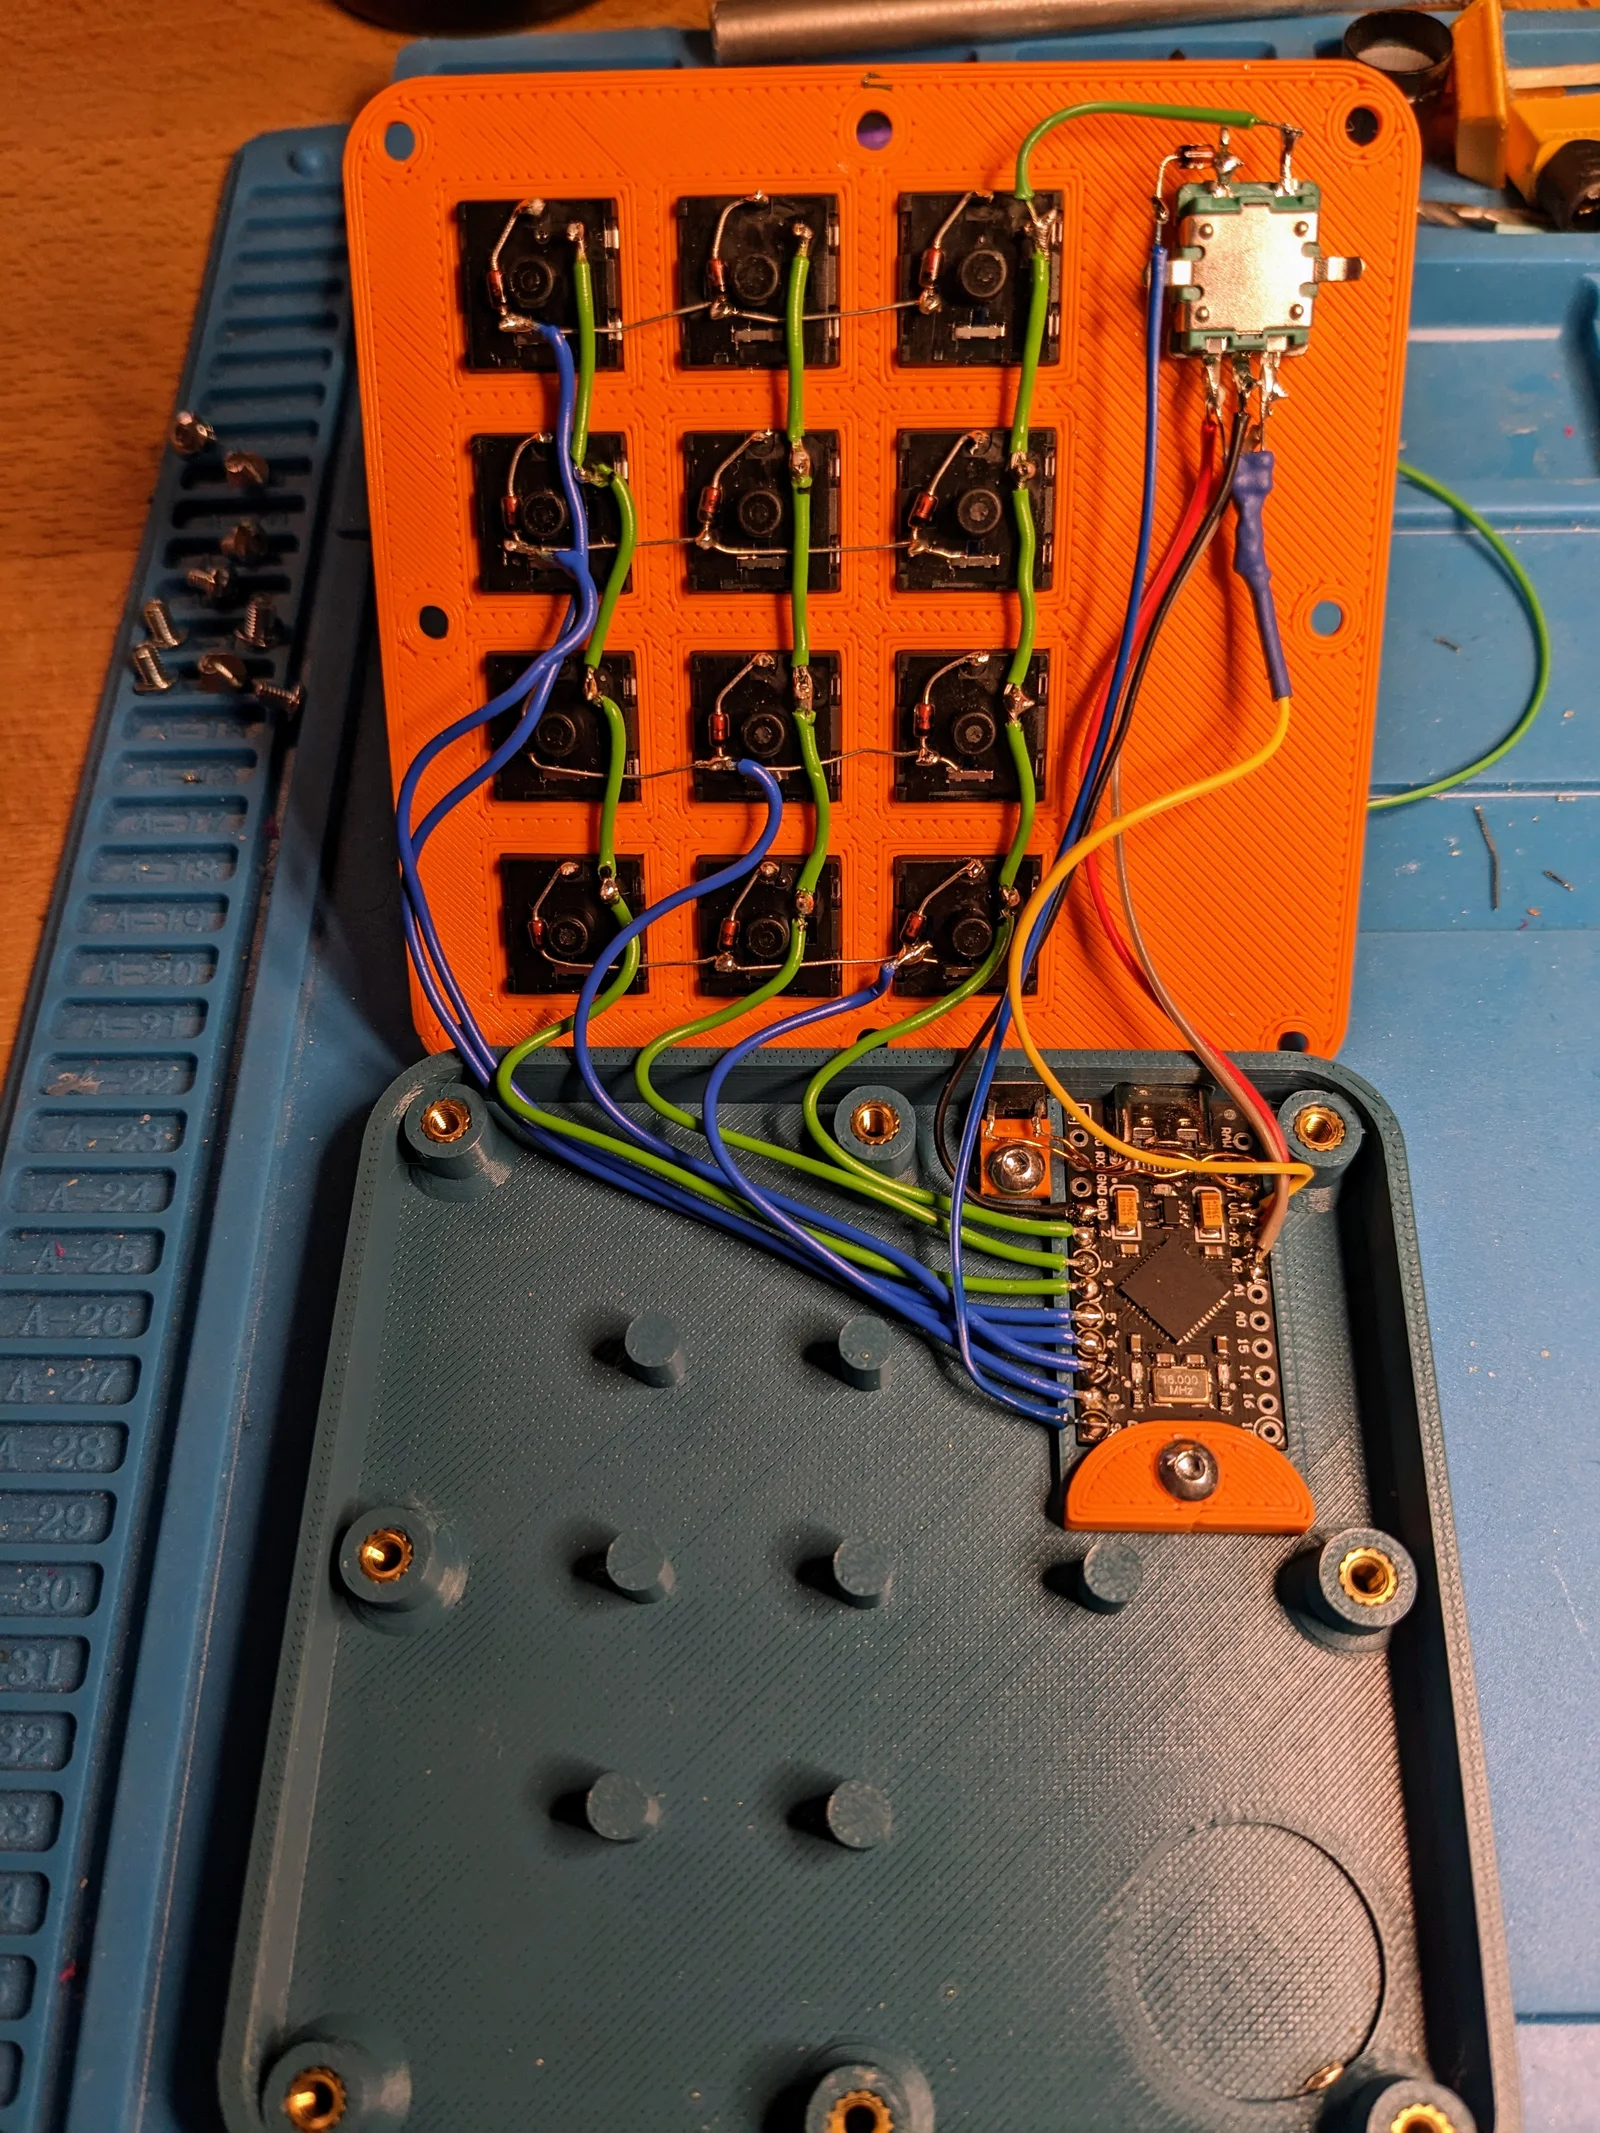
Wire the keyboard matrix as show in the diagrams below. This is pretty much the standard way to do this for all hand wired keyboards I have come across. If you have done hand-wired keyboards before, this will be business as usual.
Net
MCU Pin
Column 1
D4
Column 2
D0
Column 3, Encoder Switch Pin 1
D1
Row 1
B4
Row 2
E6
Row 3
D7
Row 4
C6
Row 5 / Encoder Switch Pin 2
B5
Encoder A
F4
Encoder B
F5
Encoder C
GND
Reset Button Pin 1
RST
Reset Button Pin 2
GND
As for the encoder: lines A and B need to be pulled up via 10k to VCC.
Row 5 is used for the encoder exclusively. The other side of the encoder switch is wired to Column 3 / D1. Please note that I have also included a diode for the encoder switch, this opens the possibility of populating 2 more switches on Row 5
For the wiring use AWG 28-30, you might have a difficult time of stuffing everything into the case when closing up. Keep the length of the wires also to a minimum.
The default keyboard mapping is as follows:
7
8
9
4
5
6
1
2
3
DEL
0
DOT
Rotary encoder is configured to Volume Up / Volume Down / Mute
Put the microcontroller into programming mode (Usually by doubletapping the reset button) and flash the provided vial or default (vanilla qmk) hex file. QMK toolbox should help you out here. If you prefer to use avrdude, this might help you out:
QMK
avrdude -p m32U4 -P /dev/ttyACM0 -c avr109 -U flash:w:./pls_macropad_default.hex
Vial
avrdude -p m32U4 -P /dev/ttyACM0 -c avr109 -U flash:w:./pls_macropad_vial.hex
If your system meets the vial requirements (udev rules for linux) you should be able to access and configure your keyboard via https://vial.rocks now:
Yes Please! Find STEP files attached and here is the onshape project if you prefer that
ByJaronLikes310Downloads1K

 Byw3rN42Likes127Downloads938

 ByTomDDLikes89Downloads578

 ByJwidessLikes34Downloads376

 ByBroBuilds3D_4455044Likes32Downloads457

 ByckthLikes148Downloads2.4K

 Bynexgen-3d-printingLikes0Downloads395

 ByVikingptty_1943738Likes50Downloads235

 By3dwakeLikes0Downloads361

 ByBrokentooth_designsLikes30Downloads227

 Byslava-kuzminLikes0Downloads284

 ByJKMCZLikes11Downloads178