




Bộ sưu tập 11 nhân vật mô hình Mecca Chameleon in 3D vui nhộn
 ByZED4EverLikes313Downloads5.2K
Build another version of this model.
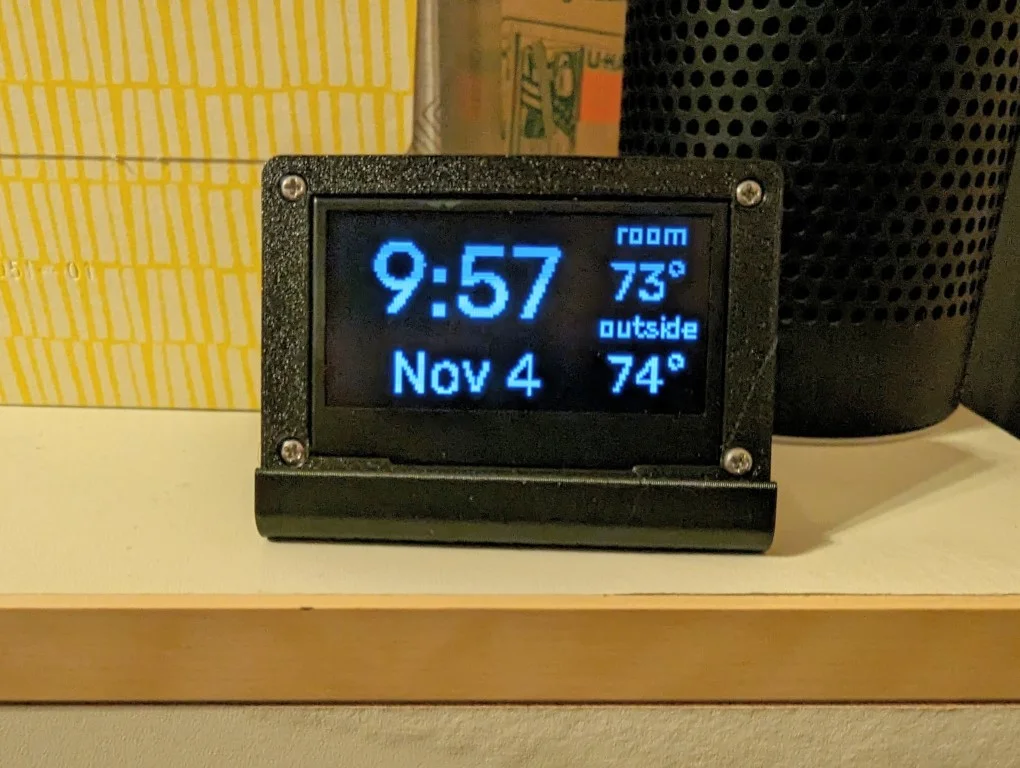
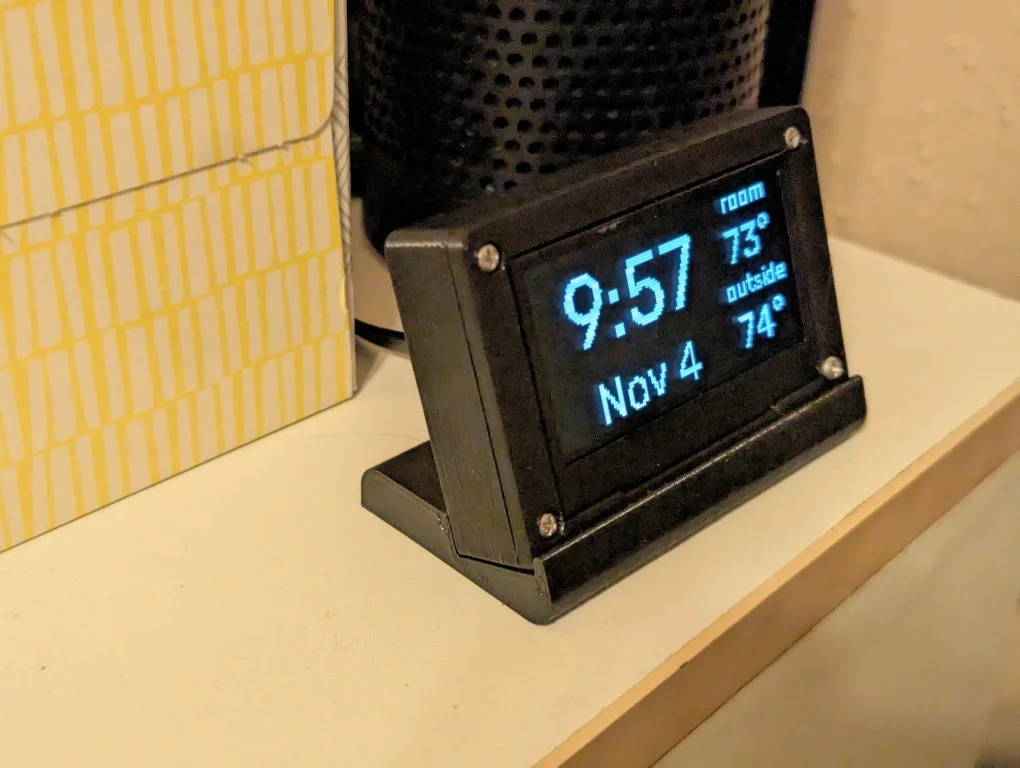
This project is for the 2.42" OLED screen (IIC or SPI) Preferably with the pins on the top center of the long side as shown in the pictures.
The ESPHome code for this project can be found here at https://github.com/kdorff/esphome/tree/main/guest-time-temp
There is about 10.9mm of space in side the case for your microcontroller.
Currently I offer two versions of the case. The "Rounded Bottom" version is the same, except the has a fillet on all four corners and might be chosen when you don't want to use the case's Platform.
Power comes in from the back. Need another side? Let me know. I'm powering the microcontroller with MicroUSB.
The case uses countersunk m2.5 screws to affix the lid to the case, instead of glue or tape. Lid and Base to attach using four m2.5 screws (8mm is about perfect).
This design requires m2.5 heat inserts in the Base. It uses these m2.5 heat inserts.
I used Polyimide Adhesive Tape (kapton-like) to insulate the microcontroller from the screen.
I used the ESP32 D1 Mini with good success.
Printer Brand:
Prusa
Printer:
Rafts:
No
Supports:
Yes
Resolution:
0.3mm
Infill:
20%
Filament: Hatchbox PLA White and Black
Notes:
Print in the provided orientations. Print at least the lid with supports.
Post-Printing =============
A chunky zip tie can be used for strain relief.
Used calipers to take measurements for the screen.
Designed (mostly) parametrically in Fusion 360.
Iterated until I was satisfied.
Category: Electronics
ByZED4EverLikes313Downloads5.2K

 ByAdam Záhořák ZáhořákLikes39Downloads256

 ByVC_DesignLikes271Downloads752

 ByfifindrLikes500Downloads4K

 Bymrfixit_324954Likes65Downloads473

 ByDan Schwartz SchwartzLikes744Downloads3.4K

 ByBrokentooth_designsLikes83Downloads449

 Byvc-designLikes0Downloads3.2K

 ByUpcrid3D_1585693Likes808Downloads2.1K

 ByWilko_SLOLikes935Downloads2K

 ByJordanK_858807Likes42Downloads436

 Bychubbs8697_2027893Likes585Downloads1.7K