



Ender 3 Bed level test
 Bygafyx3dLikes0Downloads120
Build another version of this model.
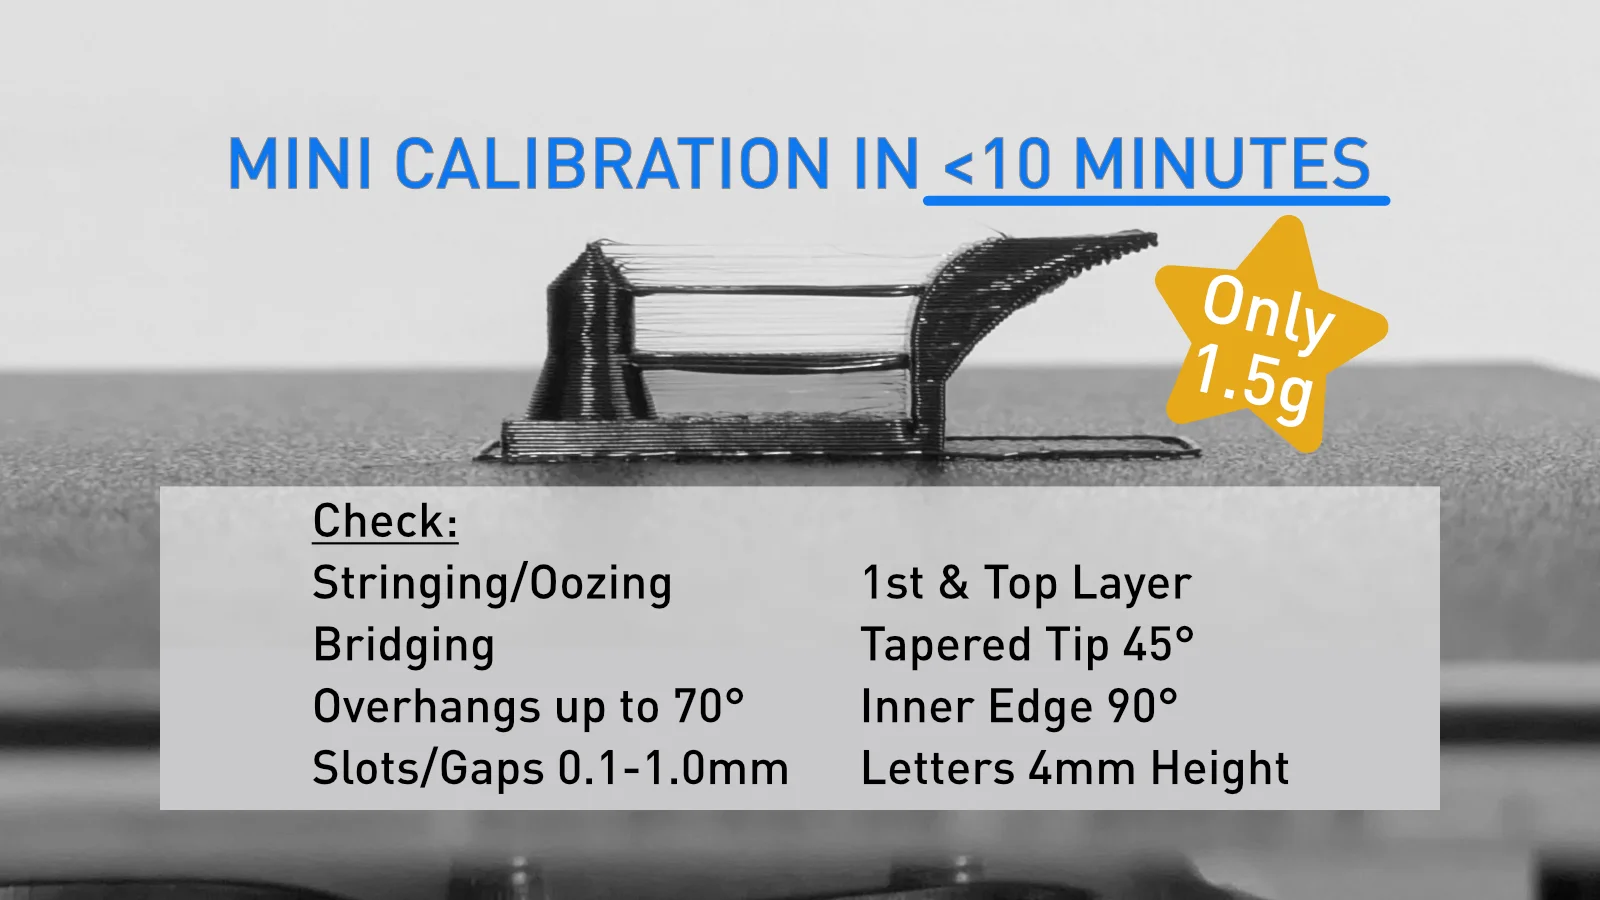
Main goal was to make a calibration test as tiny and effective as possible for the common 0.2mm layer height and 0.4mm nozzle.
Save as much material as possible
Save as much printing time as possible
Show useful test results for retraction and printing quality
Only include the most important and basic tests for proper calibration (in my opinion)
There are plenty of other test models out there, either with a very big range of tests, or just one test. Usually they are using a lot of printing material and printing time. However I just wanted to make a quick check to see, if printing results are okay regarding the most common topics - or have a quick test for fast iteration when adjusting parameters like temperatures, flow ratios, .... Compared to my V1 design, which was really useful over the years, I felt that within 10 minutes more could be tested.
Fast: Print in less than 10 minutes (depends of course on printer speed, my Ender V3 KE can print it in ~6 minutes)
Small and lightweight: ~1.5g at 38 x 13 x 12mm
3D printer friendly: No supports, rafts, brims, …
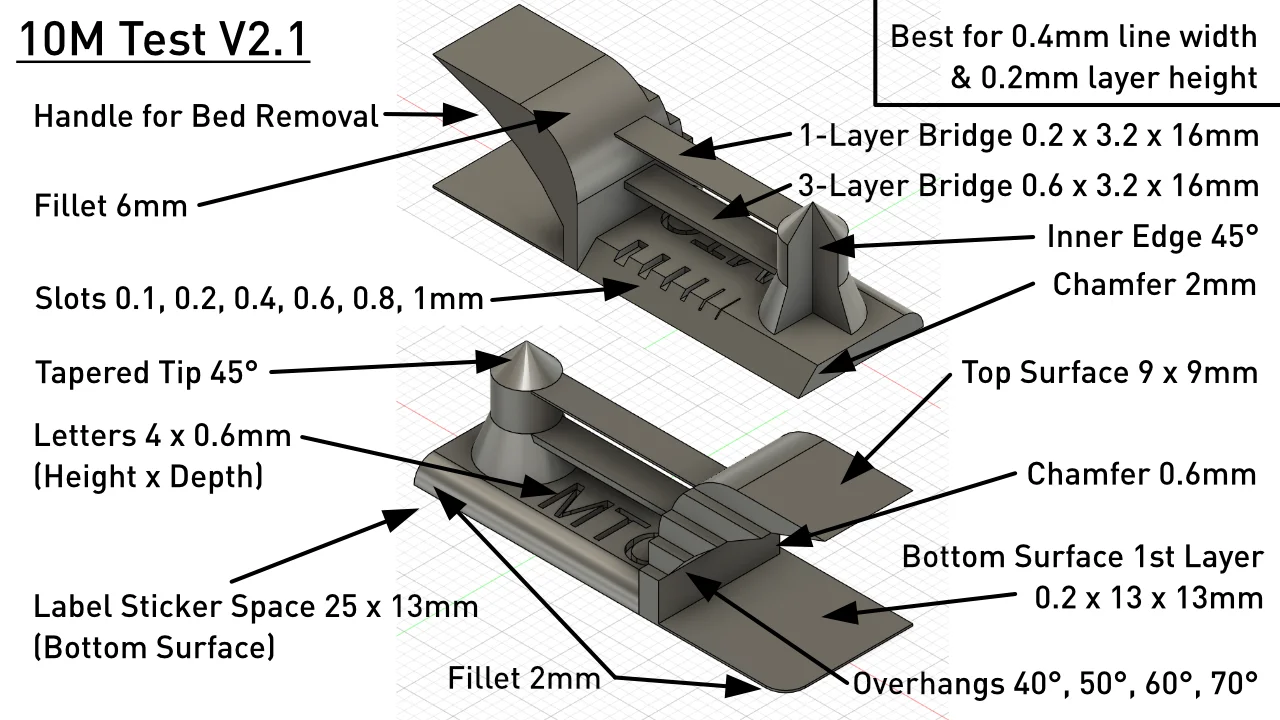
Area for 1st layer and top layer (with V2.1 model)
Bridging at ~16mm: Top bridge with 1 layer only (0.2mm) and bottom bridge with 3 layers (0.6mm)
Stringing and oozing check between left and right tower
Overhangs at 40°, 50°, 60°, 70°, topped with a 9 x 9 mm square surface
Slots/gaps at 0.1mm, 0.2mm, 0.4mm, 0.6mm, 0.8mm, 1.0mm
Fillet 2mm and 6mm in layer direction
Chamfer 45° in layer direction
Letters with 4mm height
Tapered tip 45°
Inner edge 90°
Use overhang structure as a handle to easily remove from a sticky printing bed
Space for label sticker on bottom side (13 x 25mm)
Top and bottom layers: Make sure to have enough layers, so that there is no infill below the text and gaps/slots! Works for me: 5 top layers and 3 bottom layers
Layer height: Can be also printed with other layer heights than the "default" 0.2mm, but check layer amount setting, tip #1. Also note, that the top bridge has a height of 0.2mm, which may have then more than 1 layer (e.g. at 0.1mm layer height) or disappear entirely with higher layer heights - though all depends on the slicer settings.
Overhang: The upper overhangs at 60°, 70° are of course challenging, don't be too sad if that won't work out well. IMO good designs for 3d printables should anyway never have overhangs >45°. If the top square is off, then the 70° might be too much of an overhang to handle.
Z Seam: Recommended to put it manually on the long continuous, 6mm fillet side without the steps (backside I believe)
Bygafyx3dLikes0Downloads120

 Byduo3dprintLikes0Downloads152

 BylaserbaconLikes0Downloads171

 ByswimLikes0Downloads108

 ByFonnPrintsLikes4Downloads18

 Bynadir-cn3dLikes0Downloads110

 Bytinx_1344834Likes1.2KDownloads6K

 ByKRYS_3DLikes8Downloads43

 ByleopoldmozartLikes0Downloads135

 Byledglass_319976Likes0Downloads3

 By3d-mmakerLikes0Downloads114

 ByBrokentooth_designsLikes23Downloads407