



Bộ sưu tập 11 nhân vật mô hình Mecca Chameleon in 3D vui nhộn
 ByZED4EverLikes313Downloads5.2K
Build another version of this model.
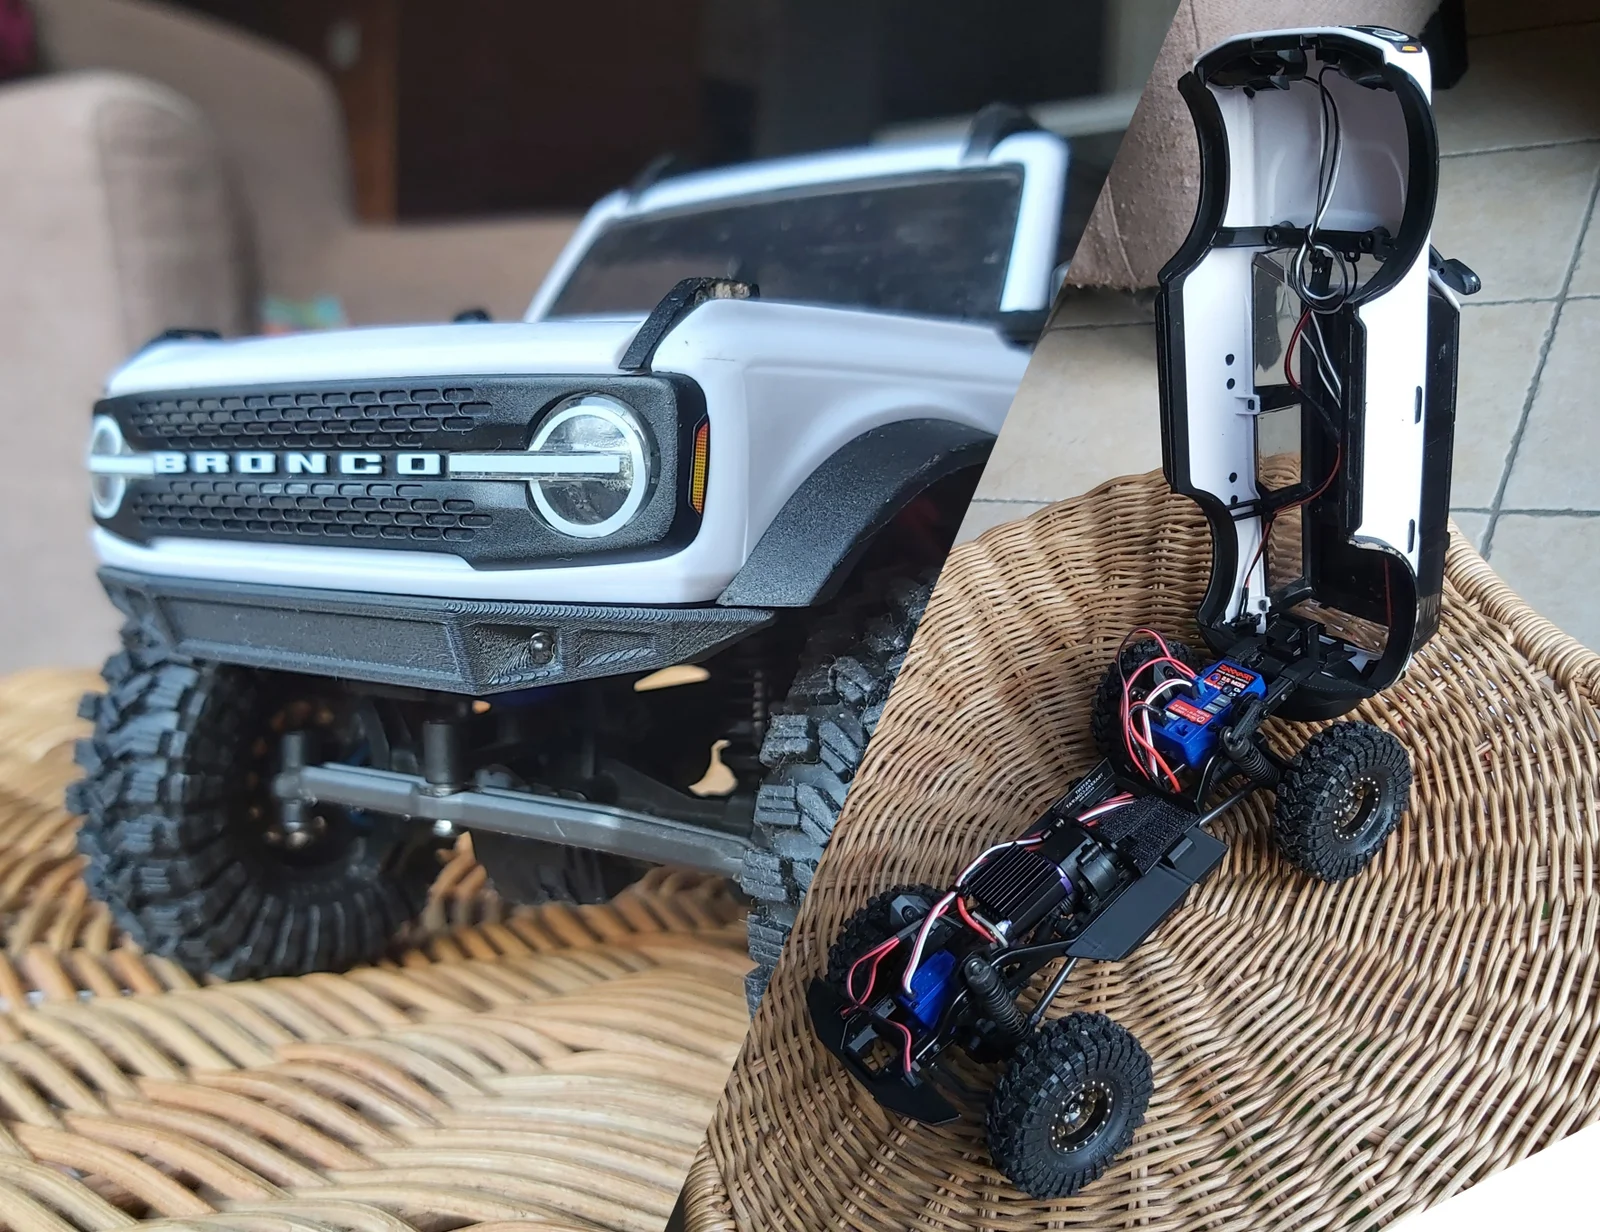
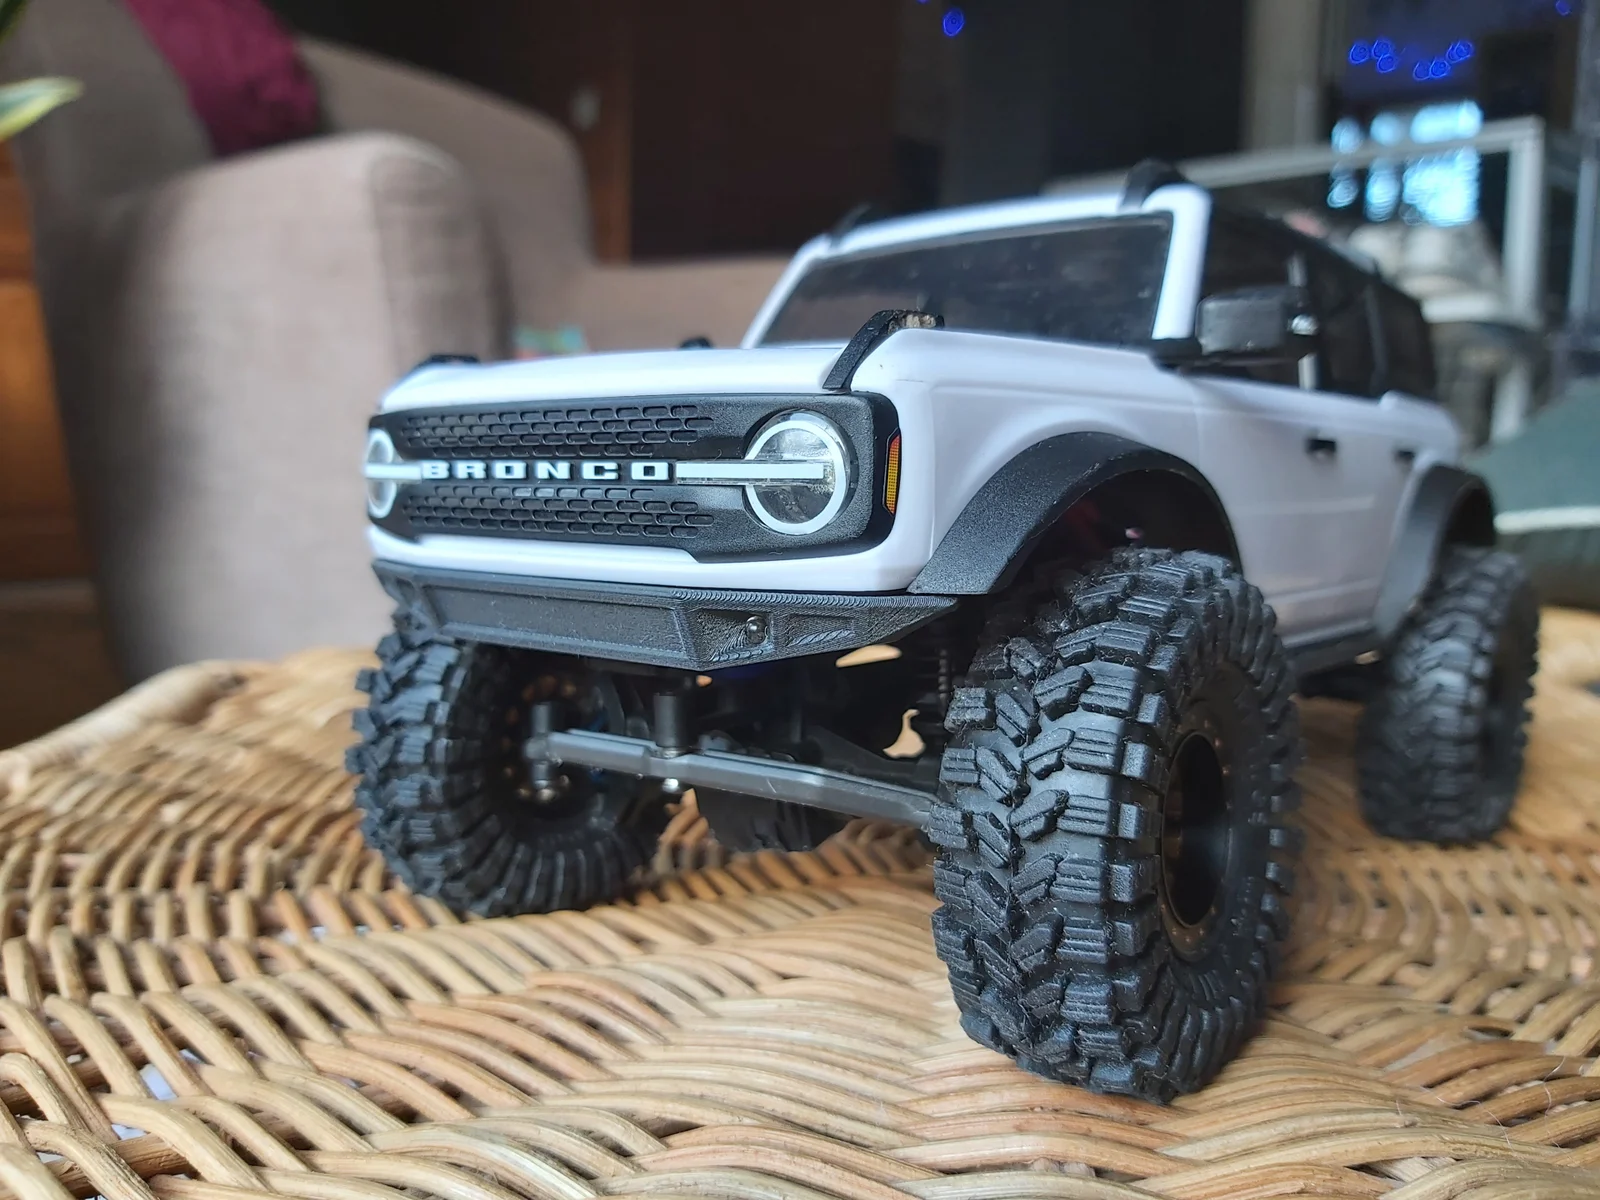
I originally created this high clearance / low profile bumper for the Trx4m Bronco to solve the issue of poor attack and departure angle, as well as to reduce rubbing of the wheels when using tires larger than the stock ones.
It is composed of a bracket and a bumper on both the front and the rear, which enabled me to make the bumpers easily swappable allows you to replace a damaged bumper with minimal disassembly, try on a different style without reprinting everything and even switch to a complete bumper delete on the fly !
This also made it possible to make the whole body hinge back to access the inside of the truck without the hassle of using both hands and having the body separated from the chassis, which might be a world's first using the stock bronco body !(at least according to my 5 minutes of googling, so please correct me if I'm wrong lol)
If you like my work and feel generous, please consider leaving a tip ! paypal.me/oclastax
(If you want to use this models for commercial purposes, please dm me so we can work something out !)
Print Settings / Recommendations:
Please keep in mind that everything was designed with my printer in mind, so if the tolerances don't work too well on your printer send me a message or leave a comment and I'll see if I can make something that works for you.
General Settings:
I designed everything to be printed with a 0.4mm nozzle at 0.2 layer height, but using a smaller nozzle / layer height shouldn't cause any issues, I would even recommend printing the bumpers themselves at a lower layer height (0.16mm in my case) for appearance purposes as they are the most visible parts.
Supports:
All parts are designed to be printed without the use of any support, except for the "front bumper bracket" and the "rear bumper bracket - center" which have very simple and flat overhangs that need some supporting, I recommend using auto generated classic supports with “only touching buildplate” enabled.
Materials:
On my rig everything was printed out of Pla+ which works perfectly fine for my part, but anything stronger like Petg or Abs should work fine too. I also printed the bumper themselves out or Pla-cf to give them a textured finish while also hiding the layer lines.
Required hardware:
Assembly:
before starting, keep in mind that everything will be screwed into plastic, so try not to overtighten things
First remove the four screw that secure the stock bumper to the metal chassis of the truck, remember to keep them as they will be reused to secure the new bumper. Next, take the left and right “rear bumper brackets” and screw them into the center bracket using the 2 M2x12 / 16 screws like so, pay attention to which one goes on what side, it should look like this:
Now, you can install this assembly as well as the front bracket to their respective ends of the chassis using the 4 screws that were used on the stock bumpers, be careful to use the following orientation:
Now, you need to choose if whether you want to go for the bumper delete or the low profile bumpers:
If you want to use lights, just unscrew the two screws that hold the small plastic brackets behind the lights on the original bumper and keep these screws, you can then remove the two LEDs (keep the 90° bend in the wires coming from the LEDs). Once this is done, take the two LEDs and fit them through the top rectangular hold and put them inside the round holes that go through the front of the bumper, this might be a bit fiddly so maybe try to unbend the two wires a bit to make it fit. Finally, take the two “light brackets” you printed and secure them behind the LEDs using the 2 screws that held the original lights in place, the raised circular part of the bracket goes towards the LEDs, it should look like this:
Then, simply screw each bumper into their respective brackets from the bottom, it is normal for the screws to come out the top a bit on the front bumper.
For the bumper delete, simply screw the "rear bumper delete plate" onto the rear bracket from the bottom using two M2x6 screws with the angled edge towards the outside, like that:
How to use:
To open the body normal, simply push in the two body clips outward while pushing on the front and rear bumper, just like with the old bumpers.
To use the hinged body feature, just push the front body clip outward and the rear bracket should simply rotate with the rear of the body still attached, this is why not overtightening the two screws holding the center bracket is important.
If you want to swap bumpers, just unscrew them using the 4 vertical screws that hold them in place, and if you want to switch to the bumper delete just screw the “rear bumper delete plate” instead of the normal bumper and don't screw anything in the front, you can also just screw the two remaining screws in the front bracket for storage.
ByZED4EverLikes313Downloads5.2K

 ByfifindrLikes500Downloads4K

 ByVC_DesignLikes679Downloads3.6K

 ByDan Schwartz SchwartzLikes744Downloads3.4K

 Byvc-designLikes0Downloads3.2K

 ByUpcrid3D_1585693Likes808Downloads2.1K

 ByWilko_SLOLikes935Downloads2K

 Bychubbs8697_2027893Likes585Downloads1.7K

 Byquibeck_3353173Likes965Downloads1.9K

 BySeppoTakaloLikes960Downloads1.9K

 Byadvanced-hobby-labLikes0Downloads288

 ByRobertoGalloc_356815Likes549Downloads1.8K