



Bộ xương Axolotl – Mô hình linh hoạt có khớp nối in trực tiếp
 ByHacker Man ManLikes248Downloads1.5K
Build another version of this model.
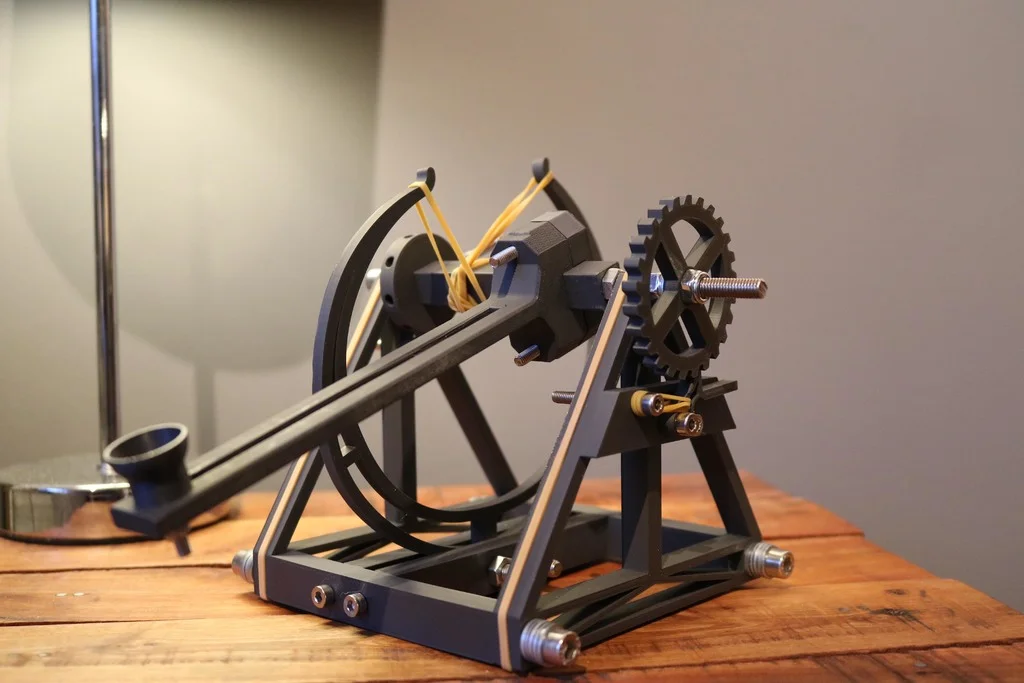
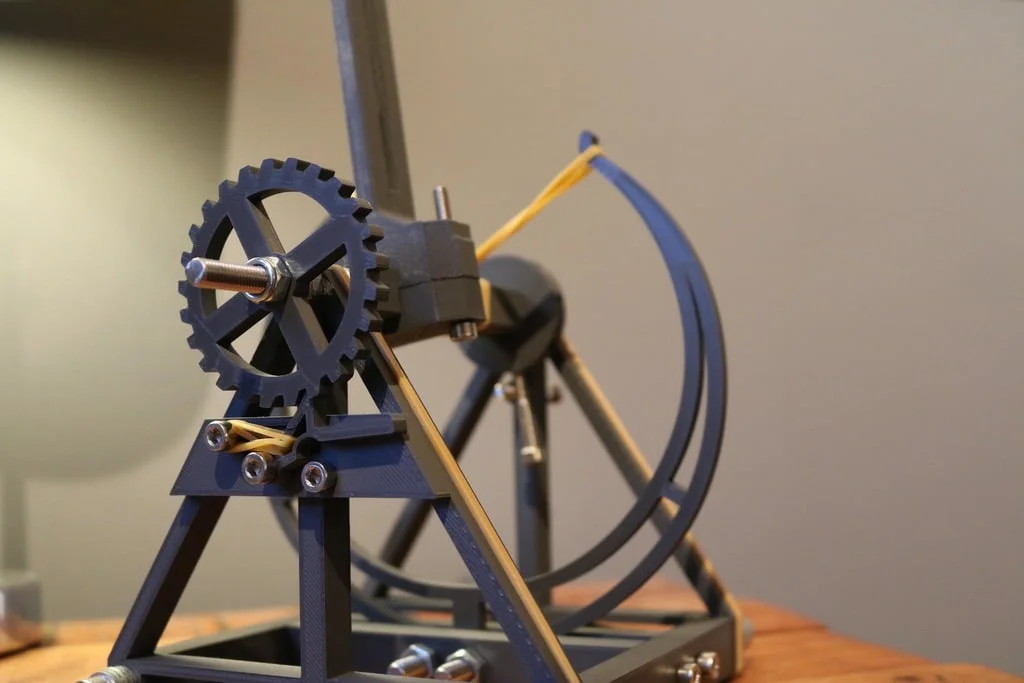
Catapult inspired by Leonardo da Vinci, more powerful than a simple desk toy, roughly 110mm tall (frame) Easily printed within 24 hours, have fun!
Be sure to upload photos of yours when its complete! Id love to be able to include them in my end of semester presentation! Thanks!
UPDATE - 31st March 2019
1 - Enlarged top holes on A frames to allow for smother rotational motion.
2 - Removed material on "Right A Frame" This removes the need for supports and saves time/ material.
3 - Added the option to print the base all in one (now only 7 of the M4x25mm cap screws are needed.
UPDATE - 1st April 2019
1 - Removed the need for a screw to stop the trigger, saves one screw and print time.
2 - Modified the whole model to use standard metric size screws (see below in "materials needed").
3 - Work began on a miniature version.
UPDATE - 5th April 2019
1 - Modified fulcrum to add strength and make easier to print without supports at the bottom.
2 - Modified left A-Frame to add strength to angle stop function.
UPDATE - 6th April 2019
1 - Added an assembly video for MK1 to ease the construction process. https://www.youtube.com/watch?v=ZB9BcsdIJiA&feature=youtu.be
UPDATE - 1st May 2019
1 - NEW ADD-ONS:
INTRODUCING:
(Both of the above use the original bucket and fasteners)
(The sights fit using an interference fit between the triangles on the "sights holder" and the triangle cut outs on top of one of the "A-Frames" The fit should be snug, if not, shim with paper or glue)
2 - Uploaded images of print orientations for certain parts to ease confusion. All other parts are as you imagine them to be printed.
3- Began work on an improved fulcrum to remove the need for the threaded rod.
UPDATE - 6th May 2019
1 - Removed the option to print the base in separate parts.
2 - Added better Sights (removed old file)
UPDATE - 13th May 2019
1- Catapult MK2 added.
Design updates -
The arm is now lighter and fits better with the fulcrum, it also looks nicer and doesnt need nuts to hold it together.
The fulcrum no longer needs a threaded rod, instead use the same M6 bolt as the other end.
The new Ratchet and Trigger are now fitted to the inside of the A-Frame (See Images) This idea was provided by "TIANYU_LIU" who remixed the MK1. Due to the high volume of messages asking for a version without the need of a threaded rod, i modified the design to use a bolt instead.
To Print MK1:
To Print MK2:
Universal Files:
For Catapult MK1:
- M4 x 25mm Cap Screws - 7 - M6 x 25mm Cap Screws - 6 - M6 x 40mm Cap Screw - 1 - M6 Threaded rod 80-100mm long - M4 Nut - 3 - M6 Hex Nut - 3 - M6 Nyloc Nut - 2 - An assortment of elastic bands (smaller ones will give greater power for the arm)
For Catapult MK2:
- M4 x 25mm Cap Screws - 6 - M6 x 25mm Cap Screws - 8 - M4 Nyloc Nut - 1 - An assortment of elastic bands (smaller ones will give greater power for the arm) - NO THREADED ROD
After Printing
Category: Mechanical Toys
ByHacker Man ManLikes248Downloads1.5K

 Byquibeck_3353173Likes351Downloads2.1K

 Bycreative-designsLikes0Downloads105

 Bycream110_291842Likes924Downloads7.7K

 ByOnemoredaveLikes861Downloads6.9K

 ByfifindrLikes0Downloads267

 Byjs14581_2767550Likes118Downloads3.3K

 ByAristotelisNellasLikes18Downloads708

 BystinovlasLikes125Downloads477

 ByTheMakerStuffLikes315Downloads1.9K

 ByGoolow_295072Likes598Downloads1.6K

 ByMikWantecLikes264Downloads1.5K