



Bộ sưu tập 11 nhân vật mô hình Mecca Chameleon in 3D vui nhộn
 ByZED4EverLikes313Downloads5.2K
Build another version of this model.
=====
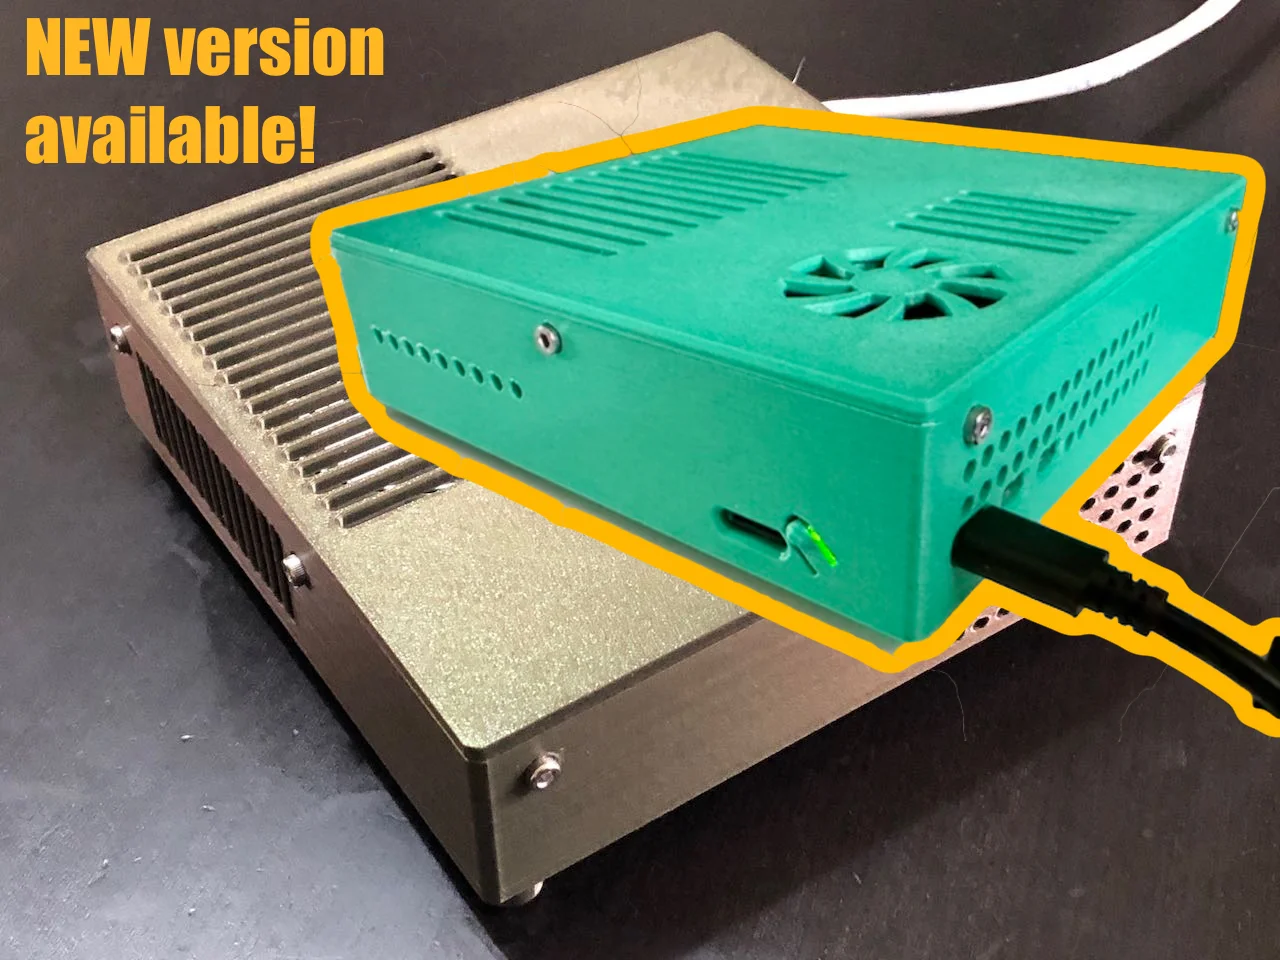
I made a new version, specially adapted for the Raspberry Pi 5. And it's way better, more robust and easy to assemble. You can still download and build the initial project here. But if you want the new design, go get it here!
=====
This project was first inspired by araimbox's PiNAS. I wanted to get rid of the soldering part to connect the hard disks. Also, I was a bit afraid of the temperature management in such a small enclosure, with all the CPU electronics so close to each other.
So here it is:
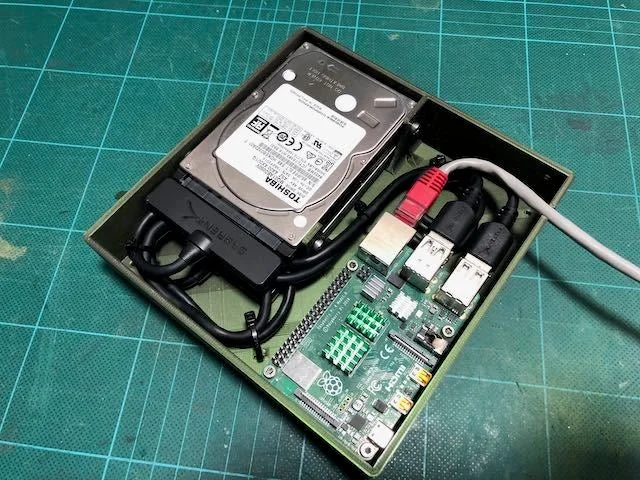
Works with aRaspberry Pi 4 andtwo USB SATA Hard disk drives connected with the shortest SATA USB cables I could find.
Small footprint, a 15.2cm x 15.2cm square.
Mainlyunibody, only two main parts including anchors to ease cable management with small zip ties. No supports needed for any of it.
No glue, only M3 screws.
Plenty of air vents toprevent choking, plus a Noctua fan that only runs when necessary thanks to Tyler's tutorial on Howchoo.com. A bit of soldering is necessary if you want to achieve this, but it's worth the effort.
I use OpenMediaVault on the software side; SMB sharing, DLNA streaming, lots of plugins and you can even run a Plex server. it's a very nice platform.
four 4mm diameter anti-slip rubber pads
The whole assembly process is illustrated below.
This project was first inspired by araimbox's PiNAS. I wanted to get rid of the soldering part to connect the hard disks. Also, I was a bit afraid of the temperature management in such a small enclosure, with all the CPU electronics so close to each other.
So here it is:
Works with aRaspberry Pi 4 andtwo USB SATA Hard disk drives connected with the shortest SATA USB cables I could find.
Small footprint, a 15.2cm x 15.2cm square.
Mainlyunibody, only two main parts including anchors to ease cable management with small zip ties. No supports needed for any of it.
No glue, only M3 screws.
Plenty of air vents toprevent choking, plus a Noctua fan that only runs when necessary thanks to Tyler's tutorial on Howchoo.com. A bit of soldering is necessary if you want to achieve this, but it's worth the effort.
I use OpenMediaVault on the software side; SMB sharing, DLNA streaming, lots of plugins and you can even run a Plex server. it's a very nice platform.
four 4mm diameter anti-slip rubber pads
The whole assembly process is illustrated below.
Printer Brand: Prusa
Printer: I3 MK3S
Rafts: No
Supports: No
Resolution: 0.20
Infill: 15%
Filament: Prusament PLA PLA Mystic Green
Notes:
You have to print one frame, one top and four feet.
The frame and top parts were designed to be sturdy so no bending would occur in case of small temperature peaks; they are quite thick so expect long prints: 10 hours for the frame and 4 for the top.
Pay attention to parts orientation on the bed (rather obvious).
ByZED4EverLikes313Downloads5.2K

 BymoonyxLikes0Downloads699

 ByrjunLikes0Downloads305

 ByUpcrid3D_1585693Likes808Downloads2.1K

 ByAdam Záhořák ZáhořákLikes39Downloads261

 ByWilko_SLOLikes935Downloads2K

 ByRobertoGalloc_356815Likes549Downloads1.8K

 ByTater_364200Likes486Downloads1.6K

 ByleonicLikes0Downloads1.4K

 Bywhilex_1739192Likes644Downloads1.1K

 ByRungeKuttaLikes229Downloads1.2K

 Byreinvent3dLikes0Downloads135