



Mô hình 3D dao Karambit CS:GO
 Bybonzai000Likes716Downloads16.8K
Build another version of this model.
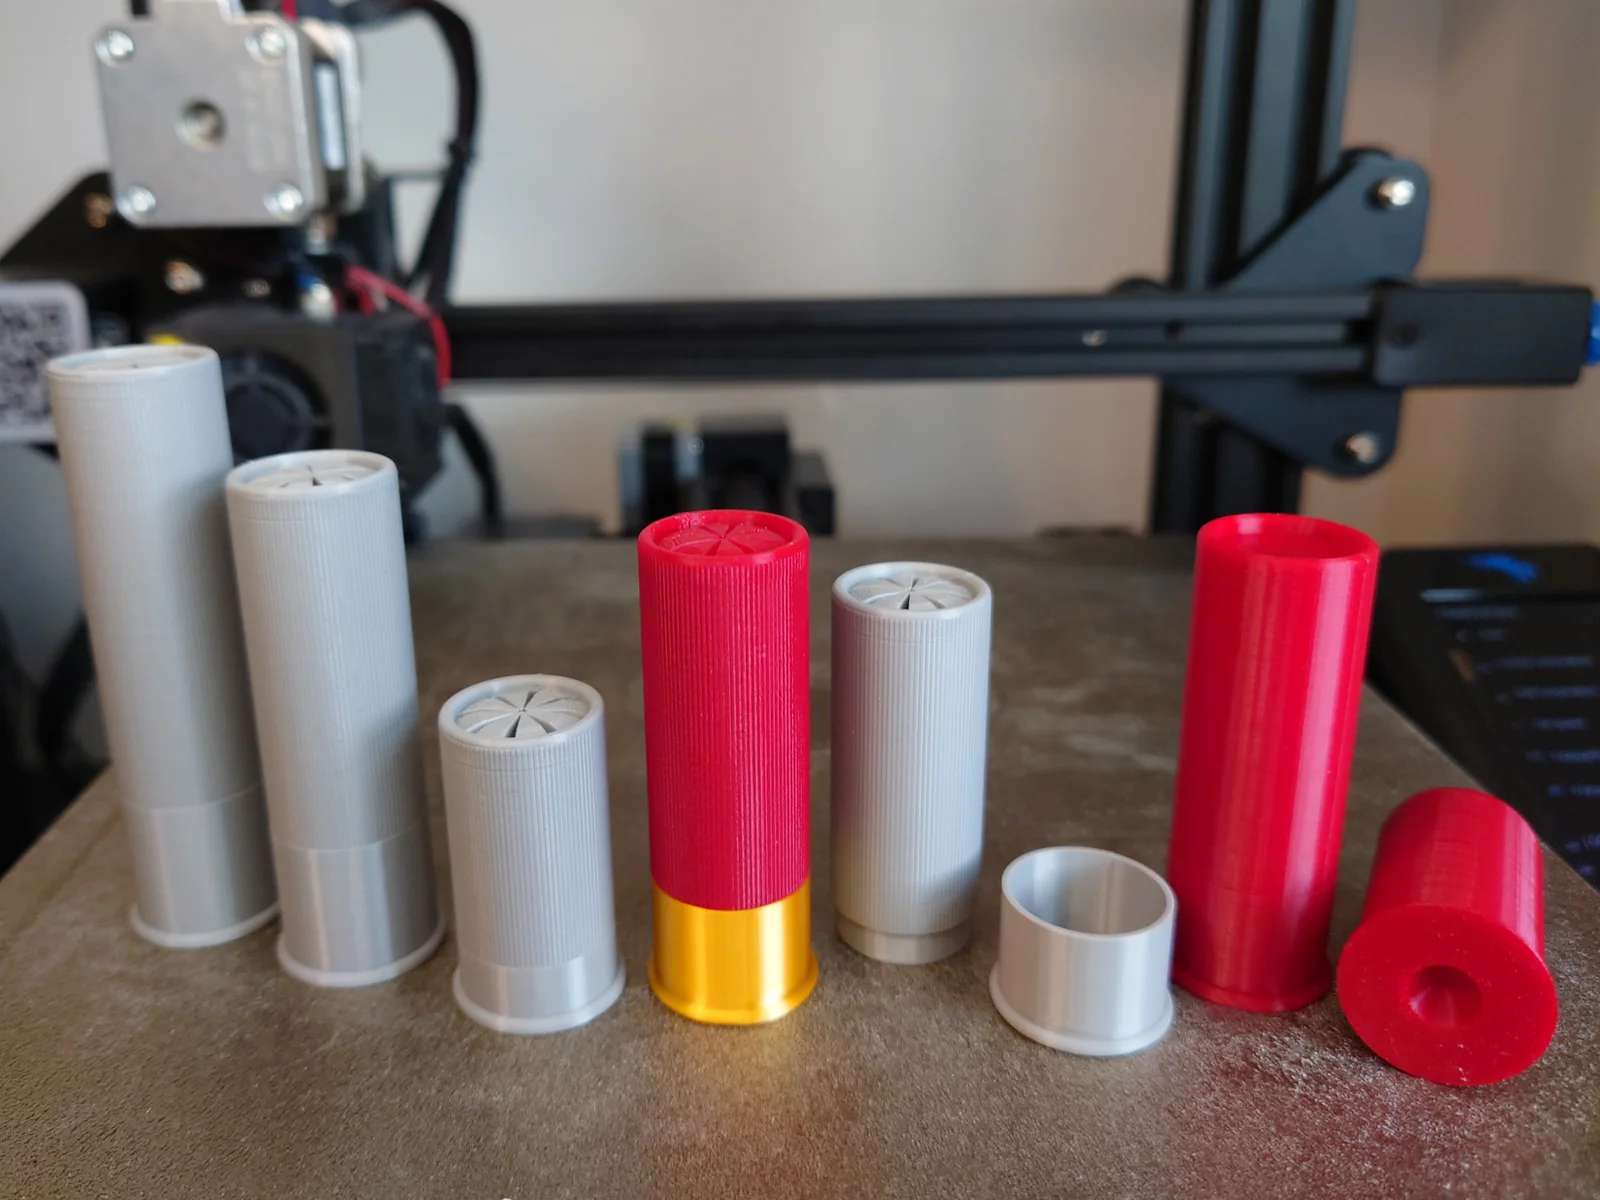
A 12 gauge shotgun shell, also known as 12ga or 12G shotshell, is a centerfire shotgun cartridge. Centerfire shotgun shells were designed in the mid 1800s.
Includes 4 lengths: 2 3/4in (most common, 2.75in, 61mm), 3in (67mm), 3 1/2in (3.5in, 80mm), 1 3/4in "shorty" (1.75in, 39mm).
Note: Shotgun shells are measured by the total length of the uncrimped/unfolded shell. The actual length of a loaded 2 3/4 inch shell is around 2.4in.
Print this for props, display, education, training, or just because it's cool.
Contains 17 files:
- Accurately sized replicas: 12ga_2.75in_cartridge.stl, 12ga_1.75in_cartridge.stl, 12ga_3in_cartridge.stl, 12ga_3.5in_cartridge.stl
- Separate brass head and case pieces for easily printing in different colors: 12ga_2.75in_head.stl, 12ga_2.75in_case.stl, 12ga_1.75in_head.stl, 12ga_1.75in_case.stl, 12ga_3in_head.stl, 12ga_3in_case.stl, 12ga_3.5in_head.stl, 12ga_3.5in_case.stl
- Snap cap/dummy round for cycle and dry fire practice, with firing pin hole and reduced case size: 12ga_2.75in_snapcap.stl, 12ga_1.75in_snapcap.stl, 12ga_3in_snapcap.stl, 12ga_3.5in_snapcap.stl
- Information txt file with recommended print settings: 12ga_pack_info.txt
Originally uploaded on Thingiverse: https://www.thingiverse.com/thing:6111702
Print Settings:
- Material: Tested with PLA and PLA+/PLA Pro.
- Overall print size: 80.1mm tall (3.5in cartridge), 22.5mm diameter.
- Layer Height/Quality: 0.16mm or less recommended, 0.12mm works best.
- Infill: 20% is fine for display, 30% or more recommended for snap cap use.
- Print Speed: 50mm/s or less recommended. I do 40mm/s overall speed and 10mm/s initial layer speed.
- Adhesion: A brim might be needed, depending on the printer and bed type. I have a textured PEI bed, and with proper calibration, additional adhesion isn't needed.
- Post print: The pieces may require some sanding or filing for proper fitment if the bottom layers bulged out a little. Fitment should be a little snug, but easy to take in and out. A properly calibrated setup shouldn't need additional work.
Bybonzai000Likes716Downloads16.8K

 ByFotisMintLikes340Downloads2.5K

 Bypapyskull_3946746Likes152Downloads506

 Bypokon_nurdspaceLikes429Downloads1.8K

 ByZabricot200_1688175Likes8Downloads185

 BybobmakesLikes37Downloads285


 ByDajaLikes119Downloads146

 Bythomaseap_259823Likes6Downloads121

 ByDC_8576Likes454Downloads1.8K

 BytheStonefoxLikes111Downloads205

 ByJuanCruz_1831746Likes1Downloads7