



Vải In 3D Cấu Trúc Hình Bát Giác (Octagon Fabric)
 ByDrewmundLikes833Downloads4.6K
Build another version of this model.
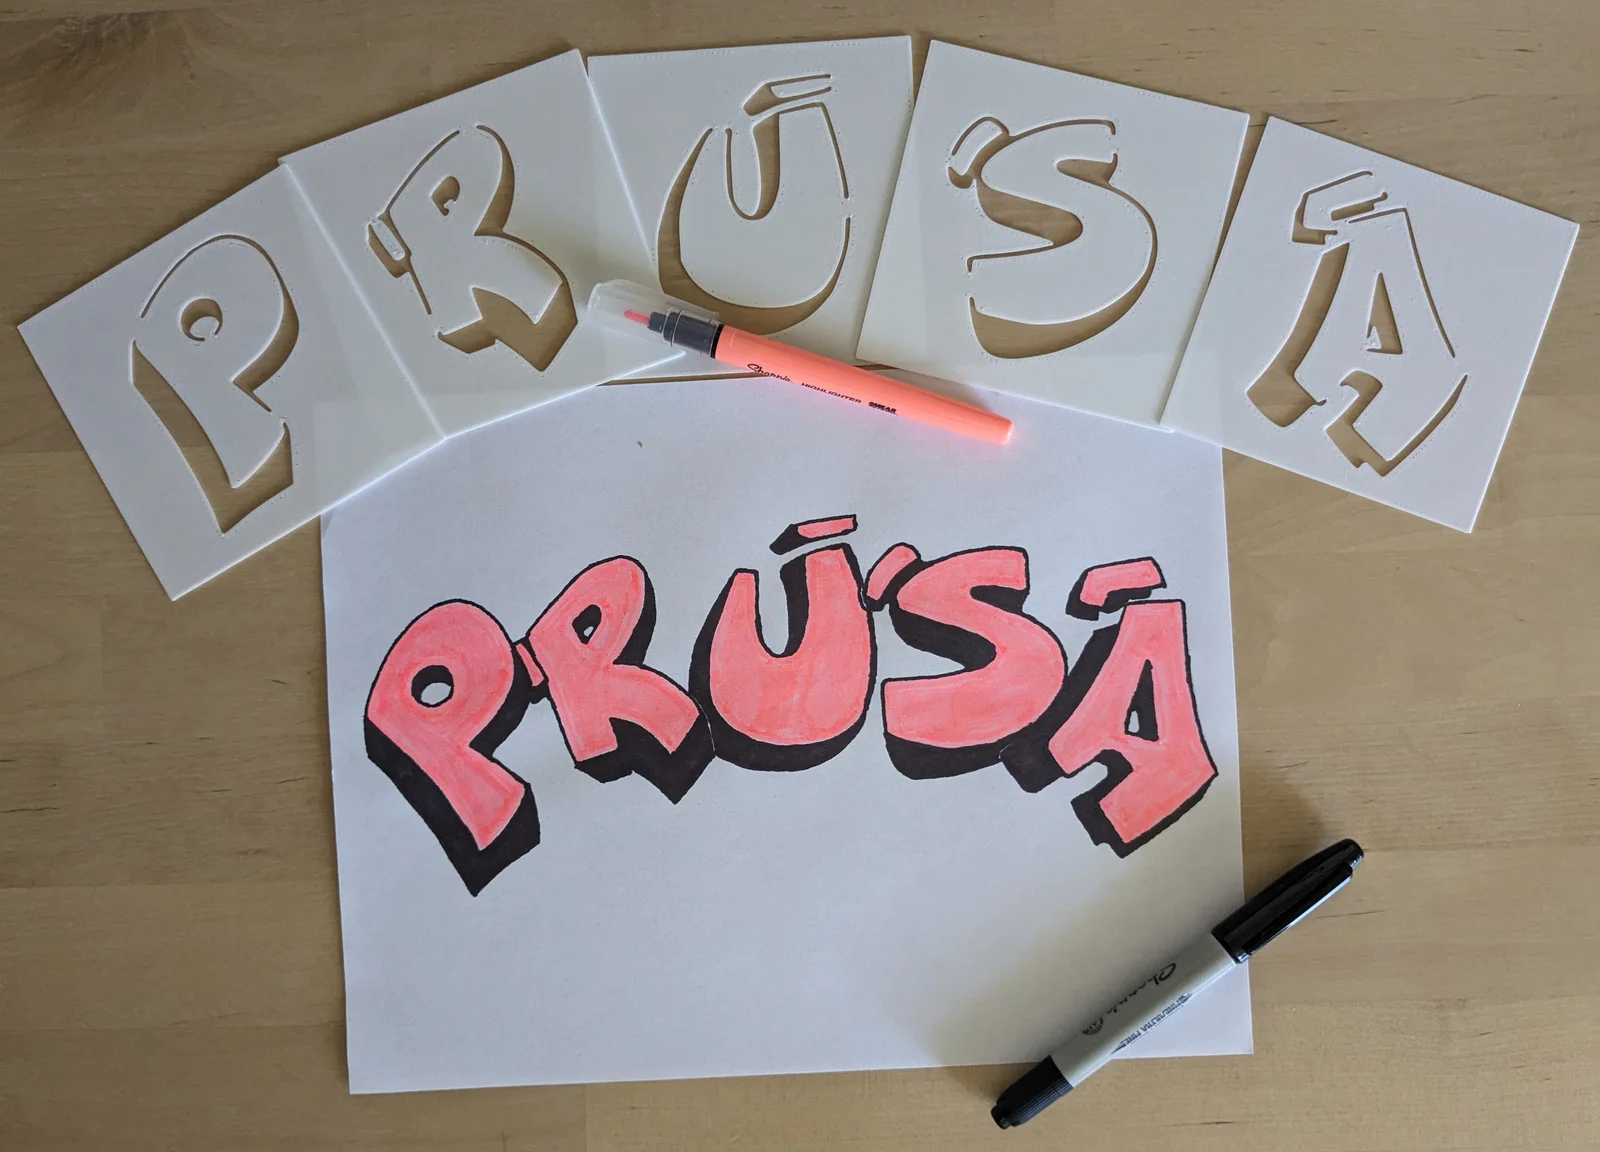
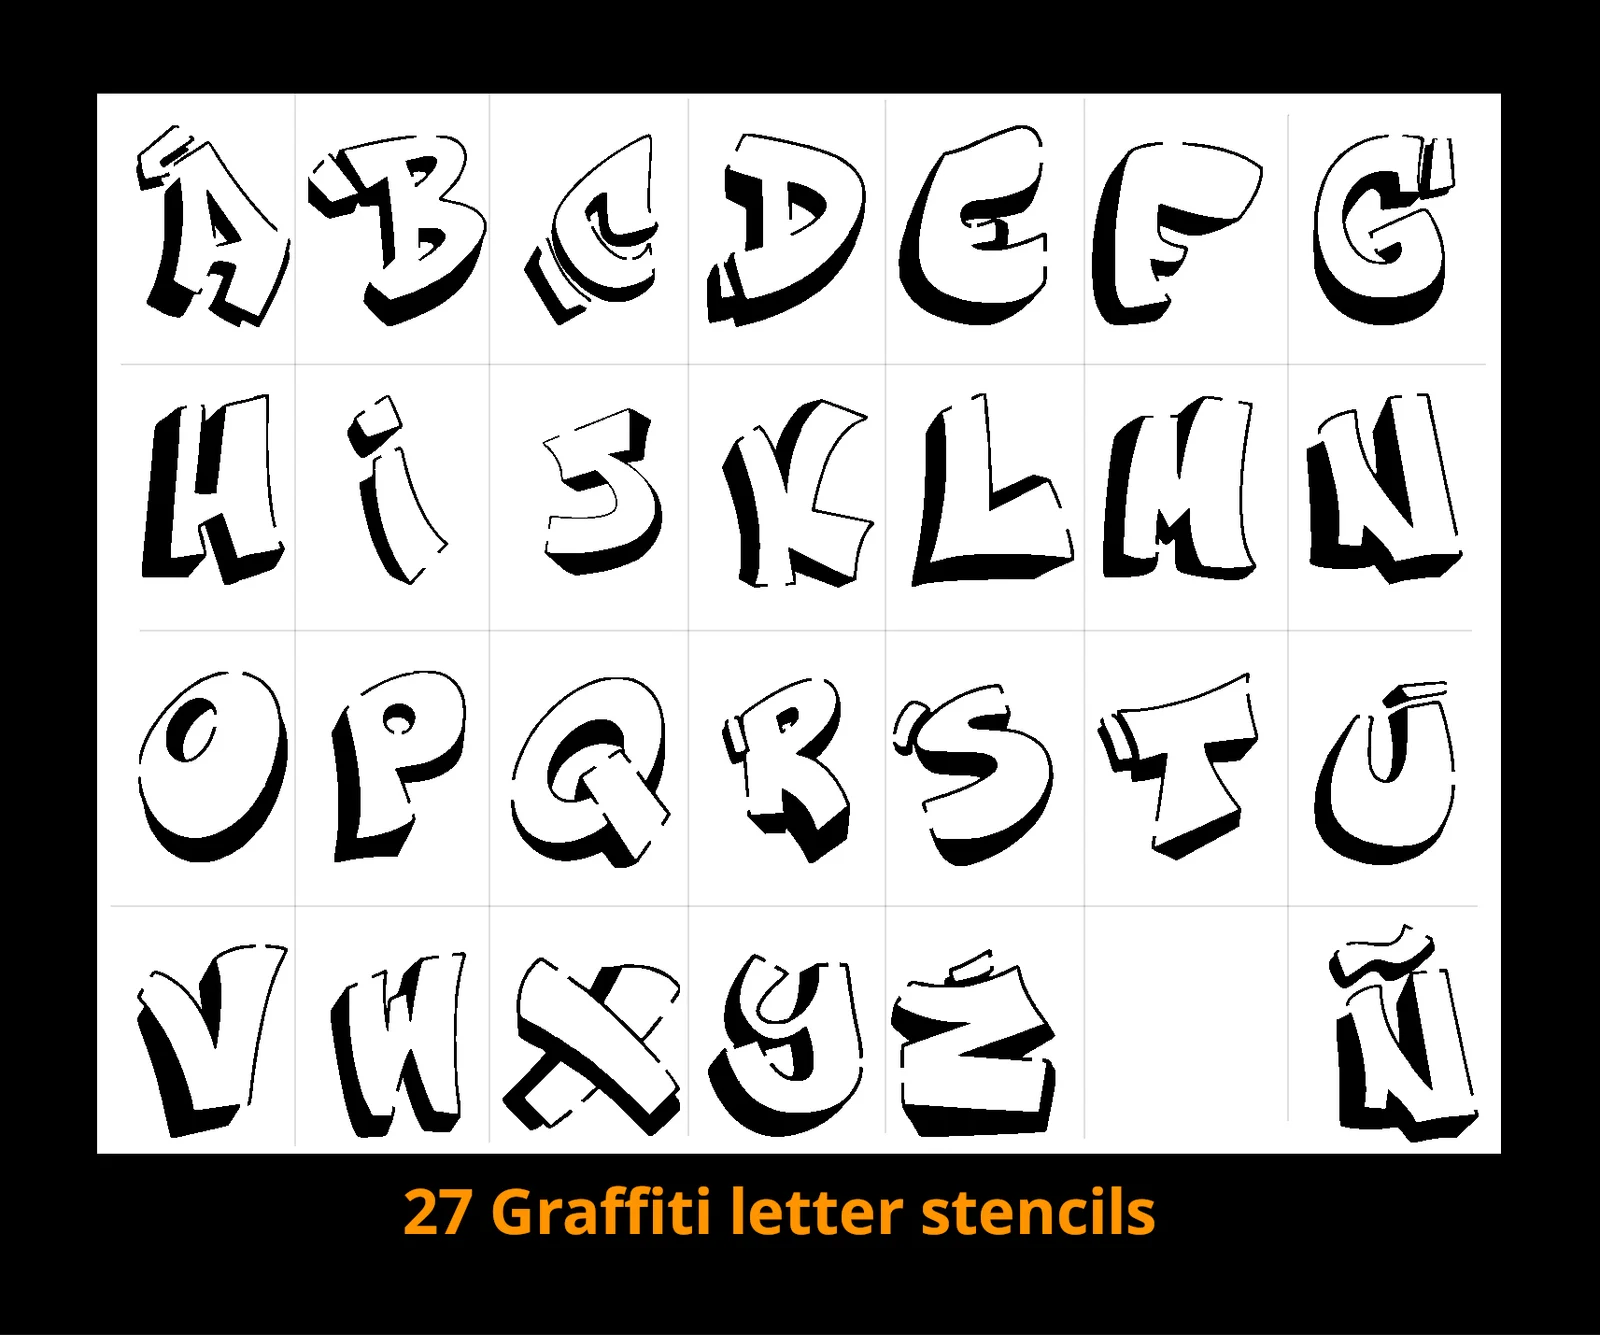
There are 27 stencils:
These stencils measure 100x100mm wide and 0.6mm thick. I chose 0.6mm because it is thin enough to not get in the way of a permanent marker while maintaining some durability.
Original artist URL: https://www.instagram.com/desiree_arte/
The graffiti letters came from a font I found on the internet. I modified the letters to work as stencils.
The README that came with the font says:
This Font is 100% free!
I would love to see the great projects where you are using it, just reach me out on instagram ( https://www.instagram.com/desiree_arte/ ) and share what you made. 👋≧◉ᴥ◉≦
Please post what you make here too! I also want to see your creation :-)
I printed the stencils using the "0.15mm DETAIL" preset in PrusaSlicer with one modification: I set the first layer height to 0.15mm so all layers would have the same size.
Print up to 4 letters at a time on a Prusa MK3S.
Graffiti letters are often overlapped, so overlap your letters too. Draw the "top" letters first and the "bottom" letters last. This shows you what parts of the letters are "covered up" by ones above them. In the example photos I drew the "P" and "A" first, followed by "R" and "S", and finally "U".
Try varying the angle your letters so they're not all straight, unless you want to make it look like a robot made it. That's fine too. This is art. You can do whatever you want.
ByDrewmundLikes833Downloads4.6K

 ByFastRaccoon_718321Likes461Downloads1.5K

 ByvexanixLikes168Downloads1.3K

 ByIvoLikes196Downloads1.1K

 Bynonoobybut_3307010Likes364Downloads1K

 ByvojtagrecLikes289Downloads902

 ByCodyMeyer_2545340Likes163Downloads726

 ByPexPeppers Hot Sauce Hot SauceLikes114Downloads559

 Bymartin-schneiderLikes0Downloads401

 ByFotisMintLikes71Downloads415

 ByAryserLikes36Downloads392

 ByowlartLikes56Downloads375