



Bộ sưu tập 11 nhân vật mô hình Mecca Chameleon in 3D vui nhộn
 ByZED4EverLikes313Downloads5.2K
Build another version of this model.
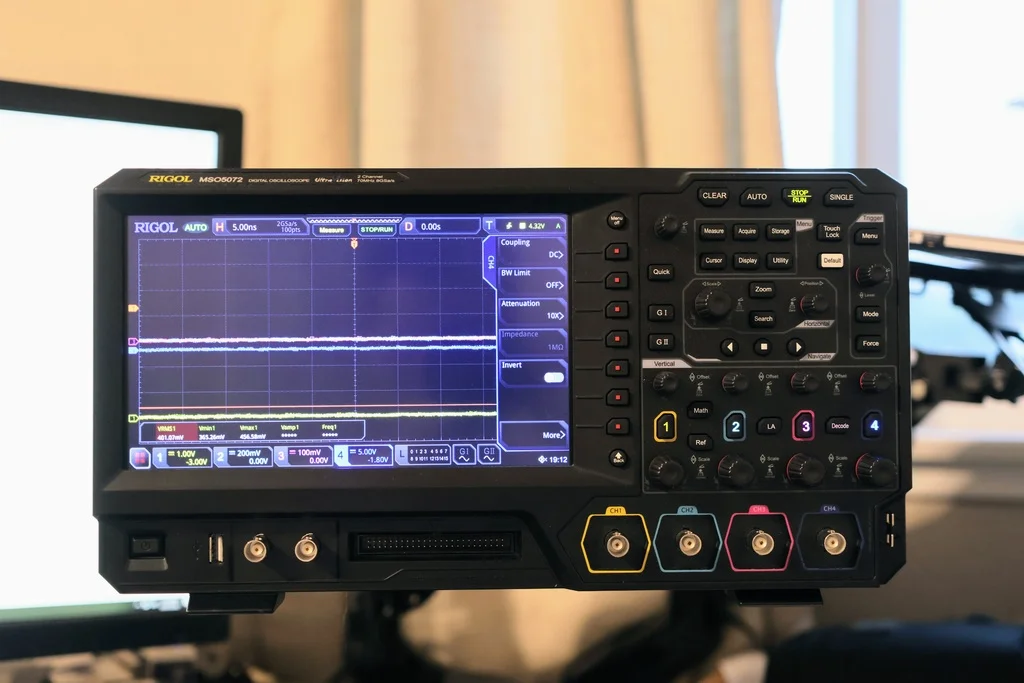
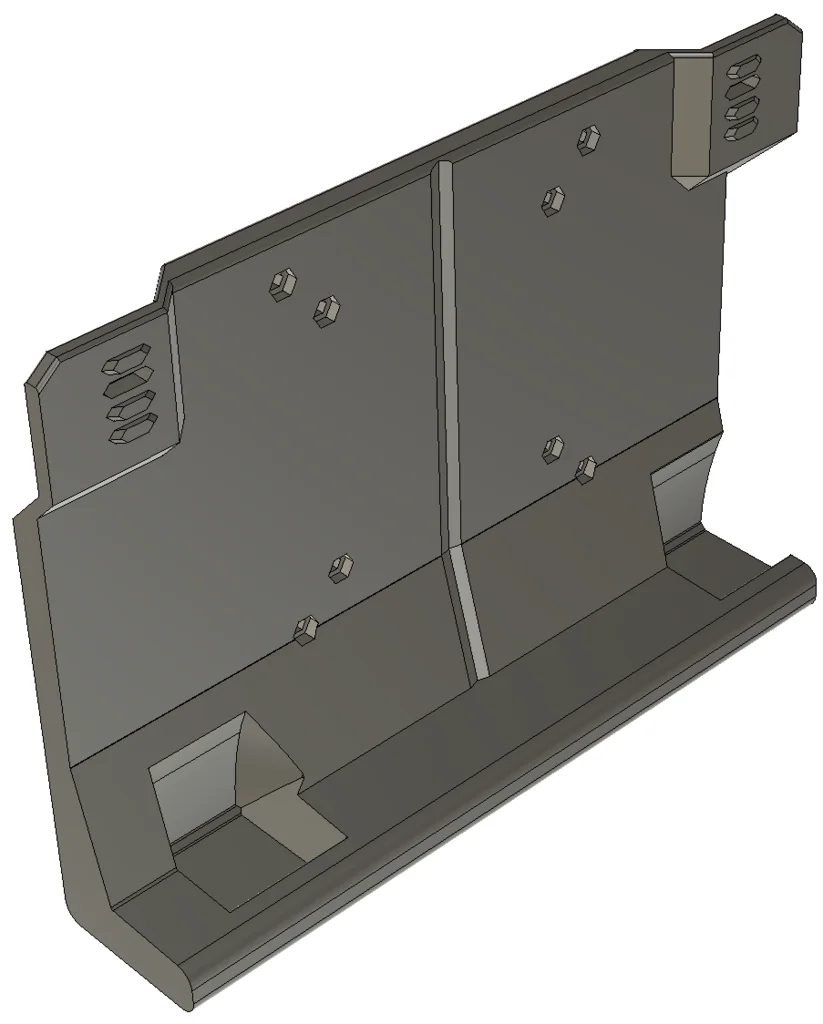
This is a VESA mount adapter for the Rigol MSO5000 series Oscilloscope. Mounting the scope above your work surface increases flexibility, frees up space, and puts the scope at eye-level.
I spent many months playing with ideas and printing/testing prototypes. If this is useful for you, a small tip would be greatly appreciated and very motivating to create & share more!
Questions/comments? Leave a comment here or discuss on EEVBlog Forums
Printer Brand:
Bambulabs
Printer:
Bambu P1S
Rafts:
No
Supports:
No
Resolution:
0.20mm
Infill:
15%
Filament: n/a PETG
Notes:
I suggest increasing infill density around the mounting holes.
I ran into some minor bed adhesion challenges due to small contact area with build plate. A brim is recommended.
For the locking tab, print with enough wall loops to ensure the center is completely composed of wall extrusion lines (no infill) for maximum strength. For a 0.4mm nozzle, 0.20mm layer height, 0.42mm line width, this is a minimum of 4 wall loops.
I have included 3MF files with these settings for Bambu/Orca slicer.
Instructions
Print the main mount and 2 copies of the Locking Tabs. When placing the oscilloscope onto the mount, the two slots on the mount should perfectly line-up with slots on the back of the oscilloscope. Insert one locking tab in each of the slots and turn 90-degrees.
Category: Electronics
ByZED4EverLikes313Downloads5.2K

 ByrjunLikes0Downloads303

 ByAdam Záhořák ZáhořákLikes39Downloads260

 ByleonicLikes0Downloads1.4K

 ByVC_DesignLikes271Downloads756

 ByfifindrLikes500Downloads4K

 Bymrfixit_324954Likes65Downloads478

 Bylab-96Likes0Downloads105

 ByDan Schwartz SchwartzLikes744Downloads3.4K

 ByBrokentooth_designsLikes83Downloads453

 Byvc-designLikes0Downloads3.2K

 Bythorin-oakenshieldLikes0Downloads530